
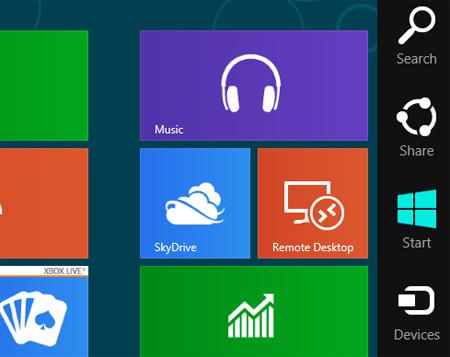
1. Step Open the Charms bar by moving your mouse pointer over the right corner of your screen. Alternatively you may press Windows key + C on Start screen to open Charms bar. Then select Search.
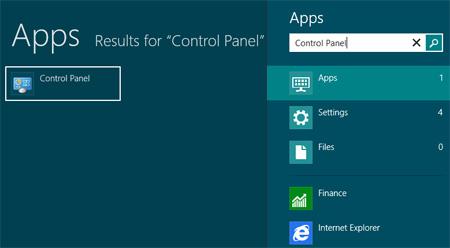
2. Step Next, type ‘Control Panel’ into the search box and click the search button. Then click on the Control Panel icon on the left side of the pane.
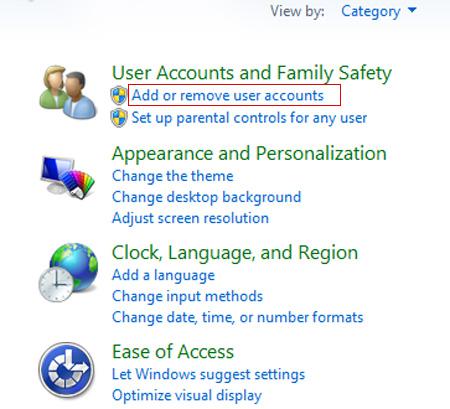
3. Step Next, Click On ‘Add or remove user accounts’ under ‘User Accounts and Family Safety’.
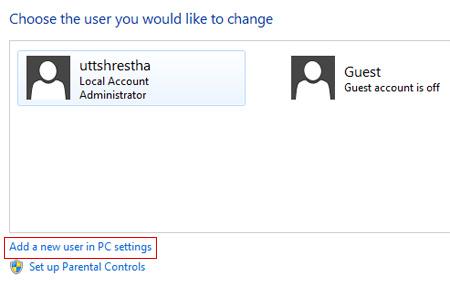
4. Step First, we need to create a new user account. The account name should match the name of your new user folder To do that, select ‘Add a new user’. Later you can delete this user account after renaming the user folder.
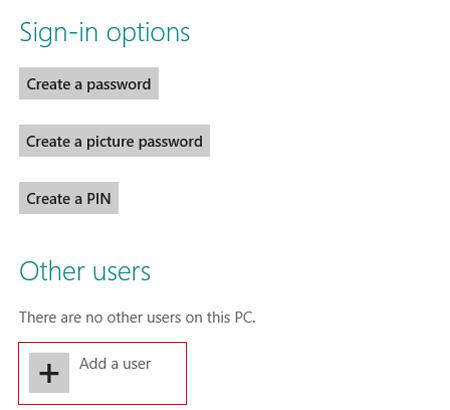
5. Step Next, click on ‘Add a user’ on the right pane.
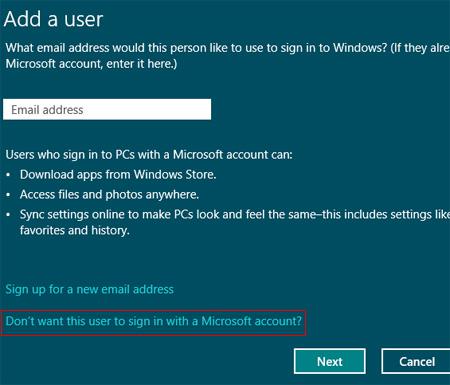
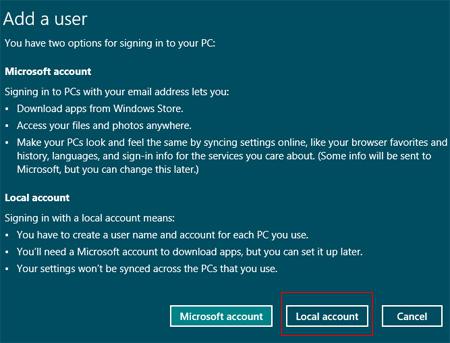
6. Step Select ‘Dont want this user to sign in with a Microsoft account?’ and click on Next
7. Step Next, select Local account.
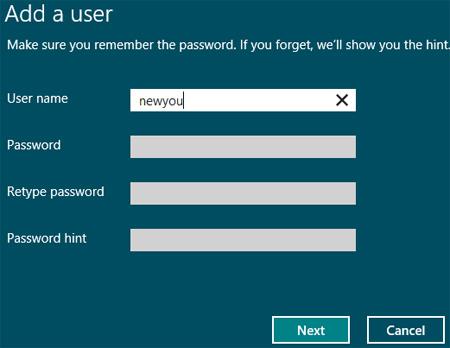
8. Step Enter your new user name and click on the Next button.
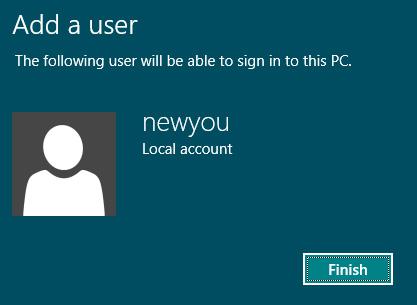
9. Step Next, click Finish.
10. Step Click the user account you have just created.
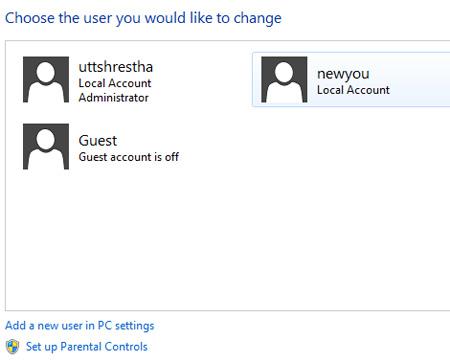
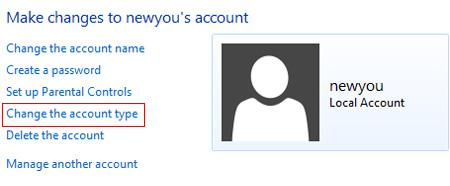
11. Select ‘Change the account type’.
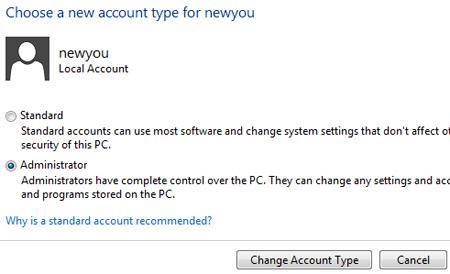
12. Select ‘Administrator’ and click on the ‘Change Account Type’ button.
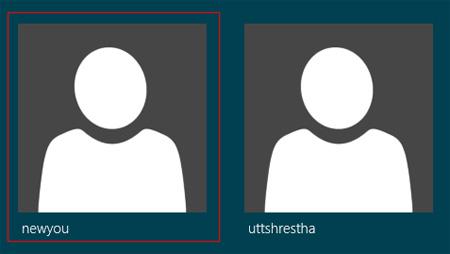
13. Next, Sign out (log off) by clicking your user name on the Start screen and select Sign out. Then log in again with the new user account that you have created
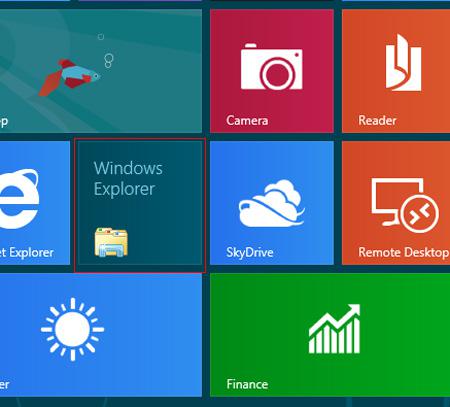
14. Next, open the Windows Explorer by clicking on the Explorer tile on the Start screen.
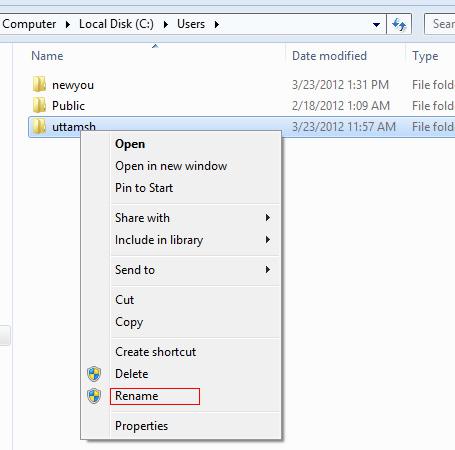
15. Navigate to C:\users and then right click on the old user folder that you want to rename. And select Rename.
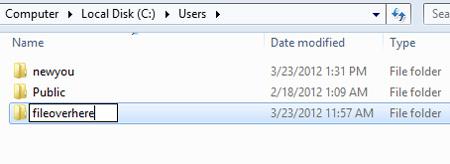
16. Next, enter a new name and press enter. If you are unable to rename the folder then you will have to restart your PC and try again. Make sure you log in with new user account.
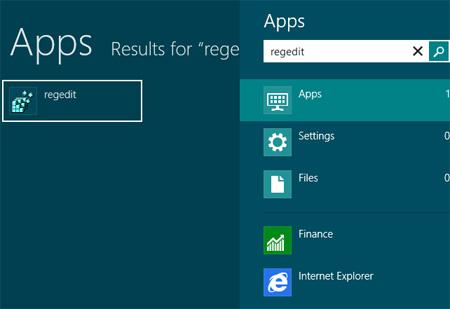
17. Next, to avoid errors, we will have to edit an registry entry. Open the registry editor by typing regedit into the App search.
18. Next, navigate to HKEY_LOCAL_MACHINE\SOFTWARE\Microsoft\Windows NT\CurrentVersion\ProfileList
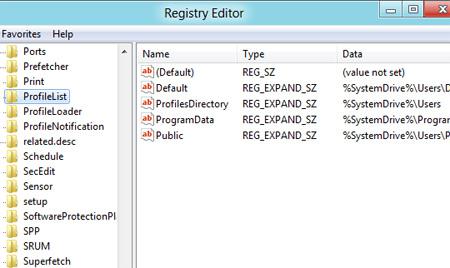
19. Right-click on the profile list and select Find.

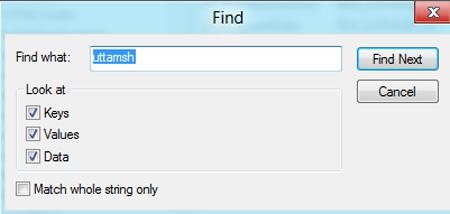
20. Type your old username in the “Find what” text box and click on the “Find Next” button.
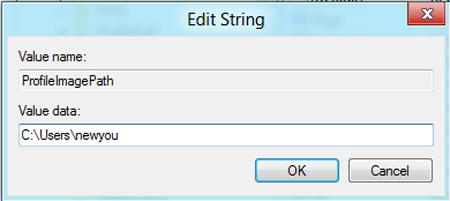
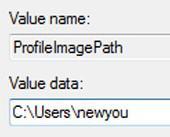
21. Next, right click on the “ProfileImagePath” on the right pane which shows your username and select Modify.

22. Finally, replace the old folder name with the new user name you have added to the Value data text box and click OK. That are basically the complete steps to rename the Windows 8 user folder.