
If you mess up your PC you can use the Windows 7 feature “system restore” to restore your PC to a stable configuration. Can help, but should be used with caution.

Doing a system restore in Windows 7
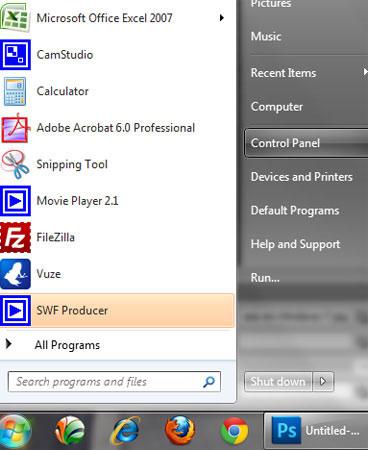
1. Step Click on the Start >> Computer.
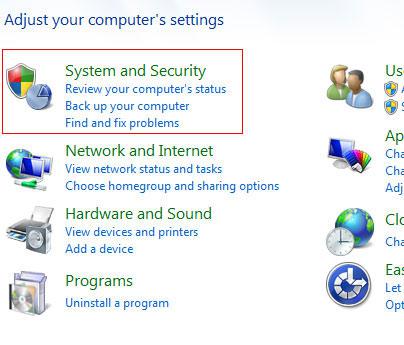
2. Step Now, click on the System and Security link.
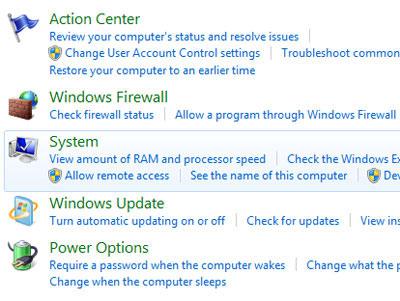
3. Step Then, click on the System.
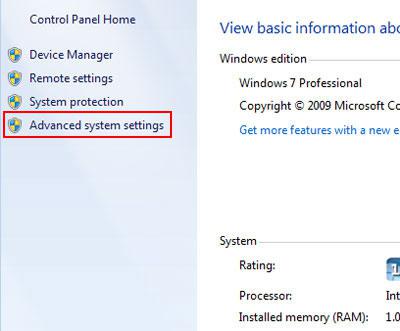
4. Step Click on the Advanced system settings link.
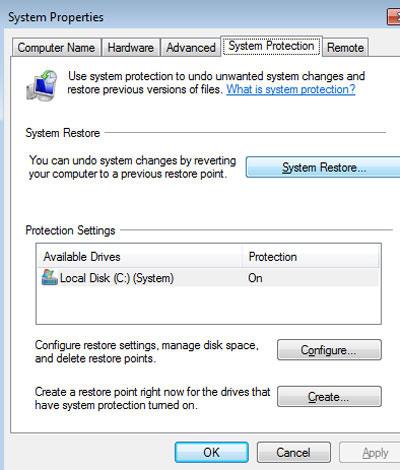
5. Step Click on the System Protection tab. Click on System Restore…
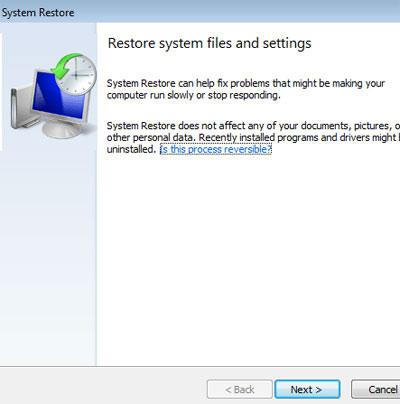
6. Step Click on the Next button.
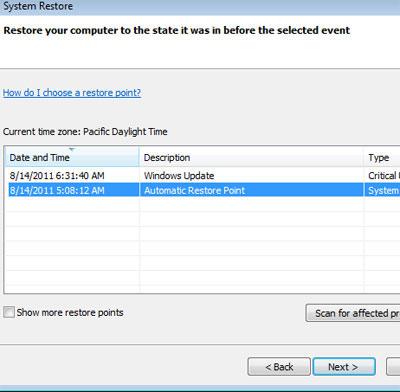
7. Step Select the restore point and click on the Next button.
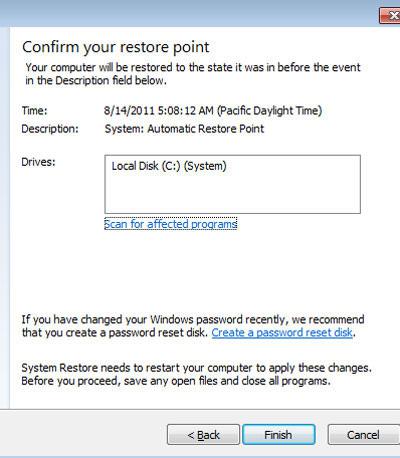
8. Step Next, you will be asked to confirm whether you really want to restore. Click on Finish.
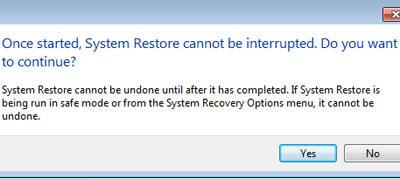
9. Step Click on Yes.
10. Step Next, you will see the system restore is starting. The system will then reboot to complete the restoration

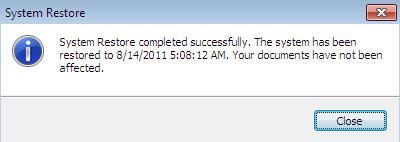
11. After rebooting, Windows 7 will start normally, but you will get a message ‘System Restore completed successfully’. Click on the Close button. Your system restoration is now completed.
12. If the problem persists, we recommend to create a new user account and run sfc.exe – for additional details, please read the tutorial:
How to repair system files with sfc.exe
The System Restore feature is very useful when you made registry changes that broke functionality of Windows 7 or if you replaced some system files. In that case, it is wise to use the system restore feature to revert back to the last stable restore point.