
If you want to change the computer name in Windows 7 read this tutorial by Vivek N. (guest post)
When Windows 7 is installed on a computer, right before completion of installation it asks user to assign a name to the computer. Naming convention that Windows 7 follows is ComputerName-PC which means that the first part (before ‘-‘) will be the name specified by the user and the text after ‘-‘ will be ‘PC’ as a default value. Many new users do not care about this during installation and they simply type the desired name and after some time they realize that the computer name is not appropriate as per the requirements. In this case, as a computer administrator, you can follow the below steps to change the computer name:
1 Logon to the Windows 7 computer with administrative credentials.
2 Click on Start button and from the menu right click on Computer.
3 From the appeared list of options click on Properties.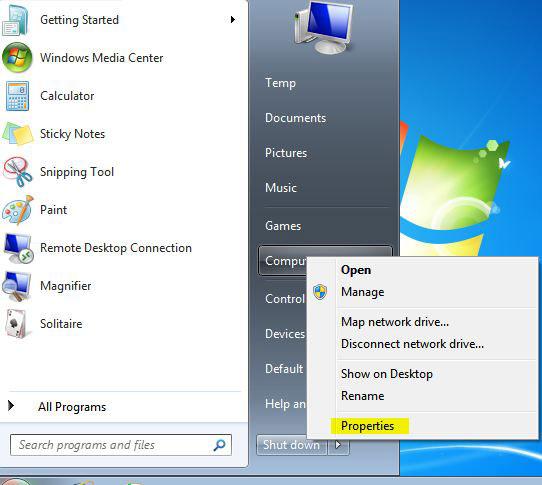
4 On the opened page under Computer name, domain, and workgroup settings section click on Change settings link.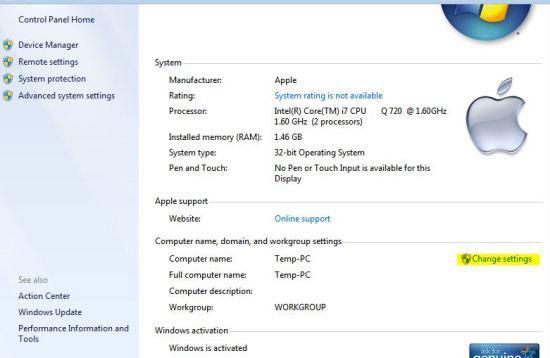
5 On System Properties box make sure that you are on Computer Name tab and click on Change button.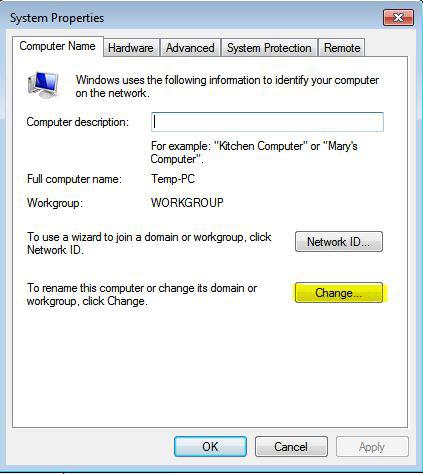
6 On Computer Name/Domain Changes box in Computer name text box delete the currently assigned computer name and type the new one.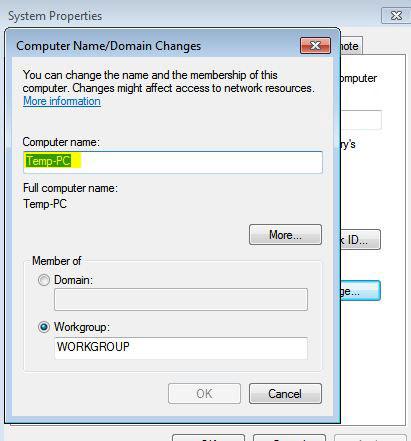
7 Once done click on Ok button and on the appeared page again click on Ok button to accept your configuration.
8 Back on System Properties page click on Close button.
9 Click on Restart Now button to restart computer to allow the changes to take effect.