If you want to change computer owner in Windows 7 read this tutorial by Vivek N. (guest post)

According to technical professionals erasing Windows operating system and reinstalling it on the computer is not at all recommended, not at least very frequently. Technical professionals always recommend troubleshooting Windows in case something goes wrong with it. Same is the case while changing registered owner name of any pre-installed Windows 7 operating system. In other words, if you want to change the registered owner name in Windows 7 without erasing and reinstalling the operating system there are few steps which are required to be followed. These steps involved some registry editing and restarting the computer. The steps are given as below:
1 Logon to Windows 7 computer with the administrator’s account or any other account that has administrative privileges.
2 Click on Start button.
3 At the bottom of start menu in search box type regedit and press enter key (press Yes button on UAC prompt).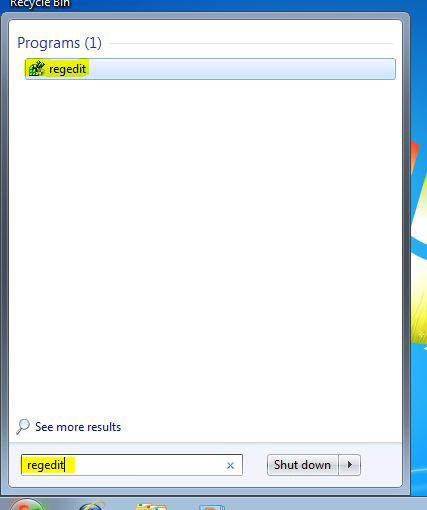
4 On Registry Editor box from the left pane go to HKEY_LOCAL_MACHINE\SOFTWARE\Microsoft\Windows NT\CurrentVersion.
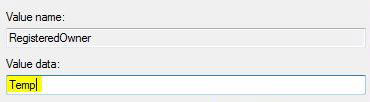
5Once located, from the right pane double-click on RegisteredOwner key.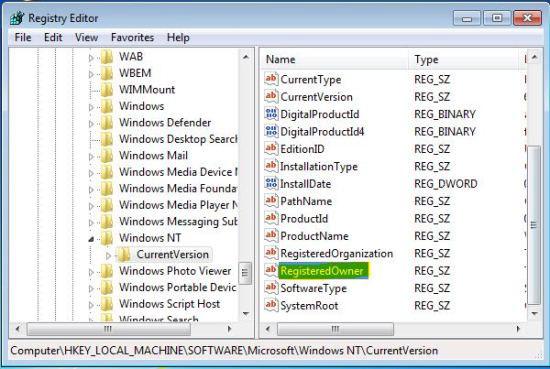
6 From the appeared Edit String box in Value data text box specify the name of the new owner of the computer.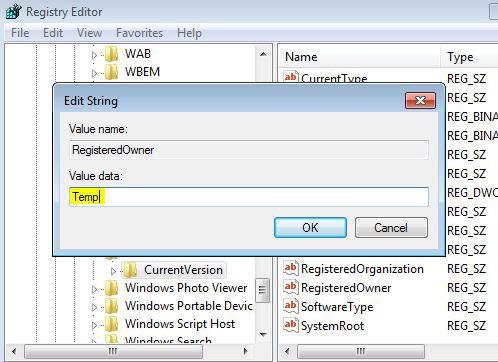
7 Finally click on Ok button to save the changes you have made and close Registry Editor box.
8 In order to make the changes take effect, restart your Windows 7 computer.
9 You can check Registered Owner name by typing Winver command in search box.