
If you want to change the import settings for your pictures and photos in Windows 7, read this small guide that will teach you how to change where it imports the photos to and what file/folder names it assigns to imported pictures.
It is a bother to manually deal with the transfer of our pictures and videos, especially if we have hundreds of pictures per transfer or import. It is definitely easier to have a setting that is used every time we import our pictures and videos to our computer. Here’s how you can make your life easier and improve the way how Windows 7 imports photos/pictures from your digital camera.
1) Before you can change your import settings, you will need to plug in your device first.
2) A few moments after plugging in your device, the ‘AutoPlay’ dialog box will appear.
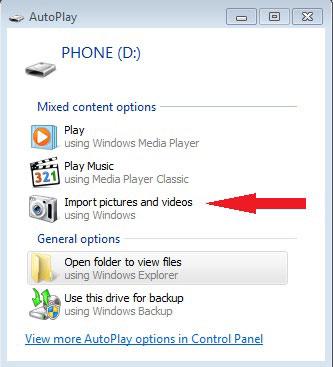
3) Click on the link that says ‘Import pictures and videos’.
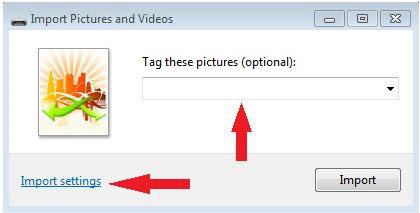
4) Another small panel, the Import Pictures and Videos panel, will appear. You may enter the optional ‘Tag’ detail for your items here.
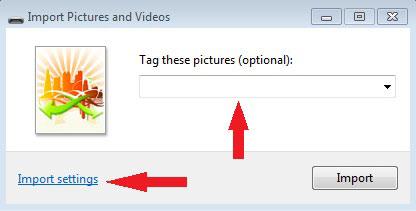
5) Click on the ‘Import Settings’ link at the bottom left of the panel.
6) This will open up the ‘Import Settings’ panel.
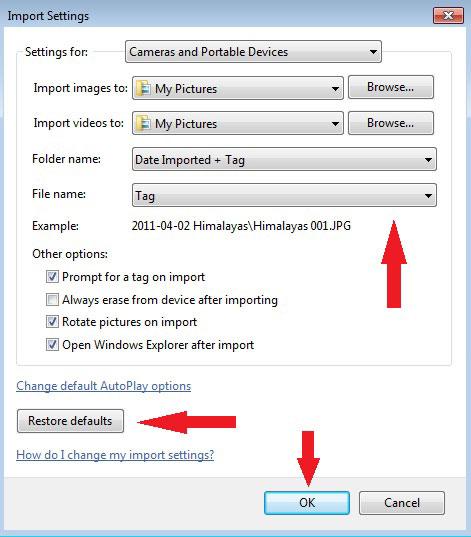
7) You can also restore the settings to the factory default by clicking on the ‘Restore Default’ button.
8) After making the changes, you may then proceed to click on the ‘OK’ button.
9) You will see the ‘Import Pictures and Videos’ panel again. Click ‘OK’ again to save your settings.
10) You can now import your items with the new import settings.
So now you can really have a one-click-import function to import your stuffs to the computer. The computer will now automatically tag your items and import it to the right folder without any input from you.