
If you want to change the system locale in Windows 7, here’s how.

The programs that we run on our computers may or may not use Unicode. For non-Unicode programs, we need a set of rule to determine how default characters like font, numbers and symbols are represented. These rules are determined by the computer’s system locale. To change your system locale, follow these simple steps:
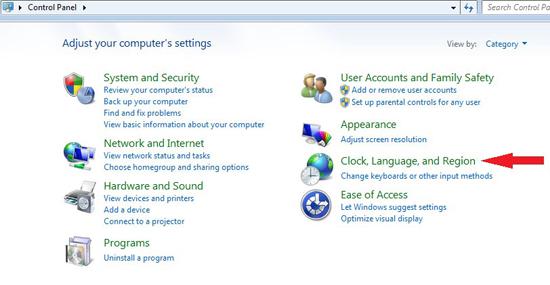
1) First, click on the ‘Start’ button and on the right hand side of the Start menu, click on the ‘Control Panel’ menu item.

2) When the ‘Control Panel’ pops up, click on the heading that says ‘Clock, Language and Region’.
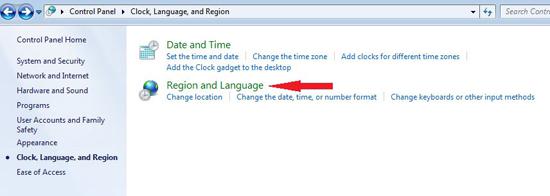
3) Then, in the next panel, find the heading that says ‘Region and Language’ and click on it.
4) In the ‘Region and Language’, click on the ‘Administrative’ tab.
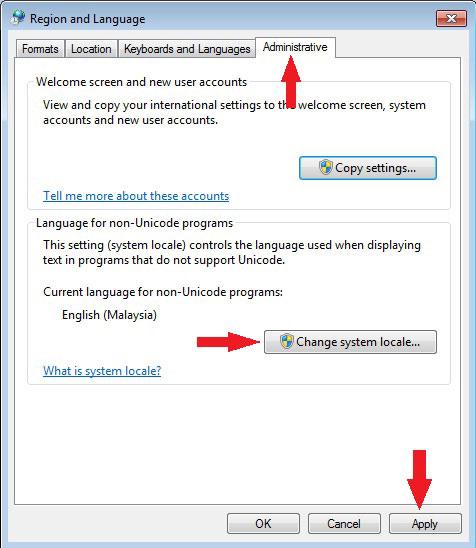
5) You will see a ‘Change System Locale’ button; you may proceed to click the it. Click on ‘Continue’ if the administration confirmation dialog pops up.
6) Then, the ‘Region and Language Settings’ window will pop up. Choose the language that you wanted to change to. Click ‘OK’ to continue.

7) Click ‘OK’ in the Region and Language again to save your new setting.
You will need to restart your computer for the changes to take effect. You should know that changes made to your system locale will not affect how other programs that use Unicode display their information.