How to create, attach and install on a Windows 7, read this guest post by Vivek N.

With the latest release of Microsoft windows operating system, that is Windows 7 Microsoft has also improved its technology and is heading towards virtualization. The benefit of virtualization is that it saves a lot of hardware cost by virtualizing the machines and operating systems as well. Microsoft has also reflected some features of virtualization in Windows 7 operating system. Windows 7 operating system can now also be installed on virtual hard disk and that virtual hard disk can be attached to the physical computer and can work just like a physical hard disk which has Windows 7 operating system installed on it. Steps for creating and attaching a virtual hard disk to the Windows 7 computer are given below:
1 Logon to Windows 7 computer with any account that has administrative privileges.
2 Click on Start button and from the menu right click on Computer.
3 From the appeared menu click on Manage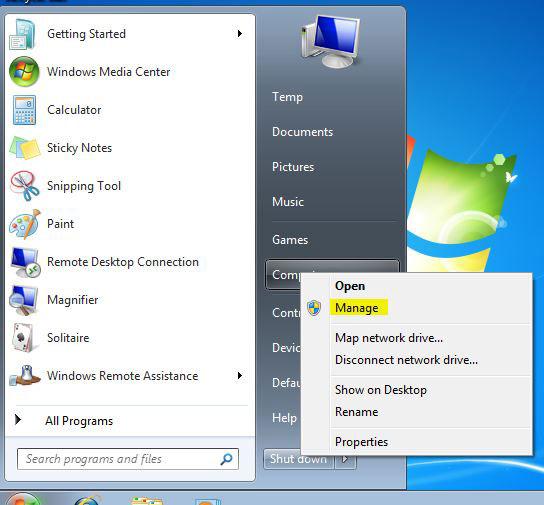
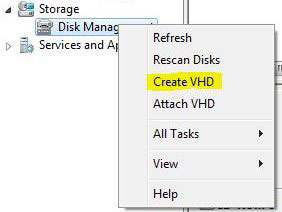
4 From Computer Management snap-in click on Disk Management to select it.
5 Once selected, right click on Disk Management from the left pane and from the appeared menu click on Create VHD.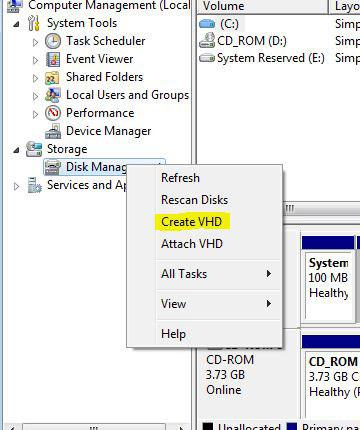
6 On the opened box click on Browse button to specify the name and location where Virtual Hard Disk (VHD) file will be stored and in Virtual hard disk size text box specify the maximum size of the virtual hard disk.
7 Ensure that Fixed size (Recommended) radio button is selected and click on Ok button to create and automatically attach a new VHD file.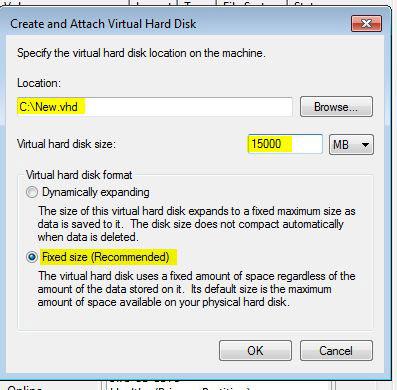
8 Right-click on the attached VHD from the right pane and from the menu click on Initialize Disk.
9 From the opened box leave everything as default and click on Ok button to initialize.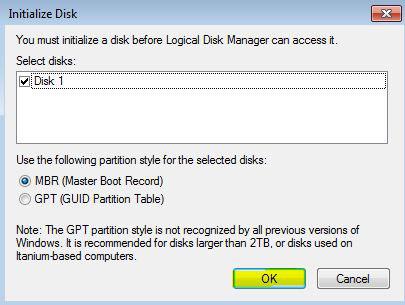
10 Boot the computer with Windows 7 DVD and choose the newly attached VHD to install Windows 7 on it.