If you want to enable full transparency in Windows 7, follow this tutorial.
Enable Full Transparency in Windows 7
Windows 7 has its beautiful “Aero Theme” providing the “Transparency Effect”. What if you want your working window to be transparent including its content? Well the “Power Menu” software is there to provide you with this option. Follow the steps and you will have your see-through windows.
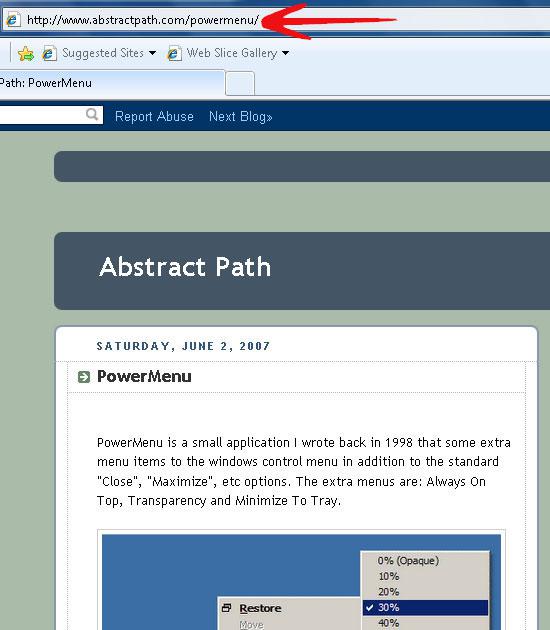
1. Step Go to Download Page for Power Menu .
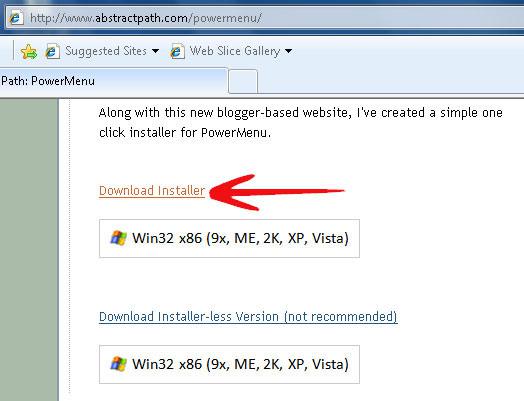
2. Step Select download Installer.
3. Step When download finishes, install “Power Menu”.
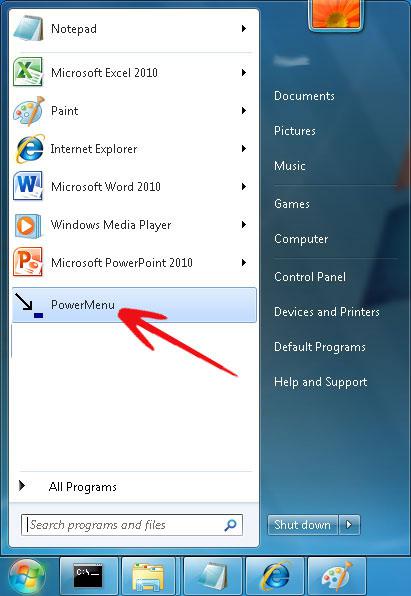
4. Step Go to “Start Menu” and click on “Power Menu” icon (newly installed).
5. StepThe “Power Menu” tray-icon will now appear in the system tray.

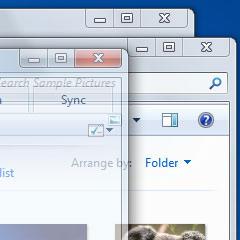
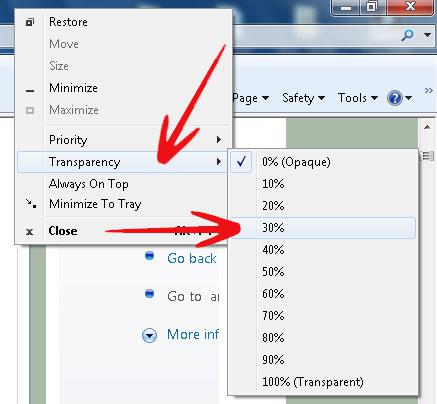
6. Step To use the “Transparency” option, select the specific window you want transparent. Right click on the menu bar, and click on “Transparency” option which will lead you to a side menu with calibrated transparency values, select the one you like.
7. Step The “Power Menu” also comes with other options like “Always on Top” and “Minimize to Tray” etc. “Minimize to Tray” can help in case your taskbar is cluttered with opened applications.
The transparency effect helps you see-through your windows and keep in touch will other applications in the background.