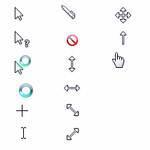

Adding new cursors
Windows 8 allows you to personalize your PC with a multitude of features. One such feature is to add new pointers/cursors. Simply follow the steps below and learn how to add your new pointers/cursors.
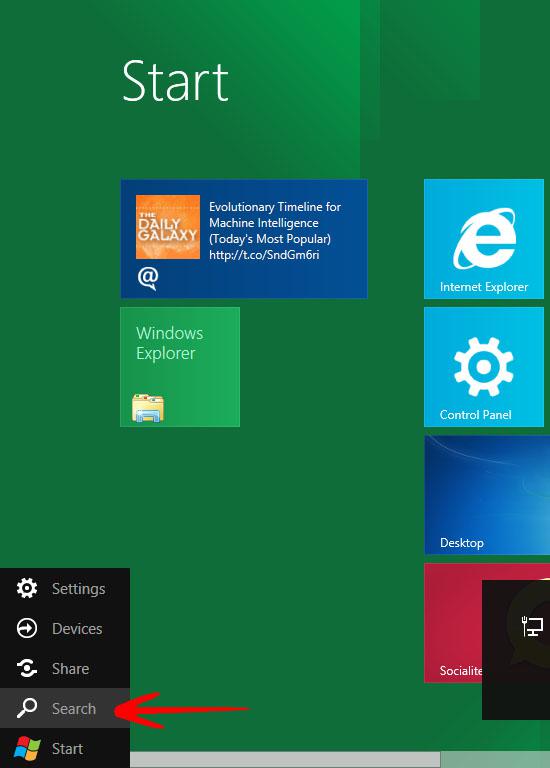
1. Step In the Metro Start Menu, click on the lower left corner. The Start menu pops up. Click on Search.
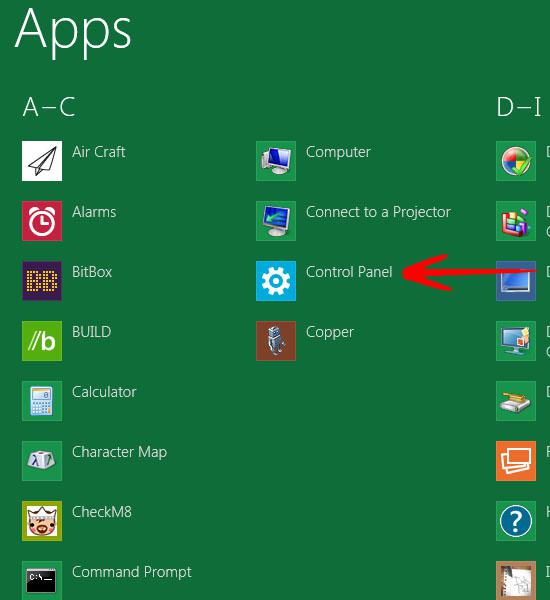
2. Step From the Apps list that appears, click on Control Panel.
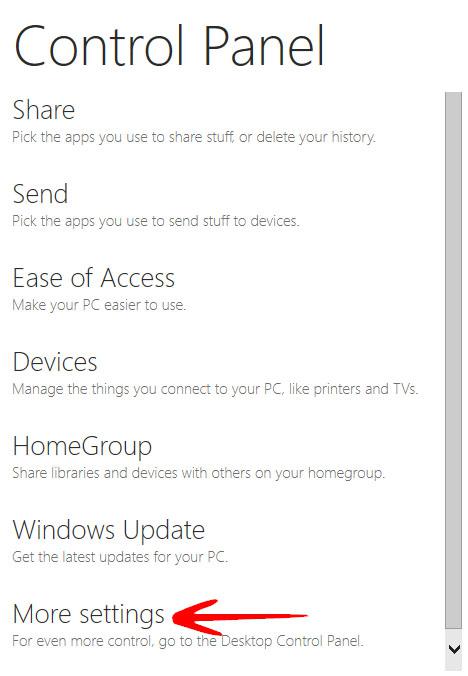
3. Step In the Control Panel, click on More Settings. This will take you to Control Panel main window.
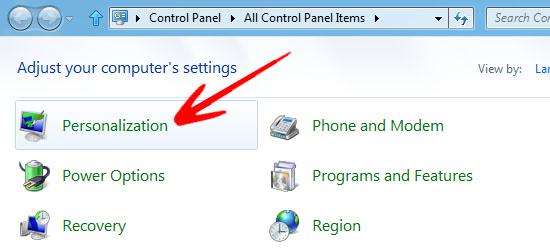
4. Step Click on Personalization.
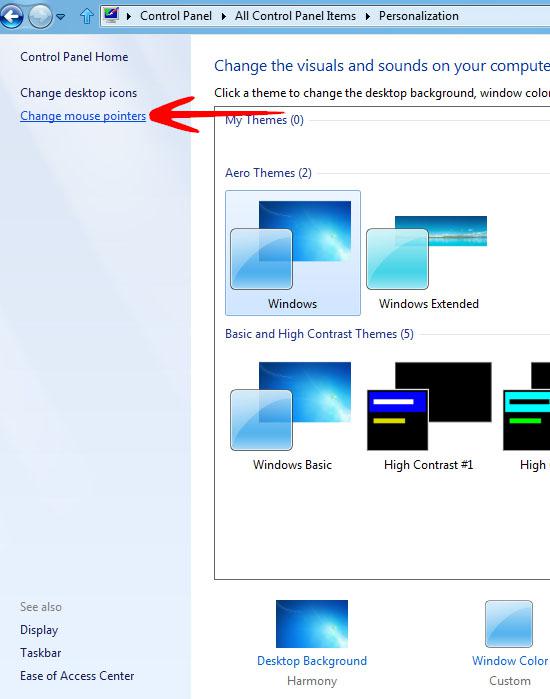
5. Step In the left pane click on Change mouse pointers.
6. Step In the Mouse Properties, select the cursor gesture (here we selected Normal Select) and click Browse.
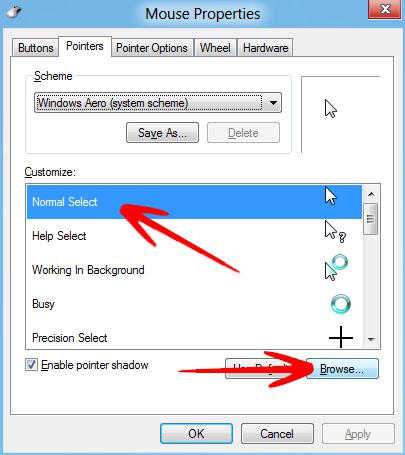
7. Step Now browse to the cursor file .ini or .cur and click Open.

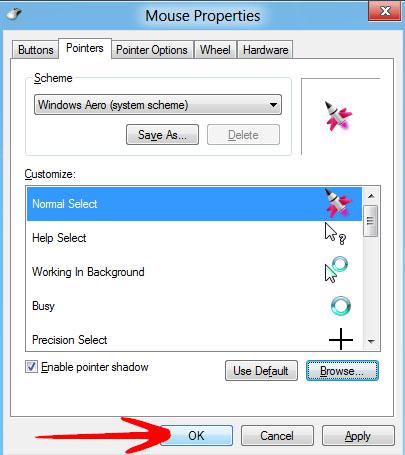
8. Step Click OK in the Mouse Properties window to apply the new cursor.
You can download and add new cursors to your windows available here.