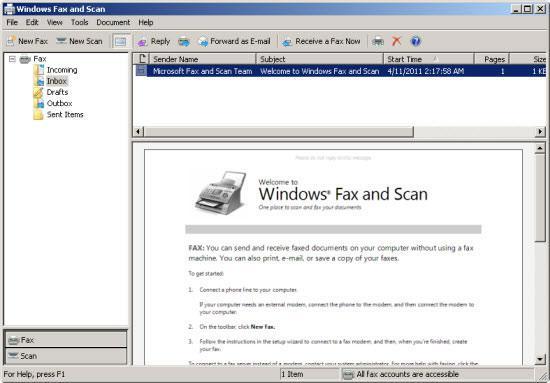
This article teaches you how to use the Windows Fax and Scan Utility in Windows 7.
The Windows Fax Service was introduced in Windows XP. This was superseded by the Windows Fax and Scan Utility in Windows Vista.
With Windows 7, the Windows Fax and Scan utility makes a comeback. In addition, all Windows 7 flavors have the utility built-in, probably in response to criticisms from customers who decried its scrapping in lower-end versions of Vista.
Before you can use the Windows Fax and Scan utility, you have to make sure that you have a working fax modem. You’ll probably find that this is not a problem, since most PCs today come bundled with a fax modem.
Once you get your fax modem to work, follow the steps below to use Windows Fax and Scan.
To Set Up a Fax Account
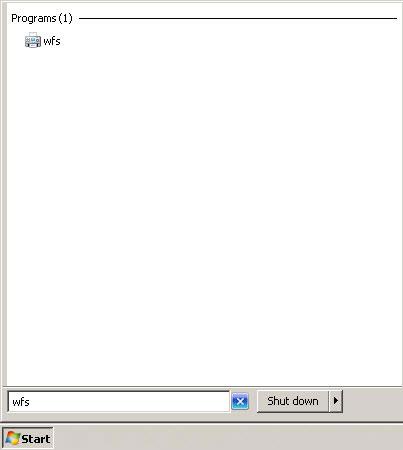
1. Step Go to Start, type in wfs, then click wfs to run the Windows Fax and Scan Utility.
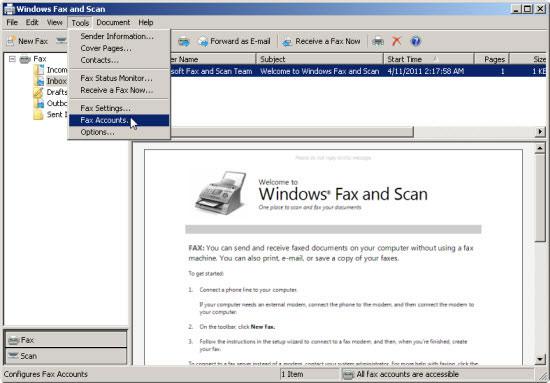
2. Step Click Tools, then Fax Accounts.
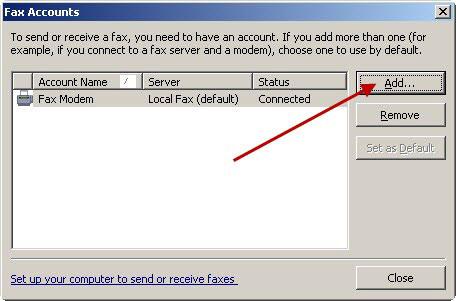
3. Step Click Add.
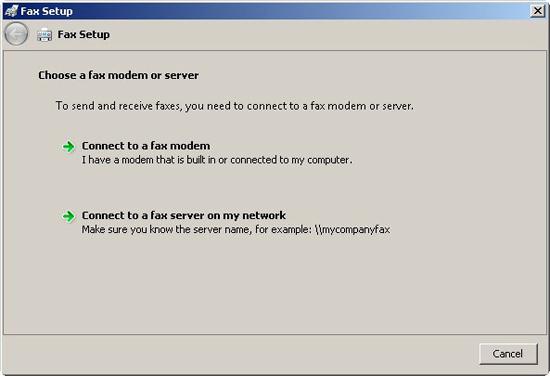
4. Step A Fax Setup wizard is displayed on your screen. Click Connect to a Fax Modem to go to the wizard’s next page.
5. Step Enter a name for your fax modem so that it will be easy to identify it when sending a fax. In the screenshot below, you can see that the default name is Fax Modem.
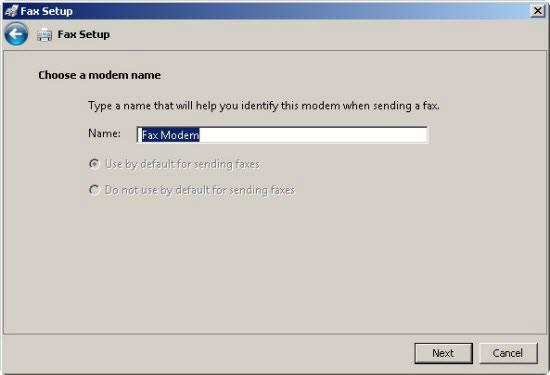
6. Step Click Next.
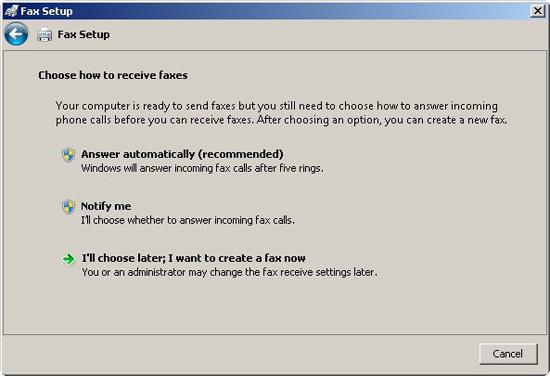
7. Step On the next page, you’ll be asked to choose how you want to receive your faxes. It is recommended that you select Answer Automatically to let Windows answer incoming fax calls after five rings. You can also choose to manually answer incoming fax calls or to choose an option later.
Now that you have a fax account, you can already send a fax using the program.
Note: Setting up a fax account is optional. You may still use Windows Fax and Scan even if you haven’t set up a fax account.
To Send a Fax Using Windows Fax and Scan
1. Step Go to Start, type in wfs, then click wfs to run the Windows Fax and Scan Utility.
2. Step Click New Fax.
3. Step If you are using Windows Fax and Scan for the first time, the Fax Setup wizard discussed in To Set Up a Fax Account above is displayed on your screen. Follow the steps discussed in that section to set up a fax account or cancel the wizard to forego this step.
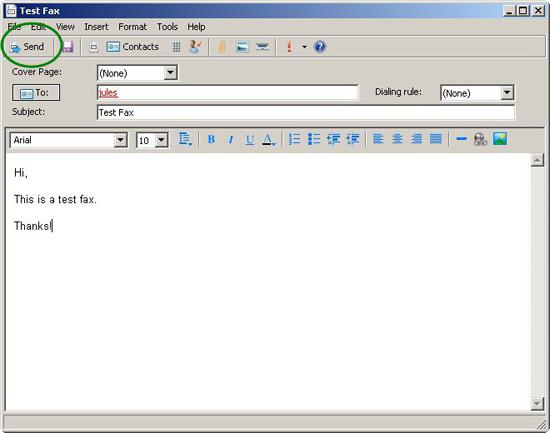
4. Step On the New Fax window, select a cover page and the recipient. Optionally, you may enter the subject for the fax message.
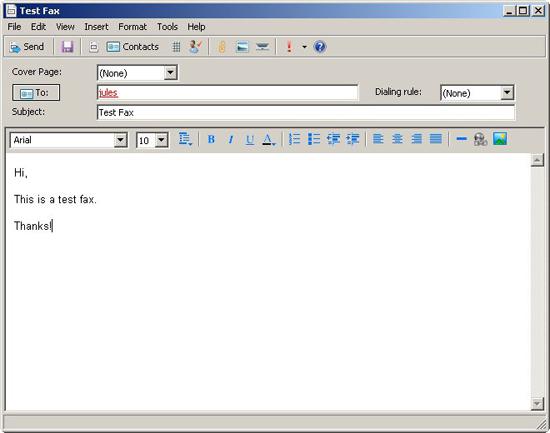
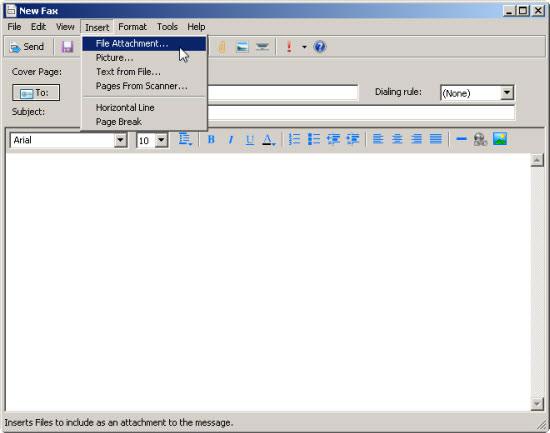
5. Step Enter the text for the fax message. You may also attach another document, some text, a picture or a scanned file to the fax message.
6. Step Click Send.
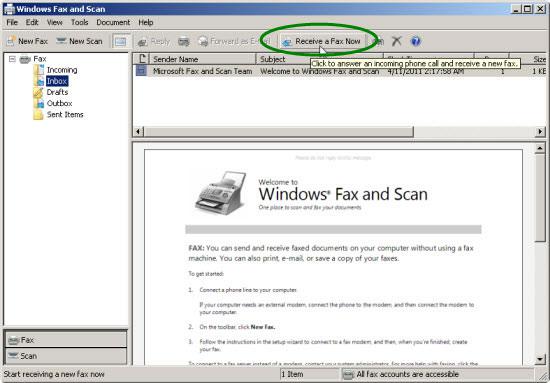
To Receive a Fax Using Windows Fax and Scan
1. Step Go to Start, type in wfs, then click wfs to run the Windows Fax and Scan Utility.
2. Step Click Receive a Fax Now.
Now that we’ve presented you with the steps necessary for using the Windows Fax and Scan Utility in Windows 7, we hope that you’ll be able to make use of this useful utility sometime in the future.