
(Guest Post) You might want to age your photo. To do this, follow these steps provided in the tutorial to age your photo.
Steps to age a photo in photoshop
1. Step Click Start >> All Programs >> Adobe Master Collection CS3 >> Adobe Photoshop CS3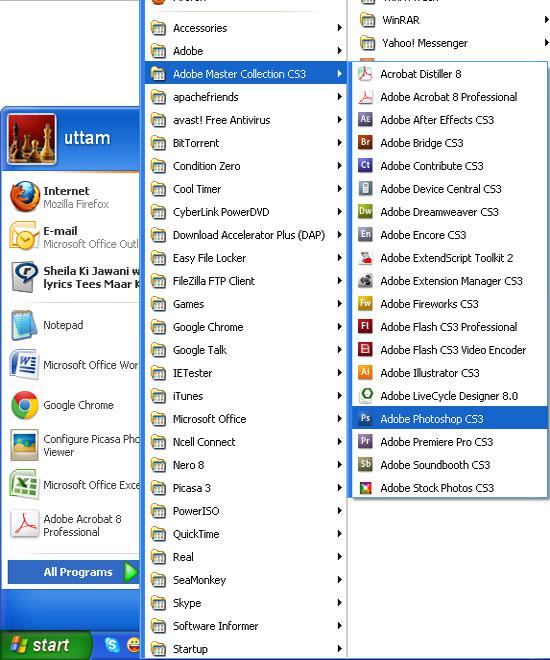
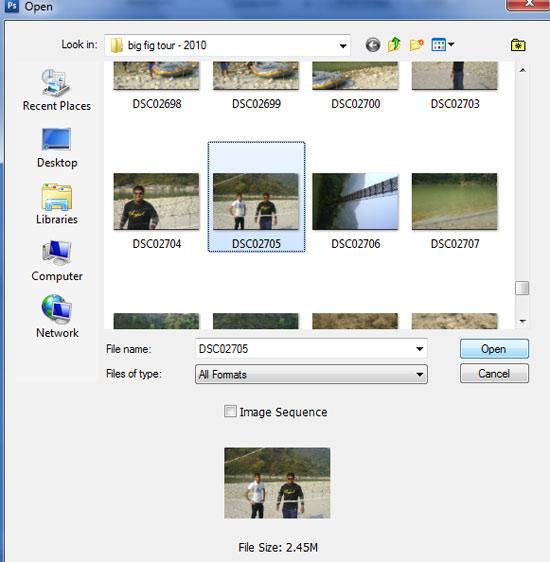
2. Step Click File >> Open and select the file you want to open and click Open.
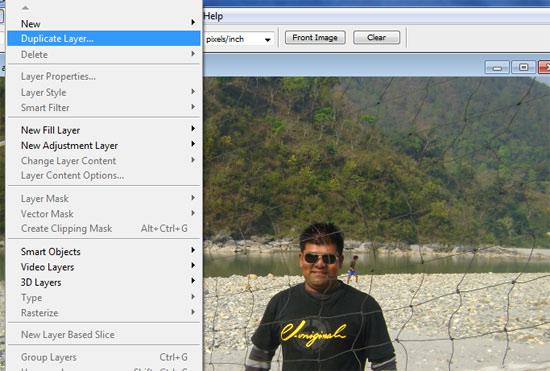
3. Step From the menu bar, click Layer >> Duplicate Layer.. and then OK. Alternatively, you can right click the layer in layer palette and choose Duplicate Layer.. and then OK
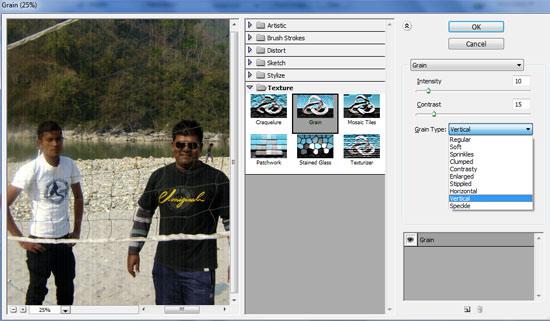
4. Step From the menu bar, click Filter >> Texture >> Grain..
5. Step Now in the Grain window, select Grain Type = Vertical, Intensity = 10 and Contrast = 15 and click OK. See the screenshot for details.
6. Step Click Image >> Adjustment >> Hue saturation. Make sure the duplicated layer is selected in layer palette.
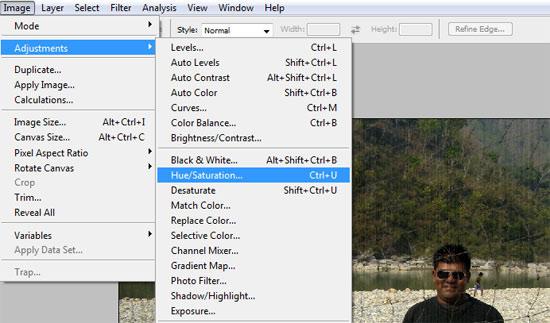
7. In the Hue saturation window, select Colorize checkmar option and put Hue = 80, Saturation = 30 and click OK.

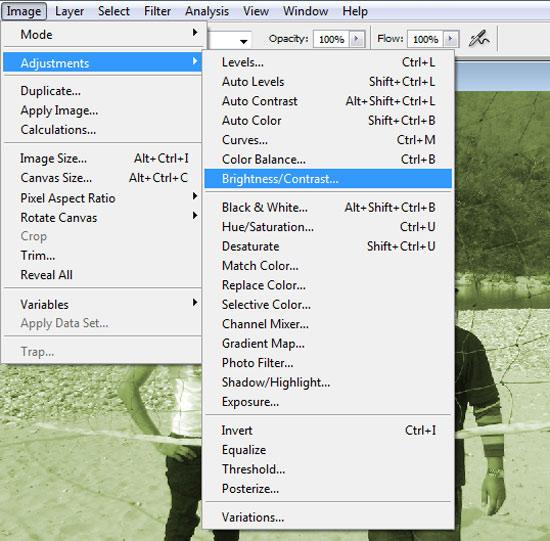
8. Step Let’s add a bit contrast and brightness to the picture. To do that, Click Image >> Adjustment >> Brightness / Contrast..
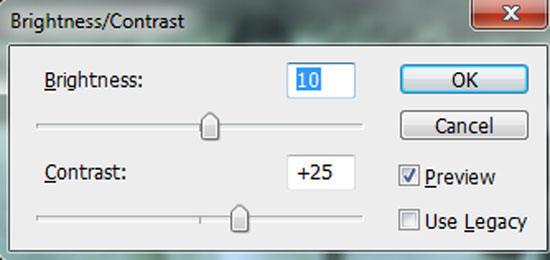
9. Step Then after a Brightness / Contrast window opens. Put Brightness = +10 and Constrast = +25 and click OK.
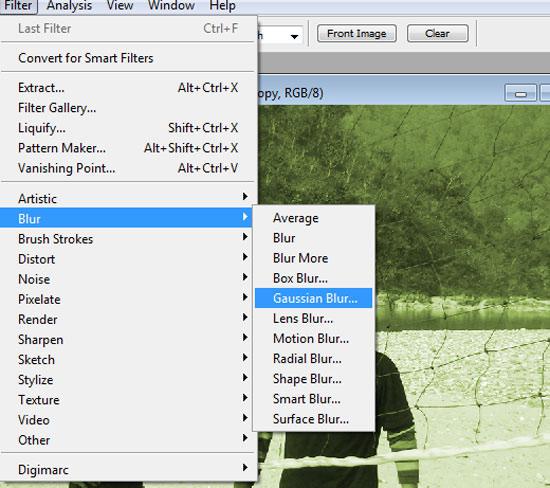
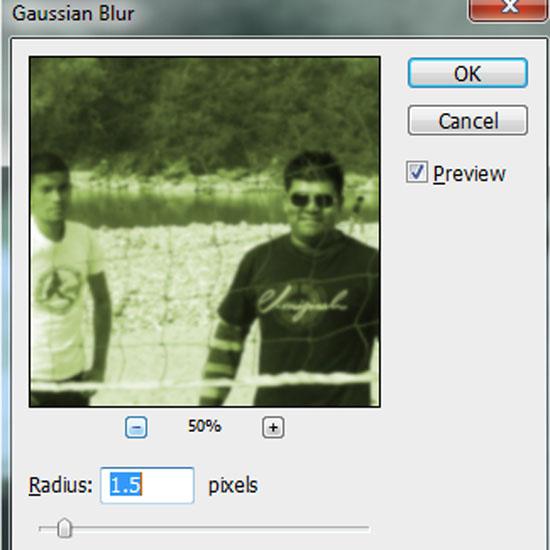
10. Step Add a Gaussian Blur. Click Filter >> Gaussian Blur from the menu bar.
11. In the opened Gaussian Blur window, put Radius = 1.5 pixels and click OK
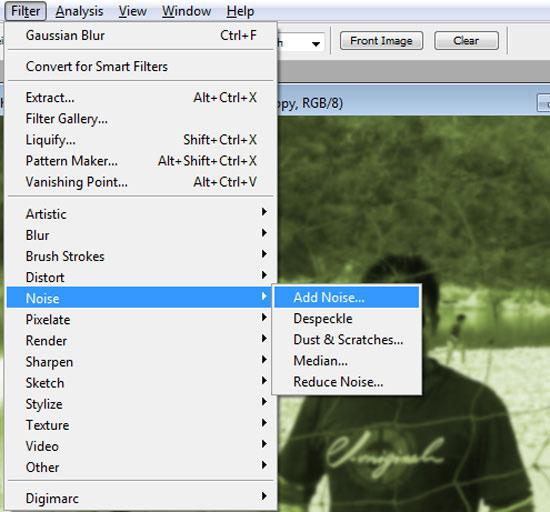
12. Lastly, add noise. To add noise, click Filter >> Noise >> Add Noise..
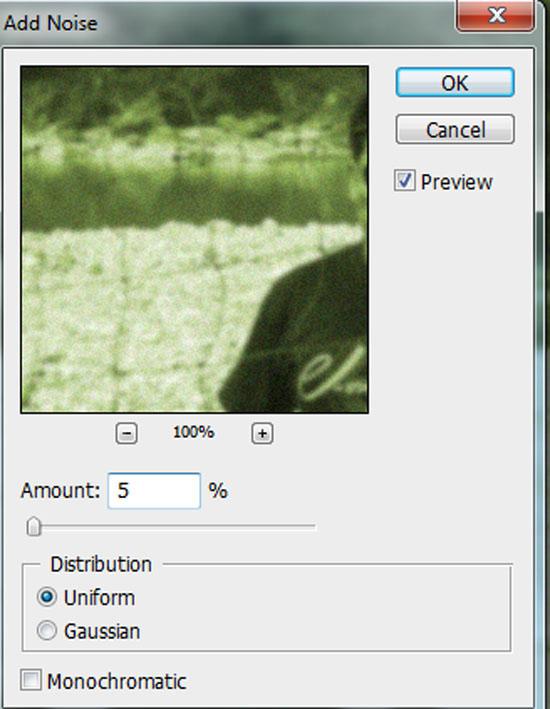
13. In the opened Gaussian Blur window, put Radius = 1.5 pixels and click OK. That’s all!
Video
Conclusion
Sometimes, you may want to give a classic feel to your picture so that it look like it was taken in 70’s. Now you can do that by following these simple steps given in this tutorial.
TOP: Download our Photoshop sample files below for this tutorial and many others:
- Download How To Resize Image In Photoshop
- Download How To Age Photo In Photoshop
- Download How To Blend Images In Photoshop
- Download How To Whiten Teeth In Photoshop
- Download How To Create Fire In Photoshop
- Download How To Resize Image In Photoshop
- Download How To Create Button In Photoshop