If you want to become a more productive Windows 7 user, read this tutorial to learn how to batch resize in Photoshop.

Steps to batch resize in Photoshop
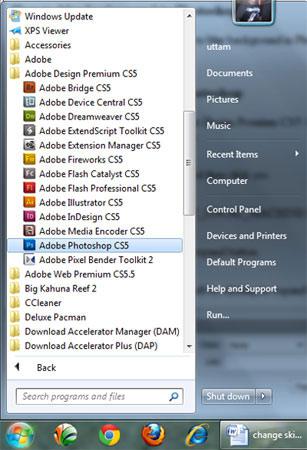
1. Step First of all open Photoshop program by clicking on the Start >> All Programs >> Adobe Design Premium CS5 >> Adobe Photoshop CS5.
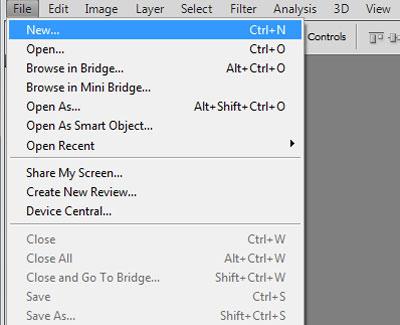
2. Step Create a new document by clicking on the File >> New and click OK.
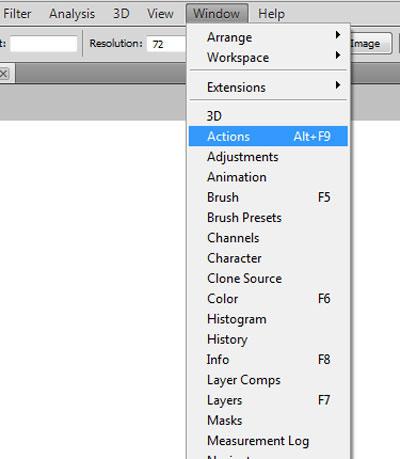
3. Step At first before applying batch resize, we have to set the size. To do this, on the menubar, click on the Window >> Actions.
4. Step Expand Default Actions by clicking on the expand icon infront of it. Under Default Actions, expand resize.
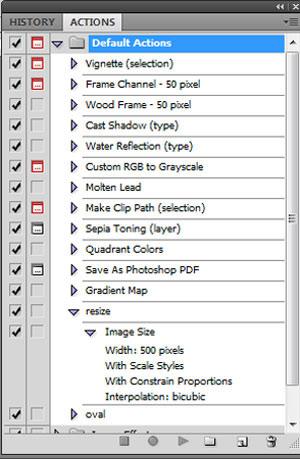
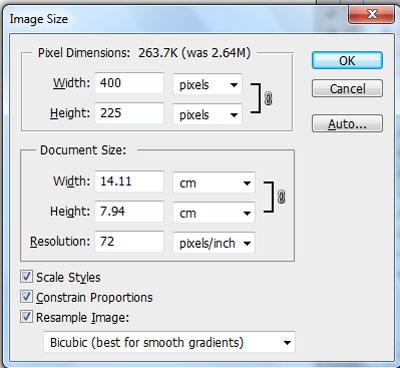
5. Step Double click on the Width:500 pixels. Then you will see Image Size where you can set width, height. In my case i have set width = 400. As Constrain Proportions is checked, the height changes automatically when width is changed. Finally click on the OK button.
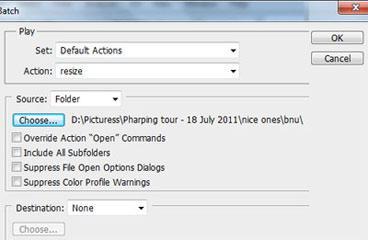
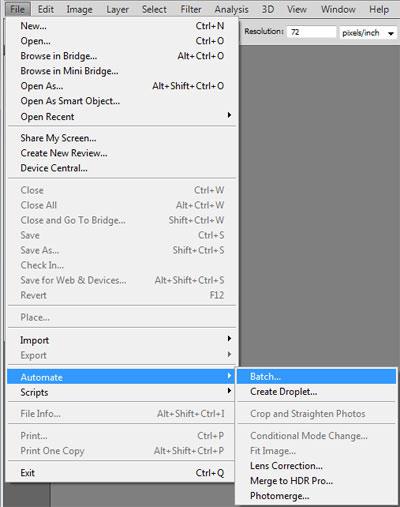
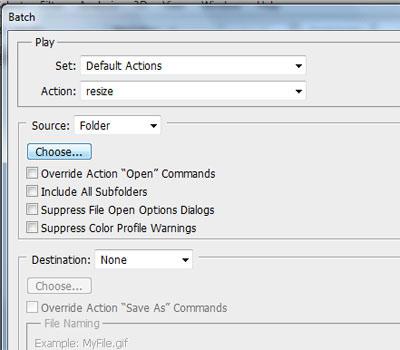
6. Step Now, let’s apply batch resize. Click on the File >> Automate >> Batch.
7. Step Next, select ‘Default Actions’ in Set and ‘resize’ in Action
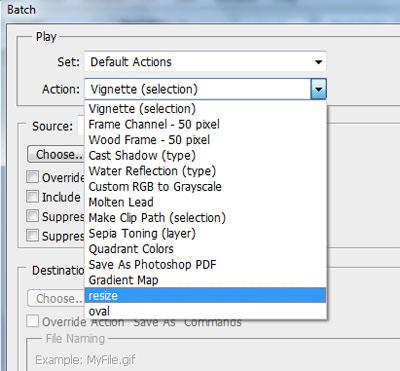
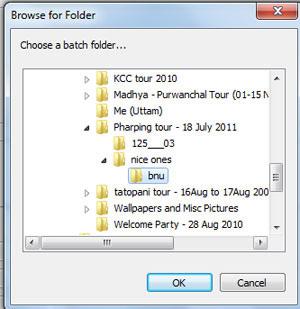
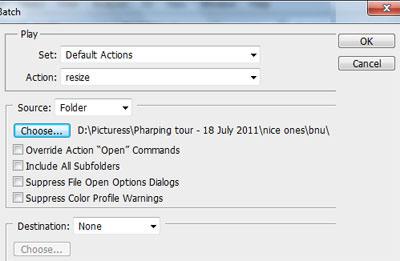
8. Step Click on the Choose… after selecting Folder in Source.
9. Step Browse / locate the folder you want to batch resize and click on the OK button.
10. Step Finally Click on the OK. Now all the images inside the folder will open and they will be resized automatically at once. Lastly, save your images.
Using batch resize is very useful if you want to resize many files at a time. It will certainly be a time consuming and tedious job to resize each and every image one by one. So in that case, batch resize is very helpful.