
In this tutorial, we are showing you how to blur background in Photoshop. You can also use this to create some fancy background wallpapers for Windows 7 with some cool blurry effects.

Blurring the background makes it so much easier to create a contrast between background and foreground. You can use this method to create some really cool Windows 7 themes.
Steps to blur background in Photoshop
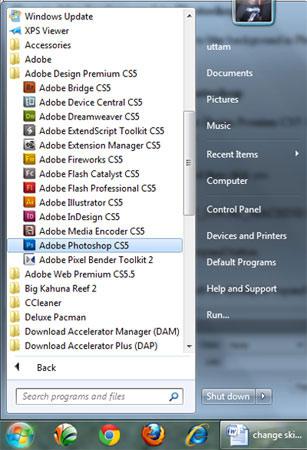
1. StepClick Start >> All Programs >> Adobe Design Premium CS5 >> Adobe Photoshop CS5. In this tutorial, we are using Adobe Photoshop CS5 but if you still have earlier version like CS2, 3, 4 then it works on them too.
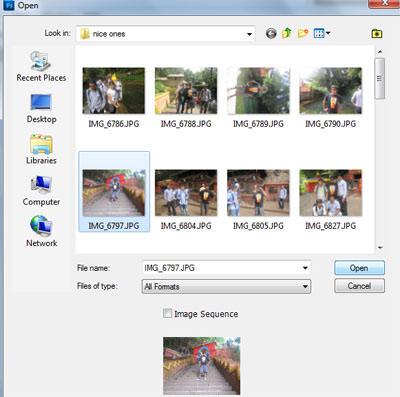
2. Step Open the image where you want to blur the background. To do this, Click on the File >> Open and select the file you want to open and click on the Open.
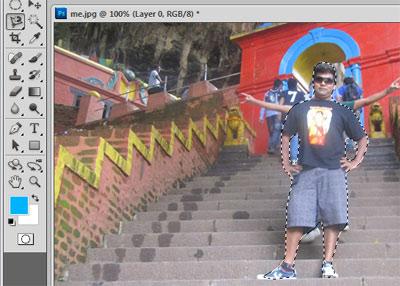
3. Step Now, Select the Magnetic Lasso Tool (Shortcut – L) and make selection around the image (person / object).
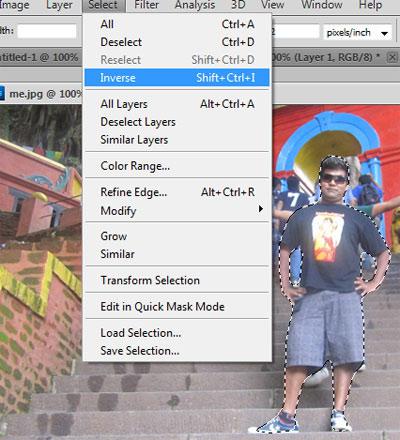
4. Step On the menu bar, click on the Select >> Inverse (Shortcut – Shift+Ctrl+I).
5. Step Click on the Filter >> Blur >> Motion Blur.
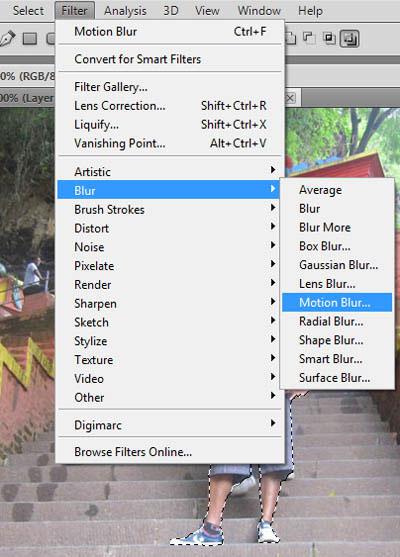
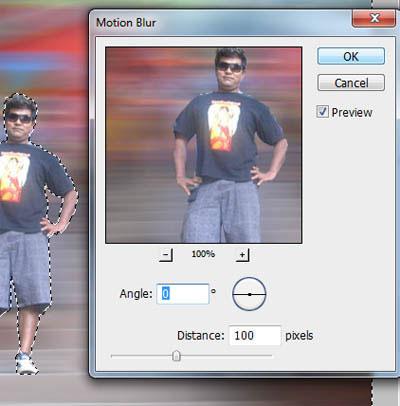
6. Step In the Motion Blur window set Distance = 100 pixels, Angle = 0 degree and then click on the OK.
7. Step Now to remove selection, on the menubar, click on the Select >> Deselect (Shortcut – Ctrl+d).
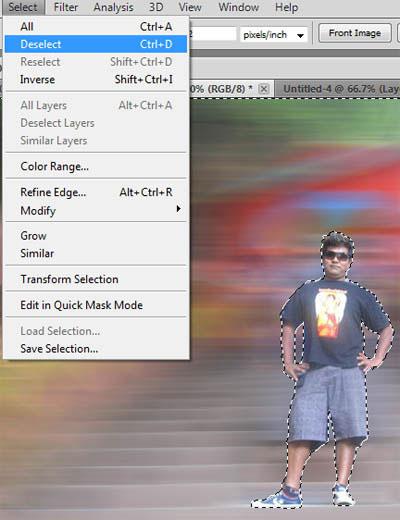
8. Step Finally, you will see the output as shown in the screenshot.

Blurring background looks good when you want to focus on the particular object / person and make rest faded to show it as not important.