If you want to to change the NAT (Network Address Translation) type in Windows 7, here’s a small guide for you!
Network Address Translation (NAT) is the process that lets an IP address to be changed to another and also allow one IP address to be shared by multiple users or computers. You can enable NAT for the users in your network to share the same IP address or disable it (although it is not really recommended). Here’s how you can do it:
1) Click on the Start button, and in the search text box, type and search for ‘cmd’.

2) A link that says ‘cmd’ under the heading ‘Program’ will be listed. Click on the link.
3) A command prompt window window will be opened. Type in ‘Ipconfig /all’.
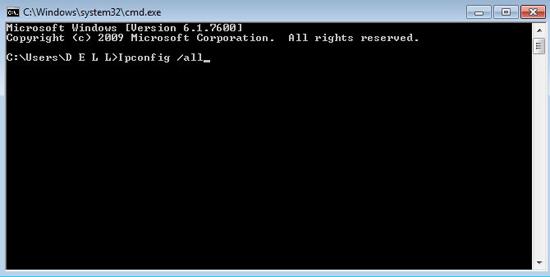
4) The Command Prompt will then be filled with a list. Look through it to find ‘Default Gateway’ or ‘IPV4 Gateway’. Note the numbers for it.
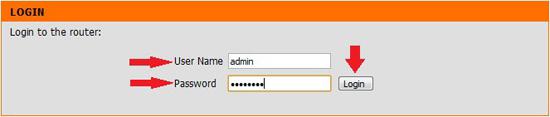
5) Then, open up a browser and enter the numbers for that you noted in the previous step. This will bring you to your router’s configuration page.
6) Enter your username and password to login to the configuration page.
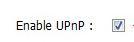
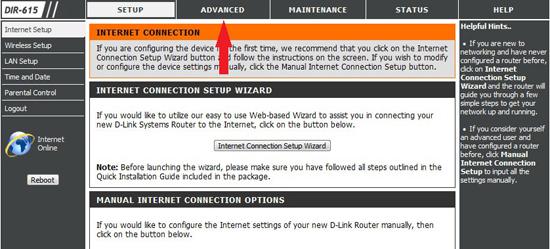
7) This step may differ for each router model. You will need to find the section where the UPnP is set. It normally placed under ‘Administration’ or ‘Advanced Settings.
8) When you are at the ‘UPnP’ setting, change the status to Enabled (or Disabled, depending on your choice).
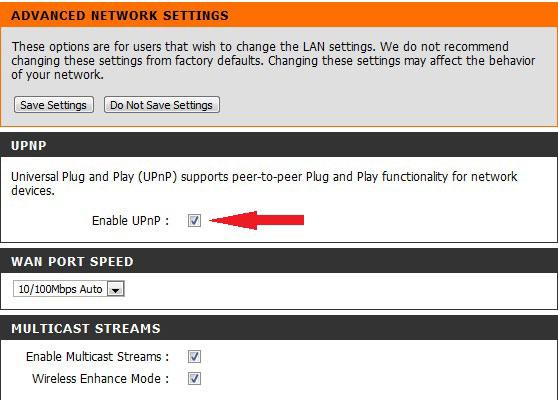
9) Click on ‘Save’ to save your settings.
It is not really a good idea to set your NAT to ‘Disable’ as the users in your network will not be able to have access to the Internet. Unless, of course, that is your intention.

