

In Windows 8, you will see the beautiful Metro Start screen which has pinned shortcuts on the desktop that allows you to quickly launch applications, files without using the search feature. Follow the steps provided in this tutorial to change numer of rows on Windows 8 metro desktop
Customizing number of rows
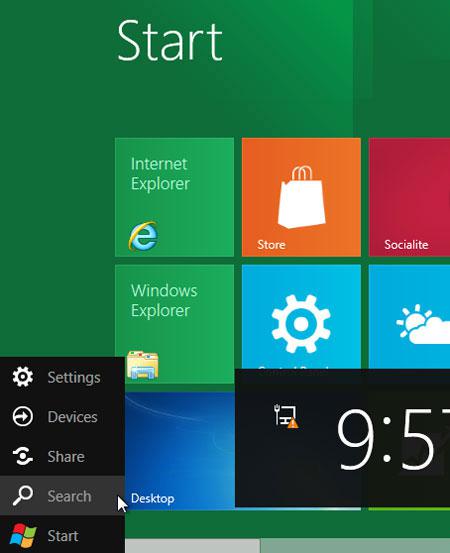
1. Step In your Metro Start Menu, move your mouse to the lower left corner and the Start menu pops up. Click on Search.
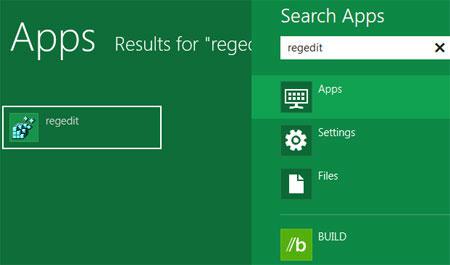
2. Step Type regedit in the Search Apps text box. Click on the regedit.
3. Step Click on the Yes in the User Account Control box.

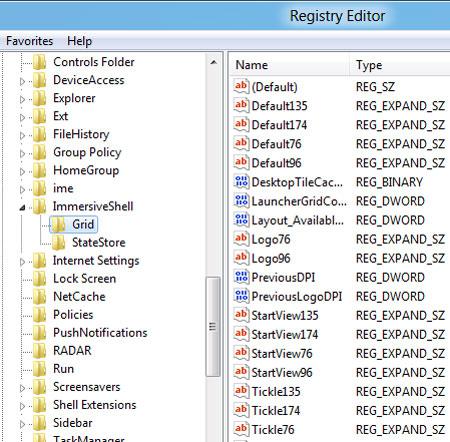
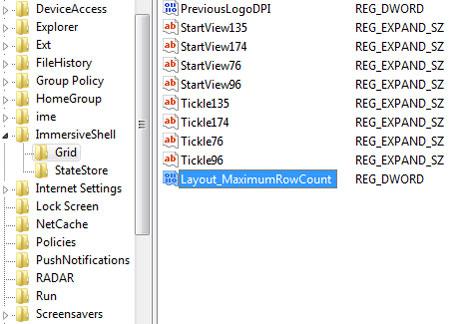
4. StepNow the Registry Editor opens. Navigate to following sub key: HKEY_CURRENT_USER\Software\Microsoft\Windows\CurrentVersion\ImmersiveShell\Grid by clicking their respective expand icon.
5. StepNext, on the right pane, look for an entry named Layout_MaximumRowCount. If you already have that entry then you do not have to create new one. In that case, skip to step – 7. If you don’t see the entry – Layout_MaximumRowCount then right click on the right pane and select New and then select DWORD (32-bit) Value.
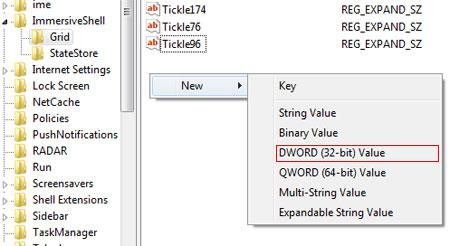
6. StepName it to ‘Layout_MaximumRowCount’..
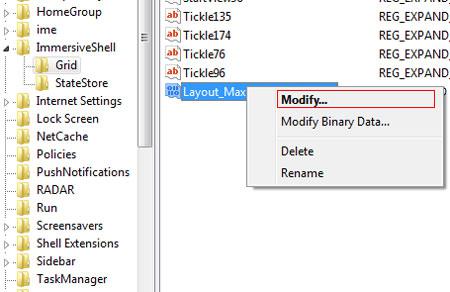
7.Next, right-click on the Layout_MaximumRowCount and select Modify.
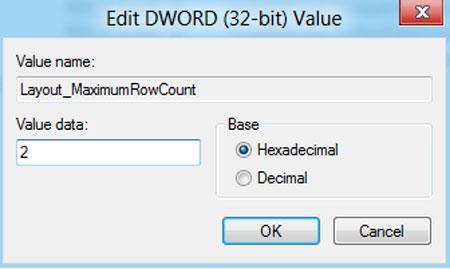
8. StepNext, change the Value data. The number given here represents number of rows to be displayed. Click on the Ok button and then close Registry Editor. Log off your computer and log-in back to see the changes.
9. StepFinally, you should see the number of rows has been changed. That are the complete steps to change number of rows on Windows 8 metro desktop.

Conclusion
Depending upon the resolution of your computer, Windows 8 set the number of rows on Windows 8 metro desktop. Usually for 1024 x 768 screen resolution it sets rows to 3-4. For 1440 x 900 it sets rows to 4-5. To manually modify the rows on Windows 8 metro desktop follow the steps provided in this tutorial.