

Default Row Number Is Set According To Your Screen Resolution
The Metro Desktop contains beautifully arranged metro icon tiles for better user experience. The number of icon rows, by default is according to the screen resolution. To adjust it manually, perform the following steps.
Increasing Rows
The Metro Desktop contains beautifully arranged metro icon tiles for better user experience. The number of icon rows, by default is according to the screen resolution. To adjust it manually, perform the following steps.
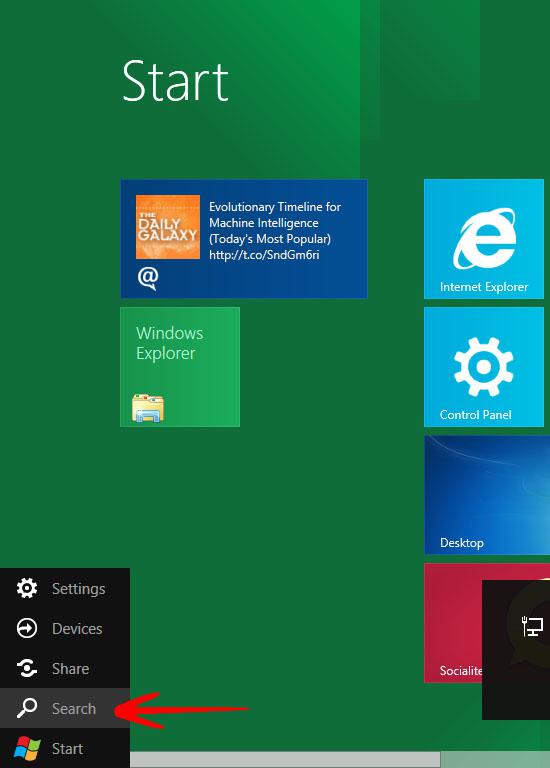
1. Step In the Metro Start Menu, click on the lower left corner. The Start menu pops up. Click on Search.
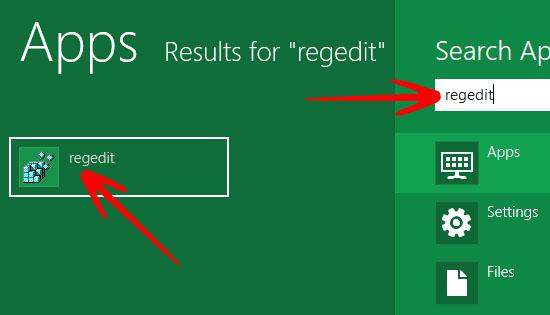
2. Step In the Apps Search Box, type regedit and press enter.
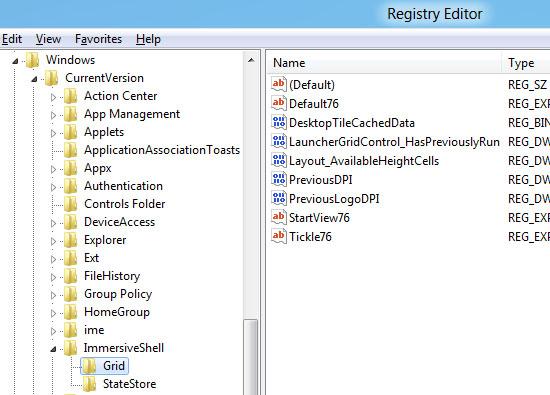
3. Step The Registry Editor opens. Go to HKEY_CURRENT_USER\Software\Microsoft\Windows\CurrentVersion\
ImmersiveShell\Grid.
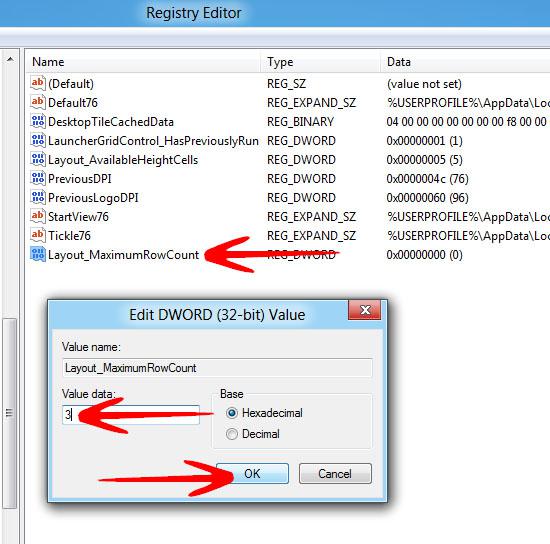
4. Step Here you need to create a new variable. Right click anywhere in the window and select New –> DWORD (32-bit) Value. Name it Layout_MaximumRowCount.
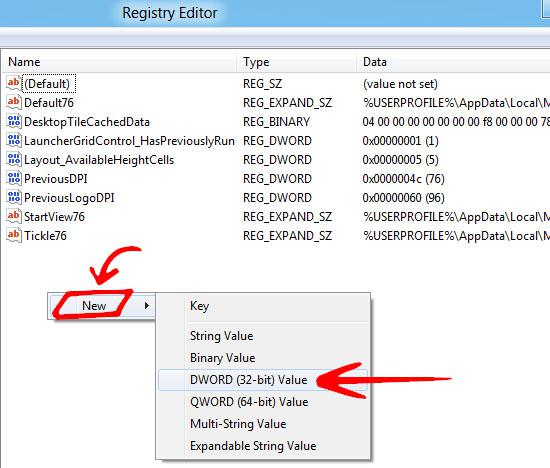
5. Step Set its desired value between 0 – 5. We, for example, entered 3. Now, logoff for the changes to take effect.
The number of rows in metro desktop are by default adjusted for a convienient touch experience on Windows 8 tablet PCs. If you increase the screen resolution, the rows are adjusted automatically.