Make your computer sleep when it is kept idle is useful to save power. You can change your sleep time easily by following the steps provided in this tutorial.
Steps to change sleep time in Windows 7
1. Step Click Start > Control Panel

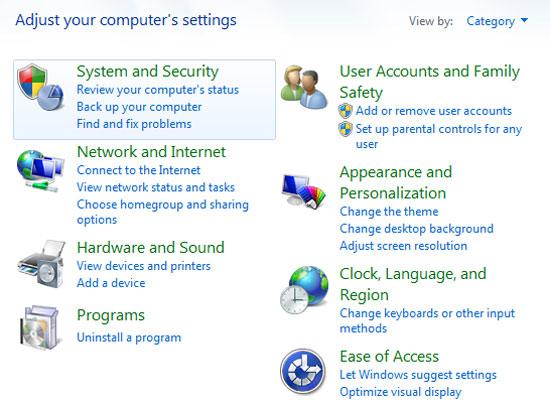
2. Step Click ‘System and Security’ link.
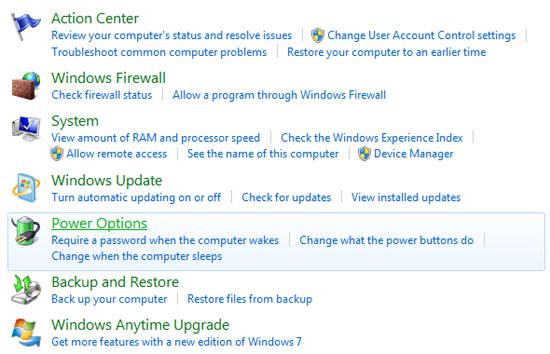
3. Step Click ‘Power Options’
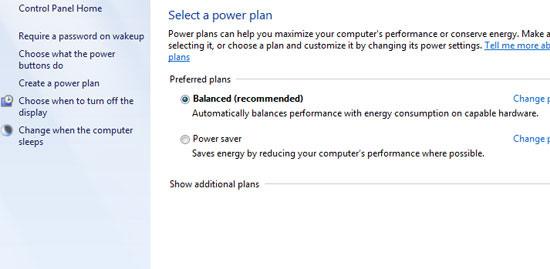
4. Step Click ‘Change when the computer sleeps’ link at the left side of the opened window.
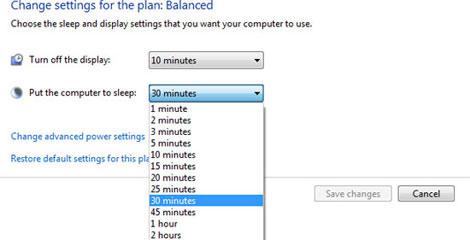
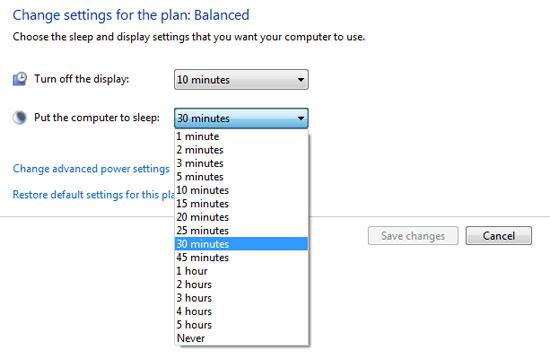
5. Step Now select the time when you want to make your computer sleep under ‘Put the computer to sleep’. Also, you can select the time when your display to turn off automatically under ‘Turn off the display’ list box. Finally click Save Changes.
Video
Whenever your computer remains idle for longer time then it is much useful to make your computer sleep automatically so that power could be saved.

