
If you want to check your video card in Windows 7 read this tutorial – beginners should make sure to install tools like GPU-Z, one of the most popular tools for this kind of job.
Check video card in Windows 7
In todays PCs, High performance Video or Graphics card are either builtin or attached seperately to the Pc’s motherboard. Occasionally you need to know the specs of your Graphic Card before installing high end graphic Games. Windows 7 provides you an overview of your installed hardware, but for indepth info you might need to install small utility programs like GPU-Z.
Step by step procedure
1. Step Right Click on the Computer icon on the Desktop or open the Start Menu and right Click on Computer and select Properties.

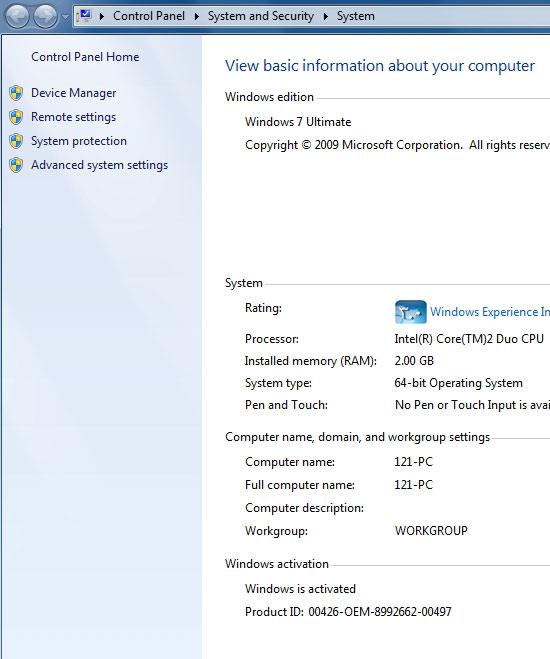
2. Step A new windows will open up displaying Basic information about your Computer.
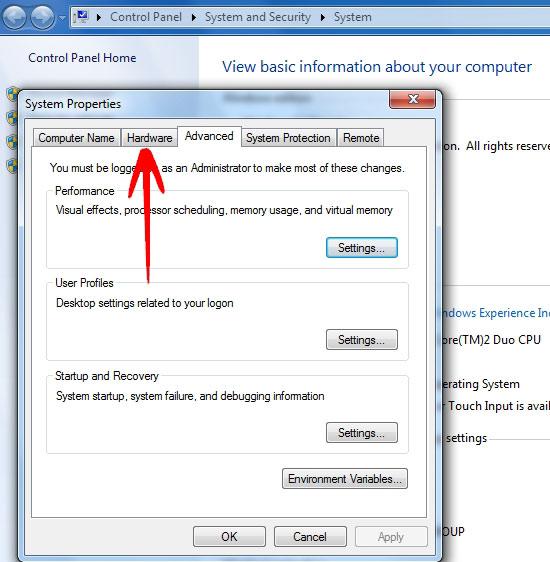
3. Step Click on Advanced System settings in the left pane.

4. Step The System Properties window will popup will other Advanced tabs focused.
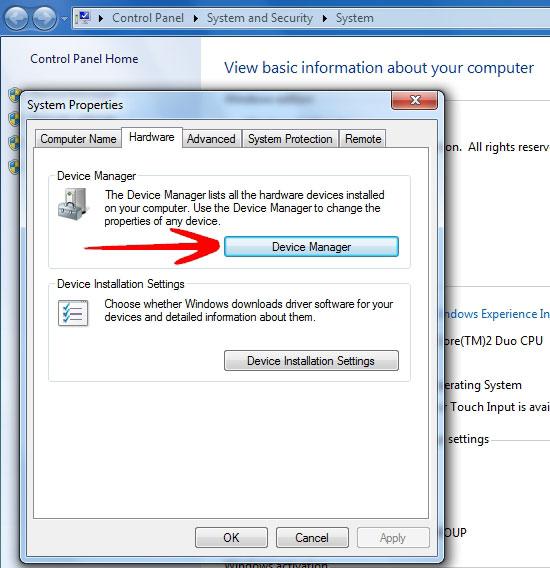
5. Step Go to the Hardware tab and click on Device Manager
6. Step The Device Manager window will open up display the Categories of Hardware attached to the Pc.
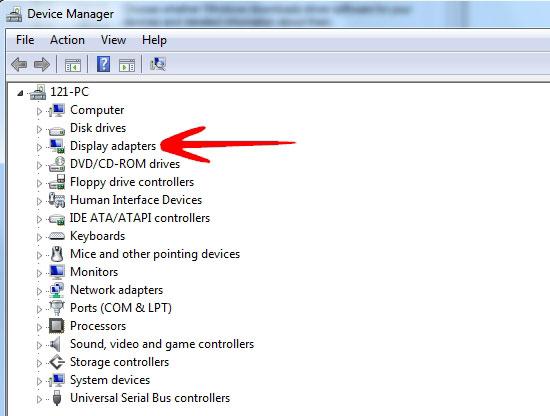
7. Step Click on Display Adapter to expand it and show the name of the Graphic chip.

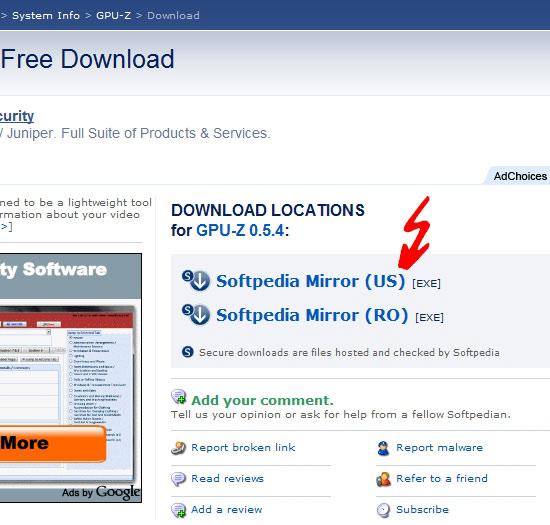
8. Step Windows only provide overview of the Graphic Card, for detailed info download the GPU-Z utility here.
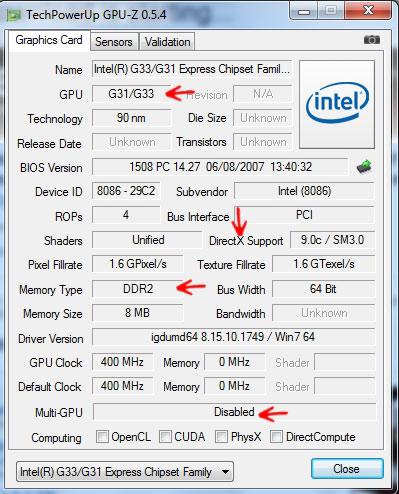
9. Step Running the GPU-Z utility will display the detailed information.
Conclusion
Windows 7 provides you an overview of your installed hardware, but for indepth info you might need to install small utility programs like GPU-Z.GPU-Z is a lightweight utility designed to give you all information about your video or Graphics Card.