
Adding A Network Printer Connected To A NAS Drive
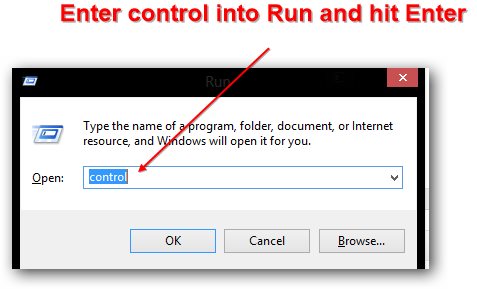
1. Step Open the regular Control Panel – hold Windows key + R at the same time and enter control:
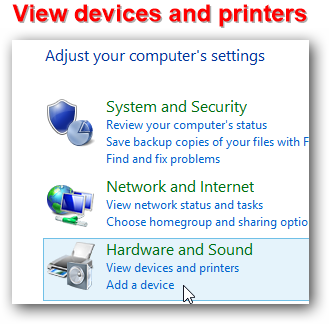
2. Step Click on View devices and printers (blue link)
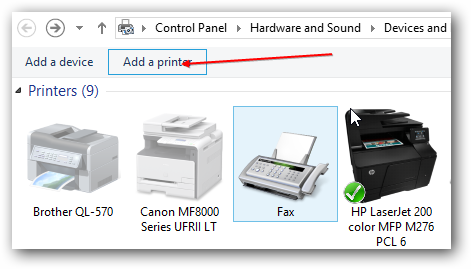
3. Step At the top click the button Add a printer
4. Step Windows 8 will now search for network printers – yes, it will include all printers connected to network drives under the condition that you have correctly added your NAS drive
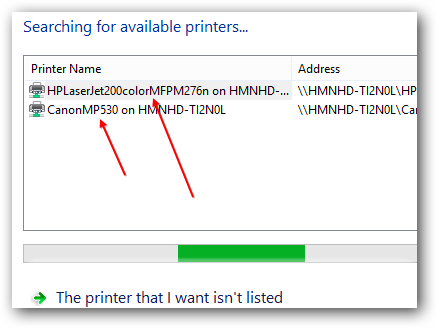
5. Step Unfortunately, Windows 7 and 8 are not very smart when it comes to assigning drivers. Often it will not be able to find the correct driver for your network printer and you have to select it manually from a pre-defined list of printers.
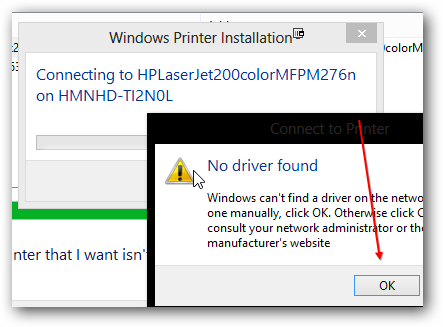
6. Step For example, in this case I am adding a HP LasetJet 200 color MFP – I looked up the model type in the printer manual, but you can also find it on the back of your printer (sometimes button, be careful when lifting it!)

7. Step If everything went smoothly you will see this after confirming your selection with OK. However, sometimes you have to head over to hp.com or your printer manufacturer website and download a more appropriate driver and then select the button “Have Disk..” (see above)
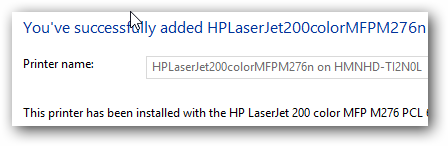
8. Step Finally, you can select the printer connected to your network drive and start printing and using all those fancy HP online tools

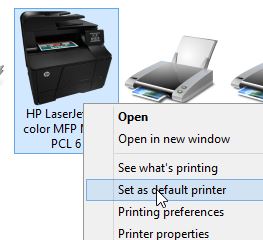
Set As Default Printer
1. Step Repeat step 1-2 from above
2. Step Right-click the newly added printer and click Set as default printer