Here’s a great tutorial that will teach you how to create a halftone effect.
Steps to halftone in Photoshop
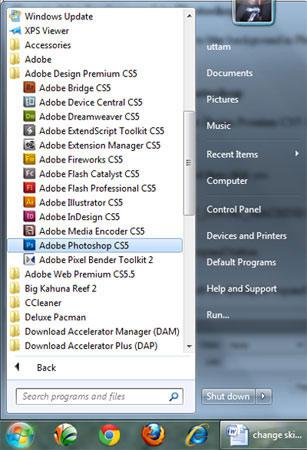
1. Step First of all start the Photoshop program, click on the Start >> All Programs >> Adobe Design Premium CS5 >> Adobe Photoshop CS5.
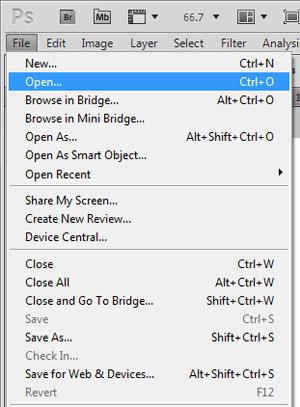
2. Step Open the file you want to halftone. To open file, click on the File >> Open. Then select the file and click Open.
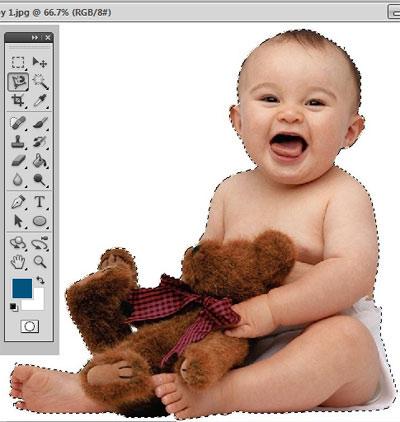
3. Step Click on the Magnetic Lasso Tool (Shortcut – L) and make selection around the image / object.
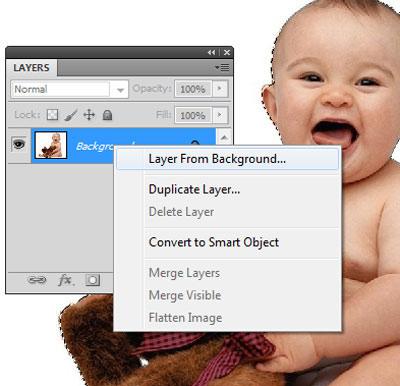
4. Step If the layer is locked, unlock it by double clicking on the layer in layer palette or right click on the layer and select “Layer From Background” and click on the OK button.
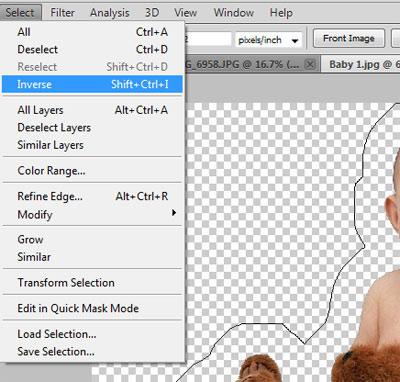
5. Step Delete the background (white or any colored parts) that is not selected. To do this, click on the Select >> Inverse located on the menubar. Then press ‘DEL’ on the keyboard. Finally, you should see the transparent background as shown in the screenshot.

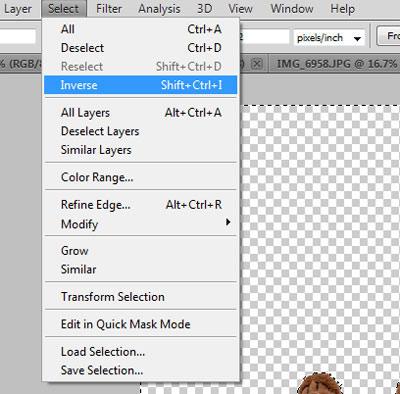
6. Step Make sure you still have a selection around the object. If you no longer have the selection then quickly press Ctrl + Alt + Z to undo the deselection. Now, on the menubar click on the Select >> Inverse to inverse the selection so only the image or object is selected again as in the step – 3.
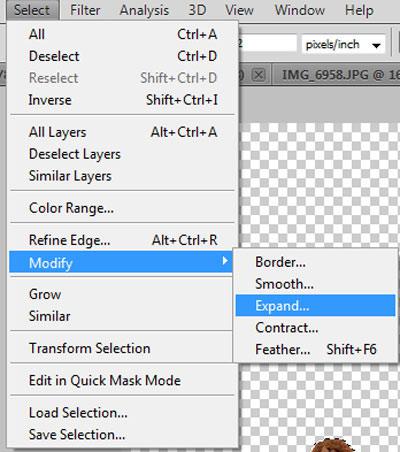
7. Step On the menubar, click on the Select >> Modify >> Expand.
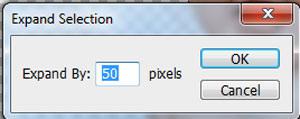
8. Step Set Expand to 50 pixels and click on the OK button
9. Step Click on elect >> Inverse again
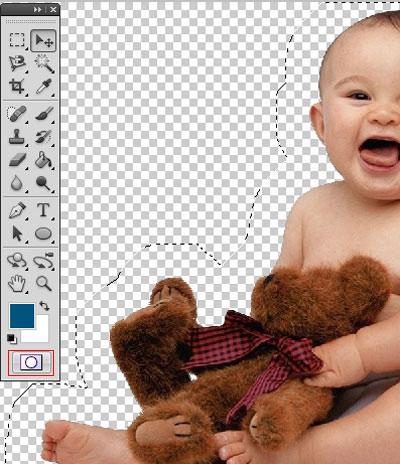
10. Step On the toolbox, click on the ‘Edit in Quick Mask Mode‘ or just press Q.
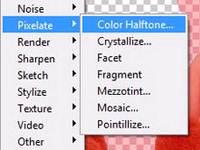
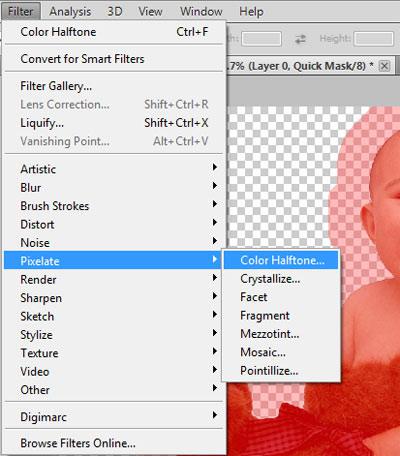
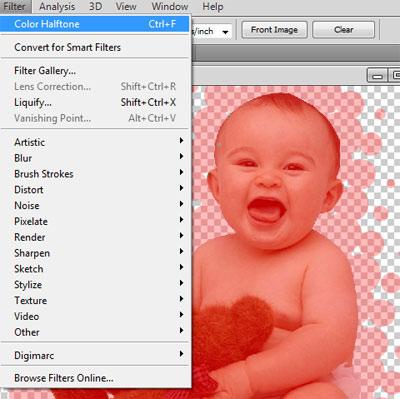
11. Now click on the Filter >> Pixelate >> Color Halftone to get a halftone effect
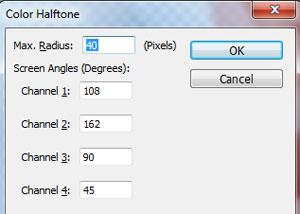
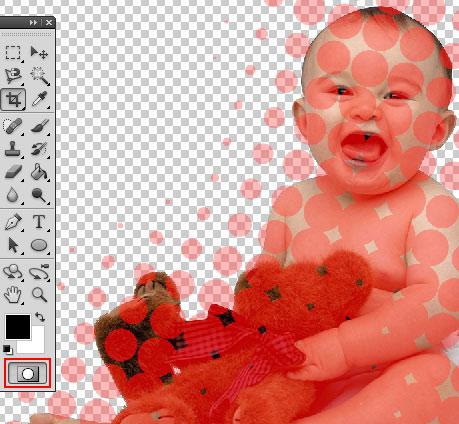
12. Set Max. Radius to 40 and set the other values as seen below:
13. If you are not satisfied with the size and the space of circles then click on the Filter >> Color Halftone or just press Ctrl + F. Repeat until there’s more space between circles
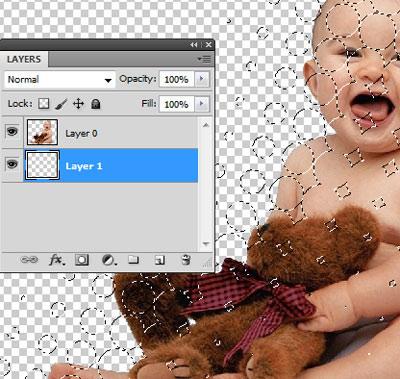
14. Now exit the quick mask mode by pressing Q or click on the ‘Edit in Quick Mask Mode’ on the toolbox.
15. Create a new layer in the layer palette. Drag it below the original layer (layer with image).
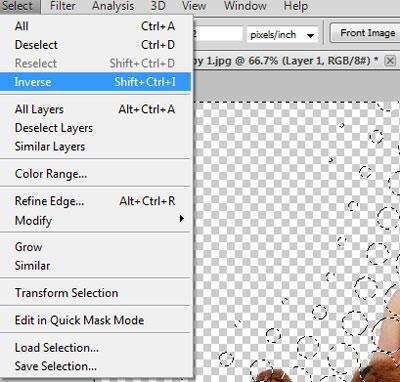
16. Inverse the selection by clicking on the Select >> Inverse..
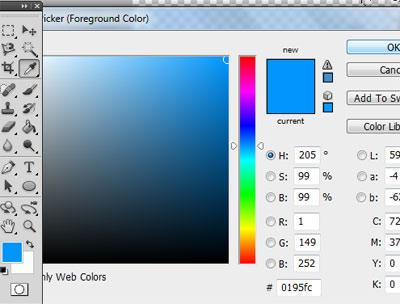
17. Select the color you want to fill the circles with and click OK
18. Press Alt + Backspace to fill. You will get something similar:

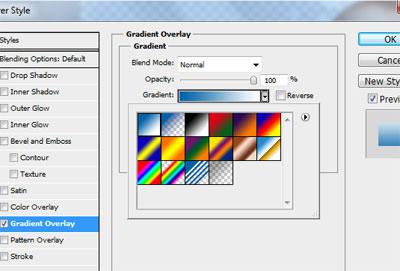
19. Let’s add some more effects. Right click on the layer with the halftone effect and select the Blending Options.

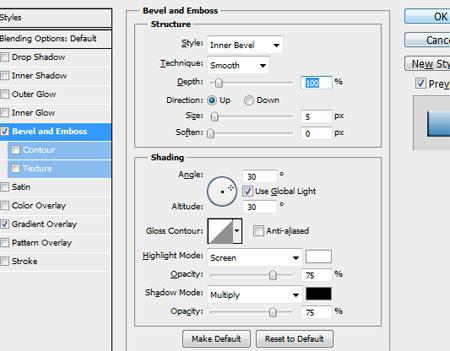
20. Select Gradient Overlay with color gradient as shown in the screenshot and click on OK.
21. Next, Select Bevel and Emboss. Set the values as shown in the screenshot and click on the OK button.
22. Finally, you should have a pretty cool halftone effect and know how to repeat that over and over again. Cool!

Conclusion
The halftone effects basically is a grid of regularly spaced dots or cells. These halftone dots or spots are different in size to simulate the appearance of shading and light. The smaller dots appear lighter where as the larger dots appear darker. This technique is often used in printers, as well as in the publishing industry, but it’s also pretty awesome to enhance your personal photos

