An easy-to-follow step by step guide on creating a Windows 8 Password Reset Disk.
About The Password Reset Disk

That’s the image that you will see if you forgot your password (again). But if you have had a password reset disk, this thing won’t be happening to you and you won’t be worrying about these things ever again.
Step By Step
Here is how you can create the password reset disk in Windows 8.
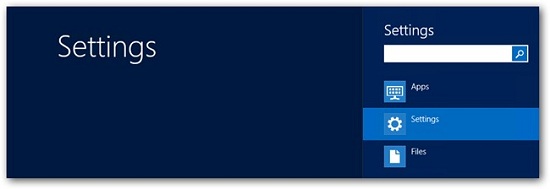
1. Step
Press the windows key together with F from your keyboard. This will take you to the Search page. Here, choose the Settings section.
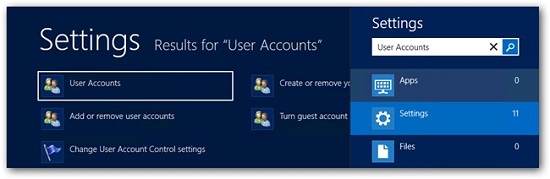
2. Step
Search User Accounts, and choose the first result.
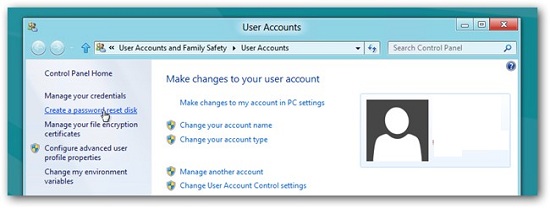
This will lead you to Control Panel, specifically, in the User Accounts. Your will see a link, Create a password reset disk.
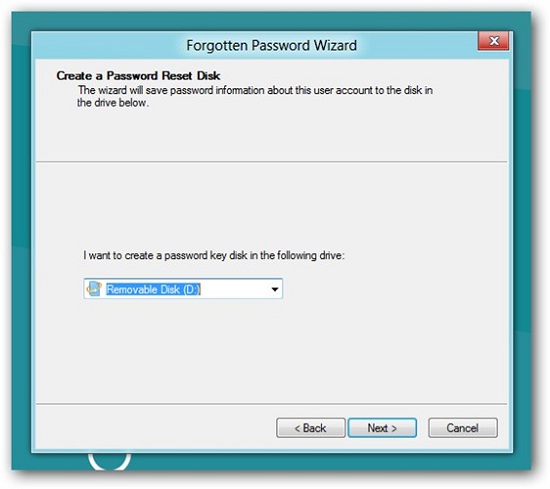
A wizard will appear. Insert your USB drive, before you click Next.
3. Step
You select the partition where you want to create your password key on, then click next.
You will now need to enter your current password.
4. Step
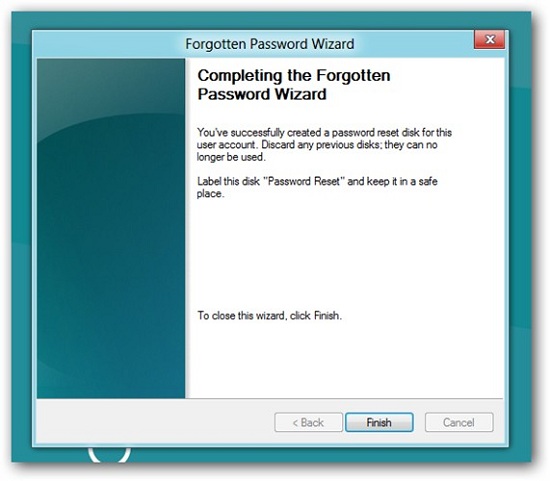
Conclusion
So, the next time you forget the password, the password reset disk will come in handy. If you type the wrong password, you will see the option Reset Password.
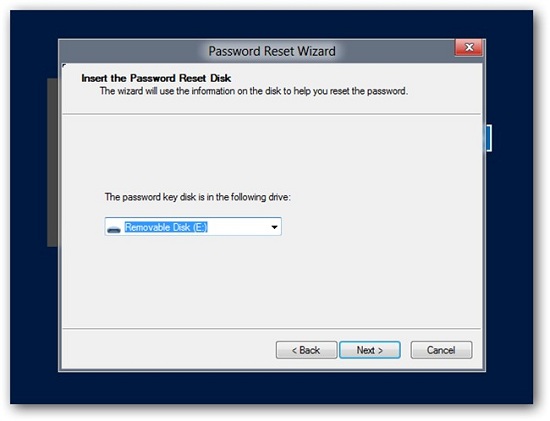
Put the USB on, then Click on Reset password. The wizard will appear, click next to continue.
Pick the disk where the Password reset is.
Now, you type the new password and also a hint for the password.

