Sometimes you need to create your own DVDs that may contain data, images, videos or audio. Windows 7 has a solution for every mentioned type. Have a look at the following steps.

How to create DVDs in Windows 7
Windows 7 has built in tools for creating DVDs with files, images, videos or audio. For a Data DVD you can simply use the Windows Explorer to write files on DVD. For Images and Videos, you can use the Windows DVD Maker. And for audio, you can use the Windows Media player to burn them on a DVD. Following steps explain in details.
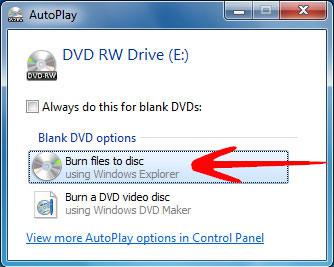
1. Step When you insert an empty disk into your DVD Writer, a pop up window offers you two options; “Burn files to disk” and “Burn a DVD Video Disk”. First we are going to take a look at creating a data DVD and secondly a DVD with images and videos.
Insert an empty DVD – Chose the first option “Burn files to disk”.
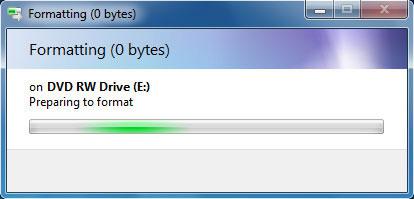
2. Step It will now ask you “How do you want to use this disk?”. You can enter the DVD Title (name) and chose the first option which is “Like a USB Flash Drive”.

3. Step This will start formatting the disk.
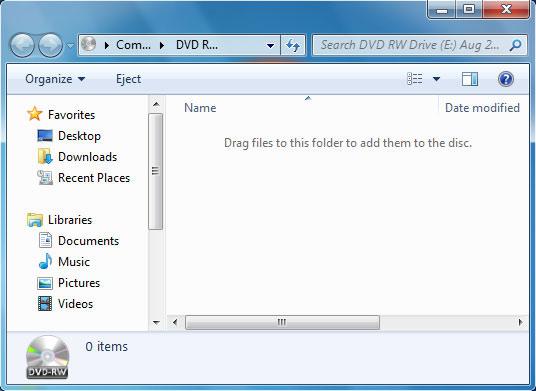
4. Step On the next screen click on “Open folder to view files”.
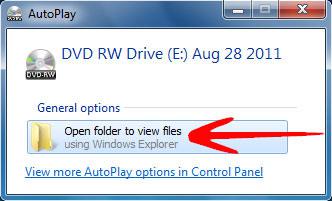
5. Step Now you are on your DVD. This folder contains nothing so far. You can simply drag and drop files/ folders you want to write on DVD to this folder.
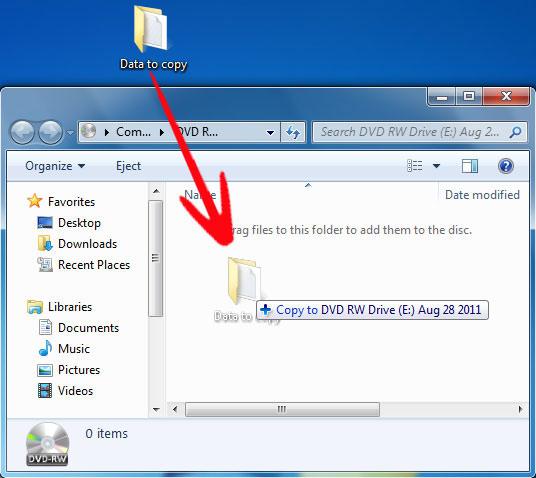
6. Step Now restore your current window so that you can easily drag and drop data. (That is, it should not be maximized now). Drag and Drop data as shown in following figure.
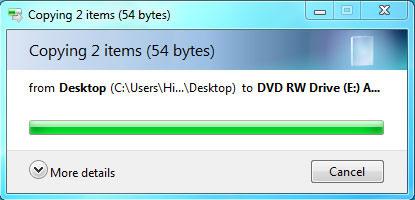
7. Step This will start writing data to the disk. And depending upon the size, your DVD will be ready to use.
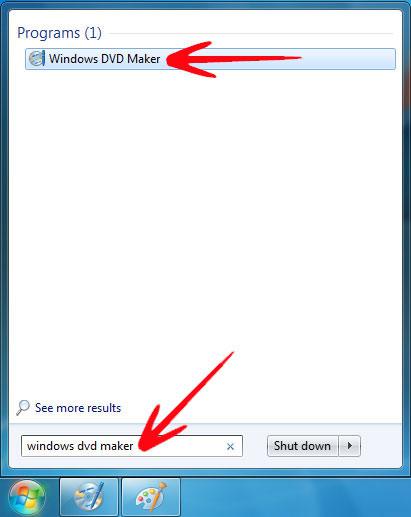
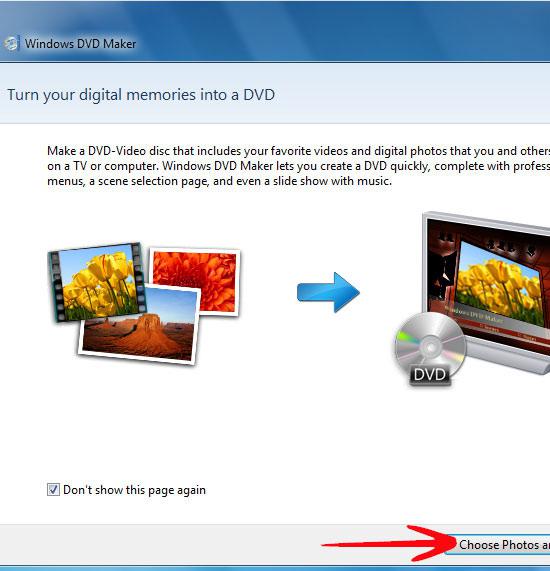
8. Step Now let’s see how you can prepare an Image/ Video DVD in Windows 7. Go to Start Menu and type in search box “Windows DVD Maker” and press enter.
9. Step This launches the Windows DVD maker. Press the button “Chose Photos and Videos”.
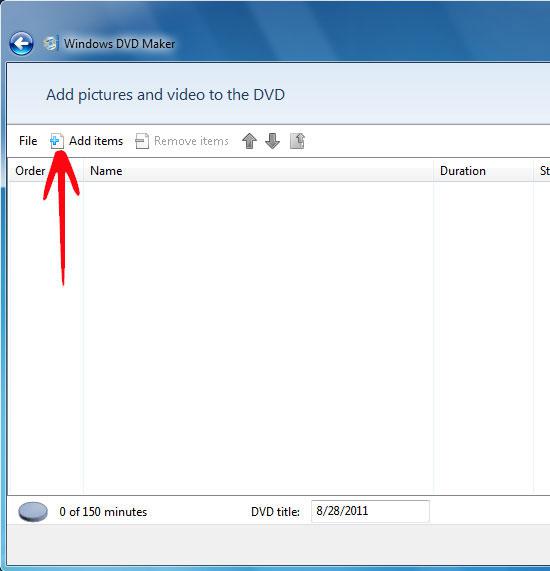
10. Step On the next screen click on “Add items”.
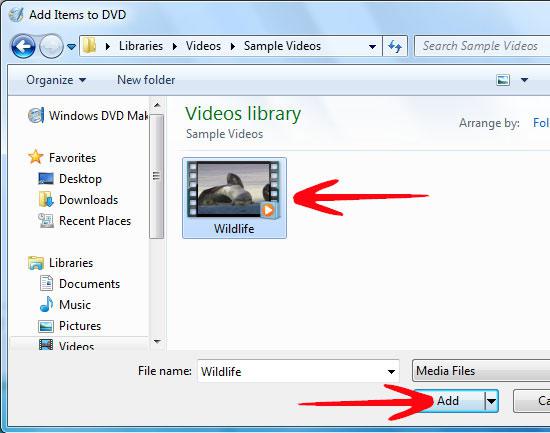
11. Browse for the media file you want to add and click on the “Add” button.
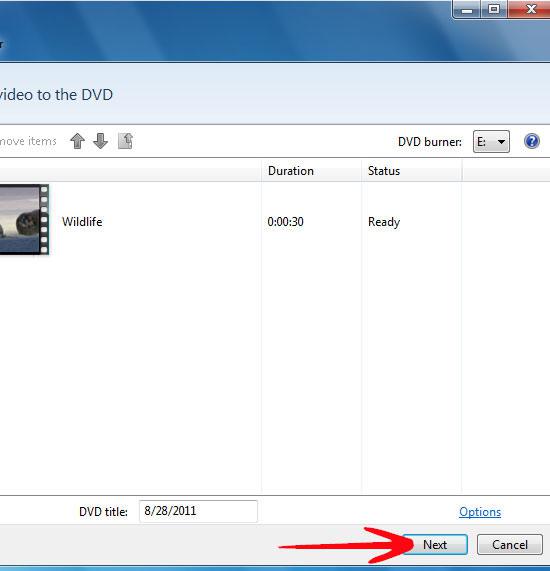
12. After the file is added to the Windows DVD maker, click Next.
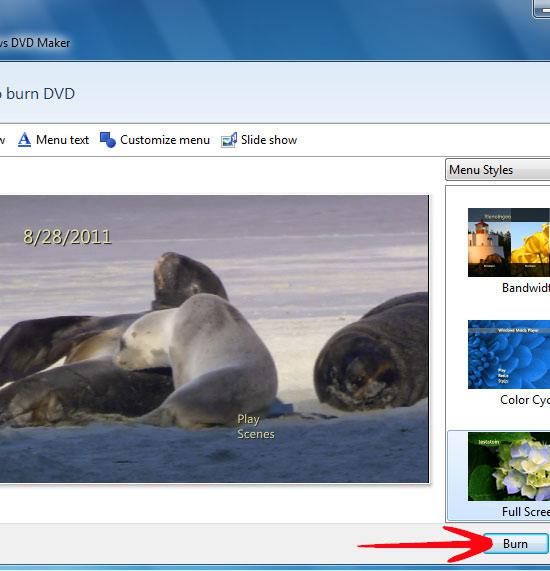
13. On the next screen click on “Burn”.
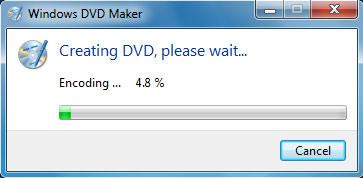
14. This will start burning your media files on your DVD. To make an audio DVD, simply go to the Windows Media Player, add the songs to a playlist and click “Burn” above.
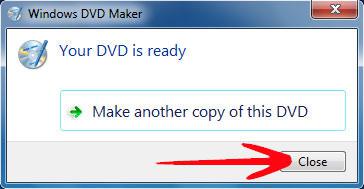
15. When the DVD has been burnt completely, the message is displayed “Your DVD is ready”.
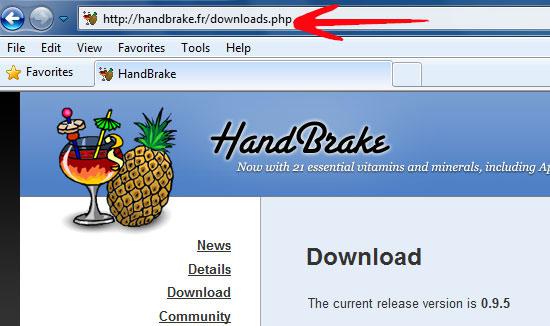
16. There may be other types of data you want to add to a DVD. For that we recommend a Free Open Source software named Handbrake which can be downloaded HERE.
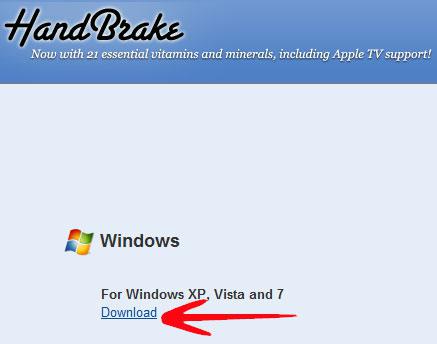
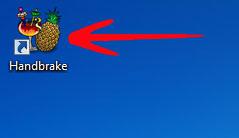
17. After you have downloaded and installed the HandBrake, go to your desktop and double click on the HandBrake icon.
HandBrake is an open source free software that is a very handy tool to copy DVDs, to create DVDs in various formats, to convert formats in DVDs and the thing I like about it, burning a queue of DVDs with one click.