Uttam is back with another tutorial on how to create hyperlinks

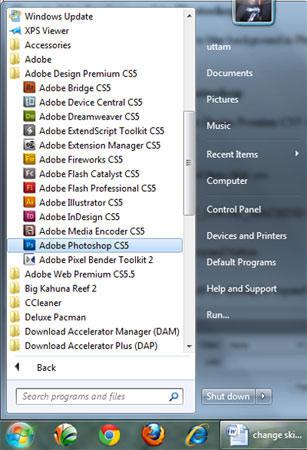
1. Step First of all you have to start the Photoshop program. To do this, click on the Start >> All Programs >> Adobe Design Premium CS5 >> Adobe Photoshop CS5.
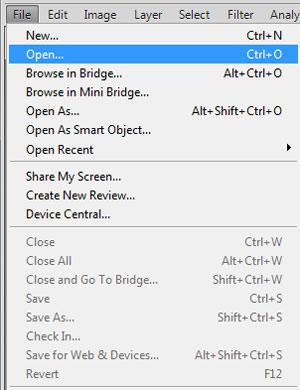
2. Step Open the image where you want to place the hyperlink. To do this, click File >> Open. Then choose the file and click on the Open button.
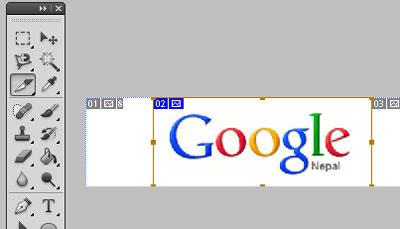
3. Step Click on the Slice Tool (Shortcut – C) below the Crop Tool and make a slice selection around the image where you want to place the hyperlink by clicking and dragging on it.
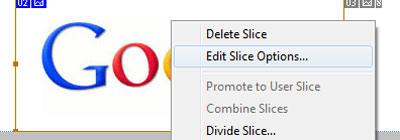
4. StepRight click on the slice you have just created and select Edit Slice Options.
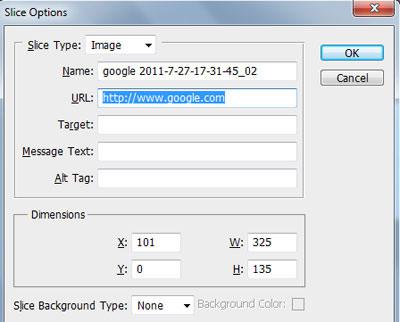
5. StepType the website address (the URL!) which you want to open when the user clicks on the sliced area. Then click on the OK button.
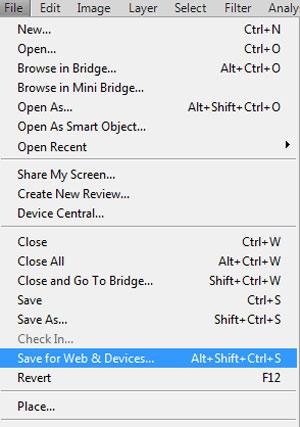
6. StepOn the menu bar, click on the File >> Save for Web & Devices.
7. StepSelect JPEG High or PNG-24 from the Preset dropdown. Then click Save.
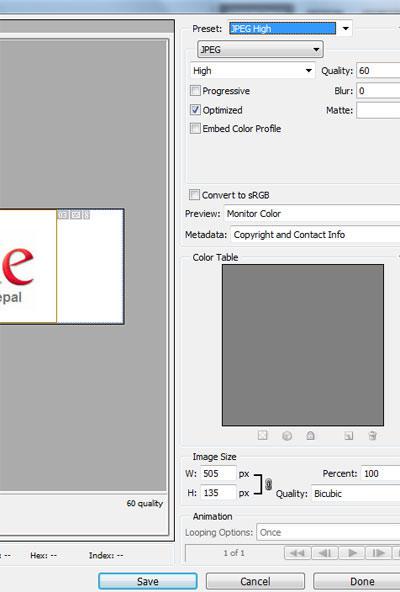
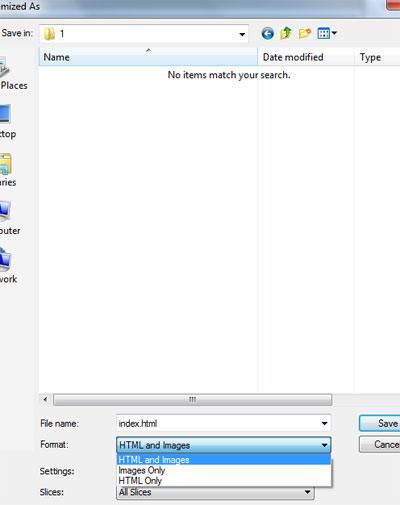
8. StepNext, give the file name, select ‘HTML and Images’ in Format and then click on the Save button..
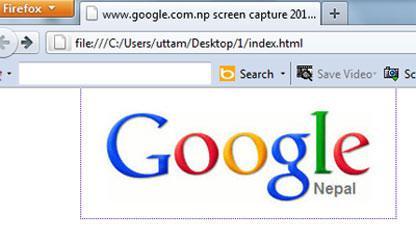
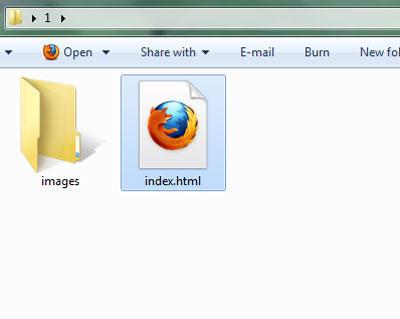
9. StepNow open the folder where the file you have just saved is located. Then double click on the html file to open it.
10. StepWhen you open the HTML file, you will see the hyperlink that you created in Photoshop. Click on it to go to the website address you have set. That are the complete steps to hyperlink in Photoshop.
