
The public folders in Windows 7 are quite useful for file sharing, however some of you might want to disable the shared folders. If so, follow this guide.
![]()
Disabling the shared folders is really easy and you don’t need to tweak the registry for it.
1. Step Open the Network and Sharing Center:
Inside the Control Panel click on Network and Internet:
Then click on Network and Sharing Center:
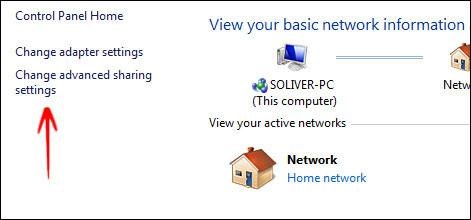
2. Step On the left side click on Change advanced sharing settings:
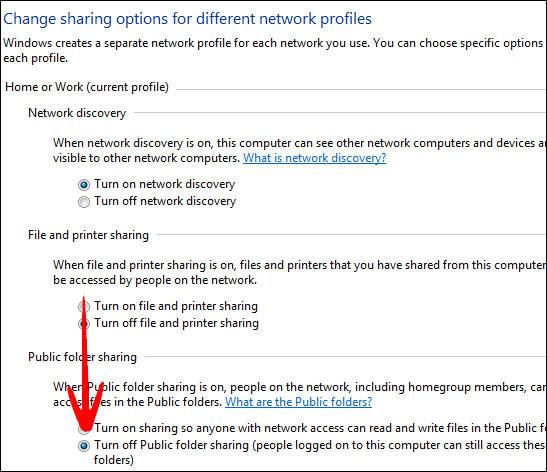
3. StepScroll down until you find the option Turn off Public folder sharing (people logged on to this computer can still access these folders) and select it.
4. Step Click on Save Changes to disable all shared folders.
The shared folders (all public folders) will now be disabled. You can check that yourself, simply enter \\Computer-PC into the Windows Explorer address bar (replace Computer-PC with your actual Computer name, e.g. RANDOM-PC). The folder Users should not be available any longer.