To display last login windows 7, follow the steps provided in this tutorial.
Steps to display last login windows 7
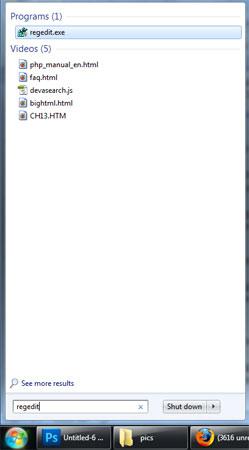
1. Step Click Start and type regedit in the ‘Search programs and files text box and press enter.
2. Step If you are asked for user access control then click yes.

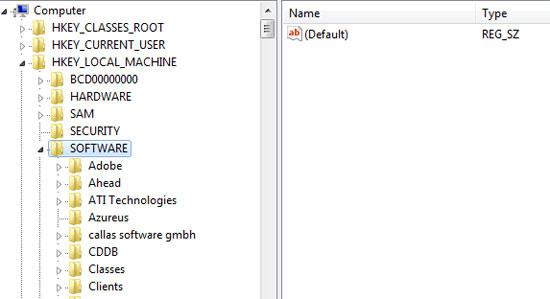
3. Step Registry Editor opens. Expand HKEY_LOCAL_MACHINE by clicking expand button in front of it.
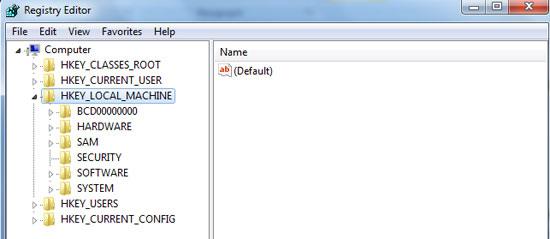
4. Step Expand SOFTWARE by clicking its expand button.
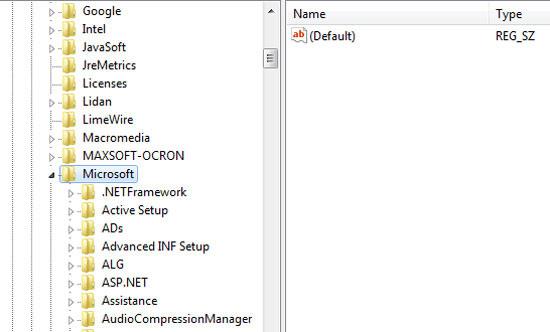
5. Step Under SOFTWARE, expand Microsoft by clicking its expand button.
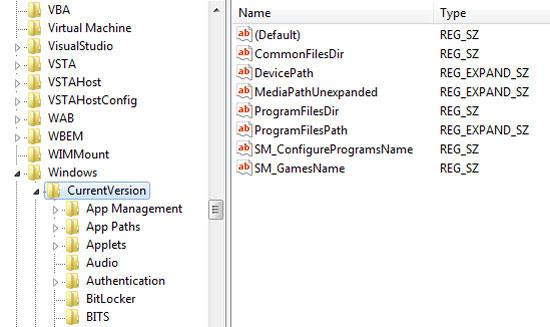
6. Step Under Microsoft, expand Windows and under it CurrentVersion by clicking its expand button.
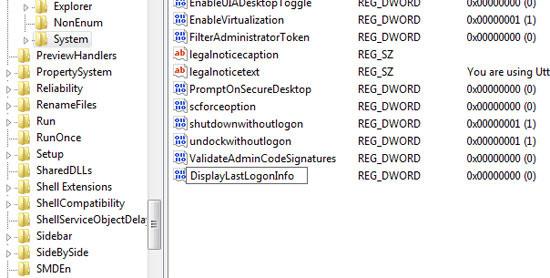
7. Step Under CurrentVersion, expand Policies and finally click System.
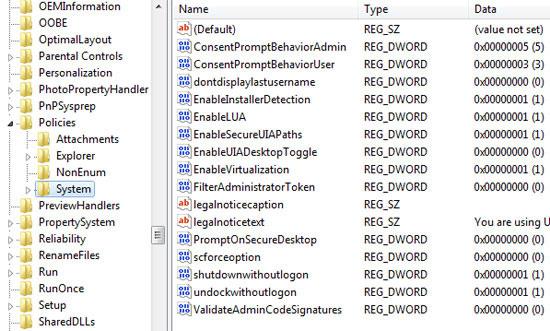
8. Step After you click System, to it’s right pane, right click on a empty area and click on New and then choose DWORD (32-bit) Value.

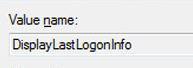
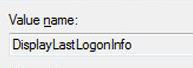
9. Step Now type DisplayLastLogonInfo and then press Enter.
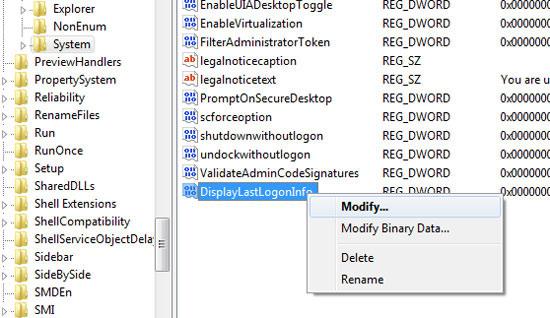
10. Step Right click on the DisplayLastLogonInfo that you have just created and select Modify.
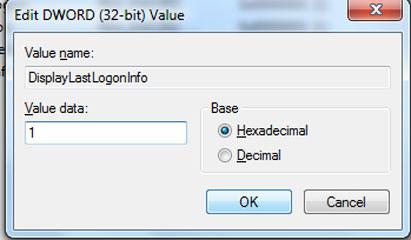
11. Type 1 and click on OK to activate display last login. That are the complete steps to display last login in Windows 7.
It might be helpful for you just incase if you want to know what is the last login that was logged on to the Windows 7.