
If you want to save time logging in, you should know how to enable the automatic Windows 7 login. With a simple registry tweak you will no longer have to enter your username and password on boot up.
![]()
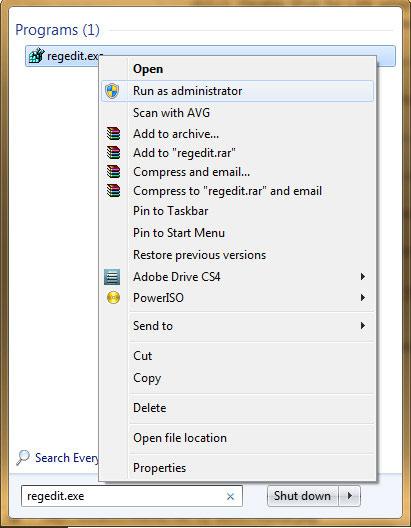
1. Step Open the registry:
2. Step Uncollapse the registry keys: [HKEY_LOCAL_MACHINE\SOFTWARE\Microsoft\Windows NT\Current Version\ Winlogon]
3. Step Create a new String value and rename it to “AutoAdminLogon“:
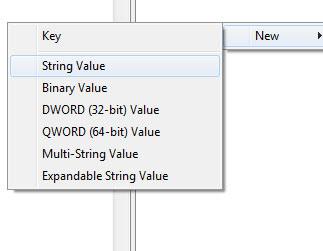
(right-click in the right pane and click on New -String Value)
4. Step Double-click on the newly created registry key and enter the value “1” and confirm with OK.
5. Step Create two more “String” registry keys and rename them to “DefaultPassword” and “DefaultUsername” (without the quotes)
6. Step Repeat what you learned in step 4, double-click on the entries and enter your username and password.
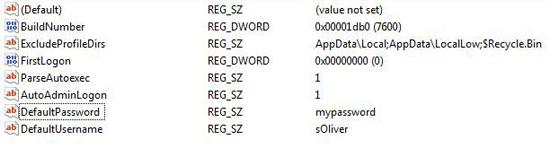
7. Step Confirm that your registry keys look similar to the following setup:
Sidenote: If you don’t add the password, Windows 7 will automatically disable the auto-login after the first time.
How to auto-login as administrator in Windows 7?
You have to activate the hidden admin account and then follow the instructions of this tutorial while logged into your admin account.