
Using The Device Manager To Enable DMA For Your Disk Drives
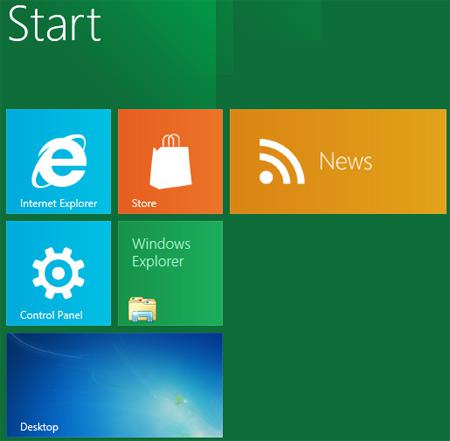
1. Step Open the Desktop by clicking Desktop tile on the Start Screen.
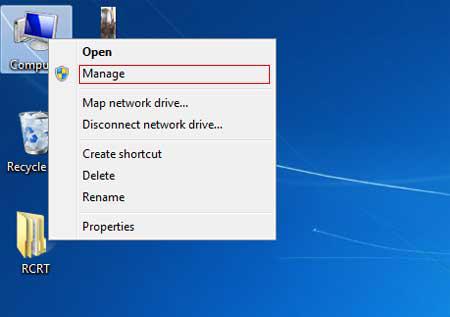
2. Step Next, Right click on your Computer and select Manage.
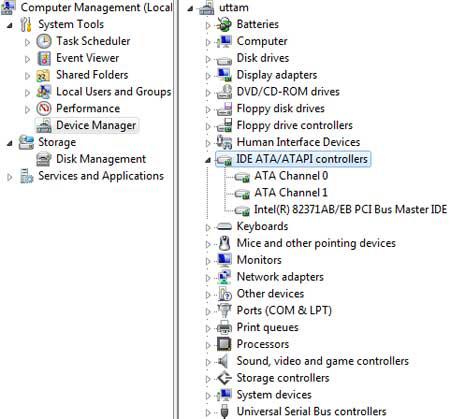
3. Step Next, in the left pane, click on the Device Manager.
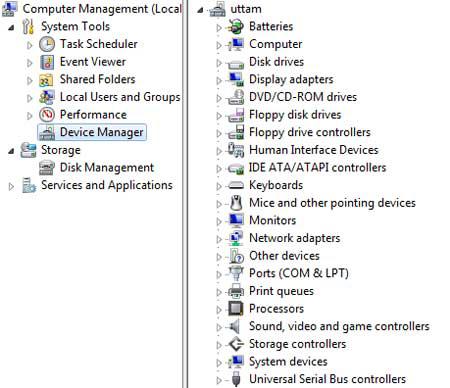
4. Step Next, in the right pane, uncollapse IDE ATA/ATAPI controllers by clicking on it’s collapse/uncollapse icon.
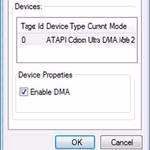
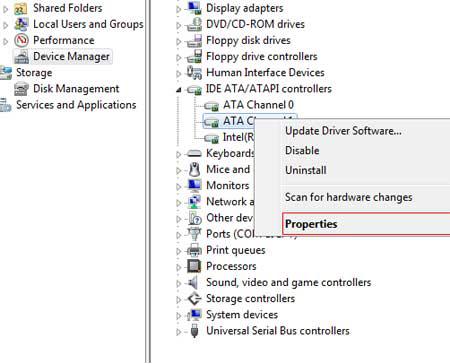
5. Step Right click on the label where Channel is part of the name. Usually you have to right-click on the Channel 1 and select Properties
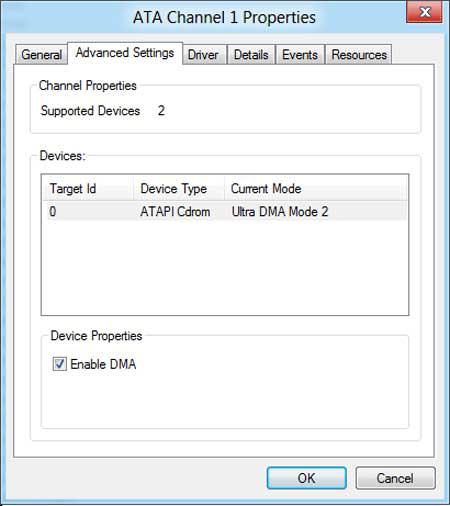
6. Step Next, click on the Advanced Settings and then check / click Enable DMA to enable it. If it is already enabled then you don’t have to enable it again. That are the complete steps to enable DMA in Windows 8.
Conclusion
Direct Memory Access (DMA) increase then device transfer rates in your computer. It is always wise to enable DMA for better device transfer rate..