Here a step by step guide on how to cut a video using Windows Movie Maker. This is a very useful program for editing home and professional videos that later can be able to uploaded to the likes of YouTube, Facebook and other social network sites.
1- How To Install Windows Movie Maker

Windows Movie Maker is a free program from Microsoft. If you have not got it installed already this guide will quickly run through the installation process also for you.
Depending on your setup you may or may not have Windows Movie Maker installed. If you don’t just quickly head to the download location linked below.
http://windows.microsoft.com/en-ie/windows-live/movie-maker#t1=overview

You should see this screen and just download the install package.
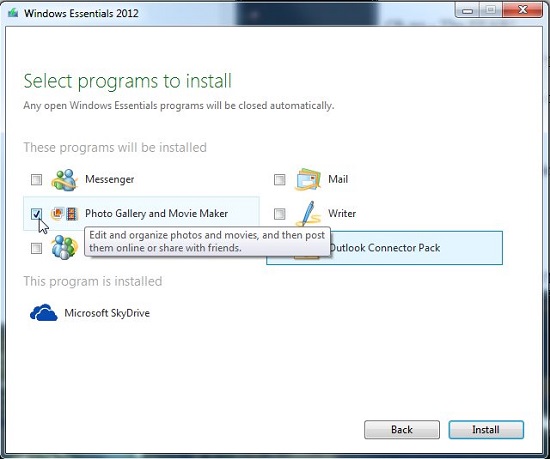
If you do not want to install any other packages just select “Photo Gallery and Movie Maker” as in the image below.
How to Insert A Video In Windows Movie Maker
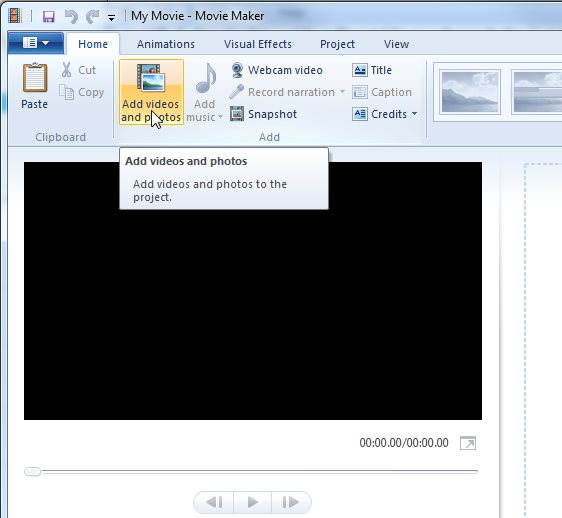
The first thing that we need to learn how to do is to insert a video. There are two different ways – one is by clicking the option “Add videos and photos” that we can see on the main toolbar, and the other one is by clicking the “Add video” button on the main screen of the program.
Then choose a video from the file browser window and click “Open”.
How To Process Video In Windows Movie Maker
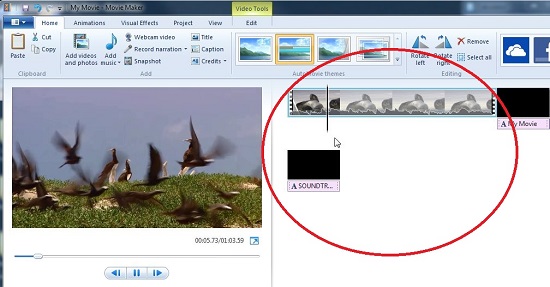
Then we need to wait while the program process the video. When it finishes we’ll see many small pictures corresponding to images from the video, and on the right of the screen we’ll find the audio of the video as seeing on the Windows Media Player. Select all the images and drags them to the timeline below.
3. If you want it so your video begins at a set point during the original video then play the video and pause it in the precise second where you want that the to start it.
Go to the “Clip” tab and click “Set Start Point”.
If you want that the video finishes before the original video finishes then pause the video in the precise second where you want that the new video finishes and go to the “Clip” tab and click “Set End Point”.
Save and Other Features Of Windows Movie Maker
To complete the task simply go to the File Menu and click “Save Movie”. And that’s it! You we’ll have your own edited video. Remember that in the Windows Movie Maker program we have many others editing functions: we can add effects, transitions, movie titles and credits to our videos, create a slideshare, change the audio or create a new audio file, and even upload a video from this program directly to any website. In future step by step guides we will cover some of these features.

