
With the help of Virtual PC you can install Ubuntu in Windows 7

Installing Ubuntu in Windows 7
Ubuntu is the popular Open Source Free Operating System based on Linux with successfull releases since 2004. Its latest stable version with Long Term Support (LTS) is 10.04. To install Ubuntu in Windows 7 you can use the Microsoft Virtual PC 2007, which helps you in running a (guest) operating system on (host OS) Windows 7.
Step by step procedure
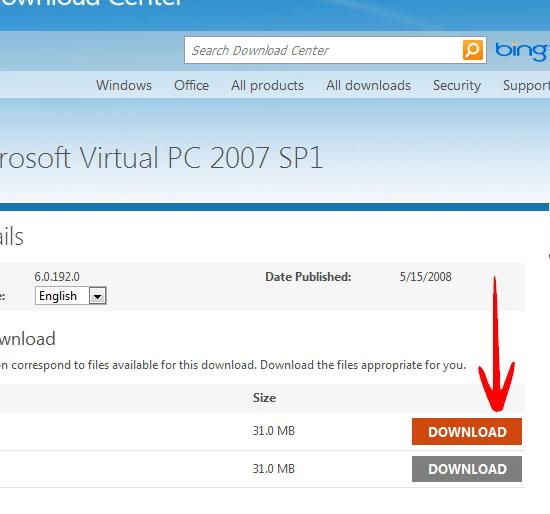
1. Step Download the Microsoft Virtual Pc 2007 from Microsoft.com or filehippo.com
Installing Virtual PC is simple. You will also need the .iso or bootable CD/DVD of Ubuntu 10.04. You can download the .iso free from www.ubuntu.com.
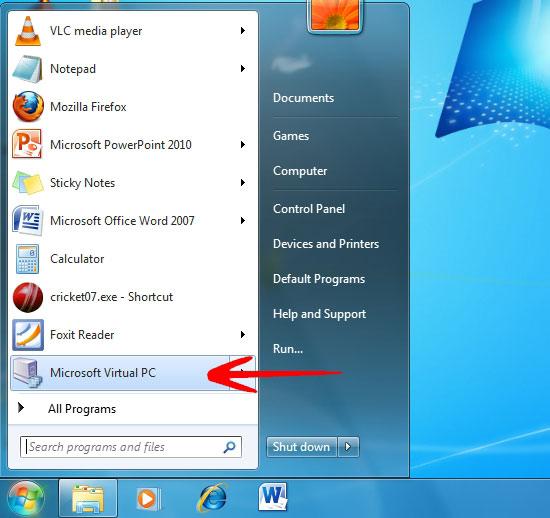
2. Step When the Installation and Downloading of Ubuntu is complete, Launch Microsoft Virtual PC 2007.
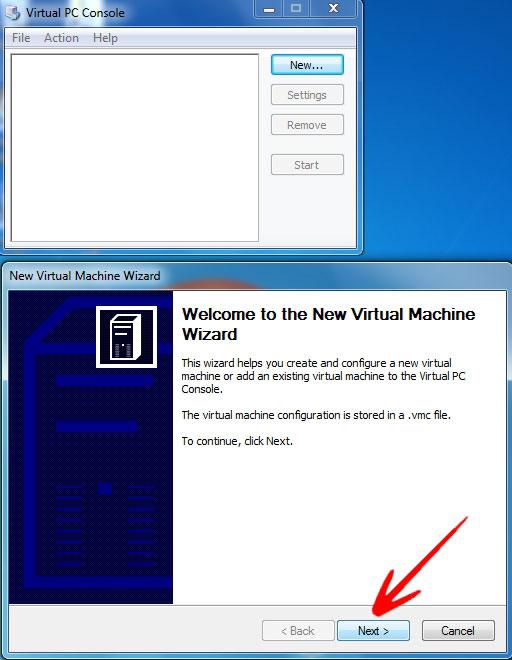
3. Step The Virtual PC Console and New Virtual PC wizard will popup. Continue with the New Virtual PC wizard and click next.
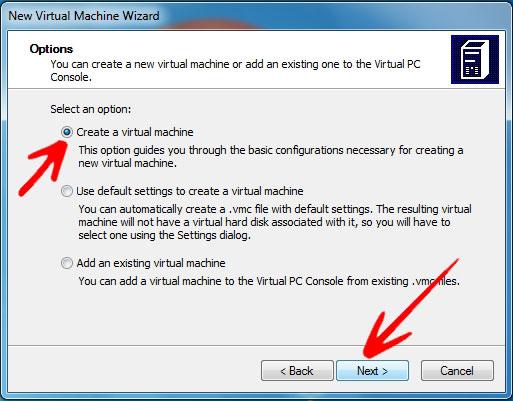
4. Step Since you are creating a new virtual machine, select the option Create a virtual machine and click next.
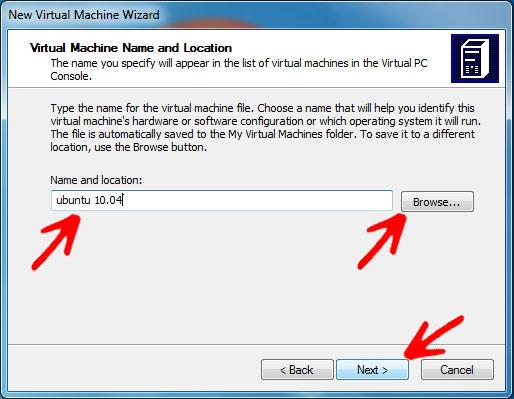
5. Step Enter the Name and select the location of the where the virtual machine files will be stored. The default location is Document/My Virtual Machines/. I entered ubuntu 10.04, Click Next to Continue.
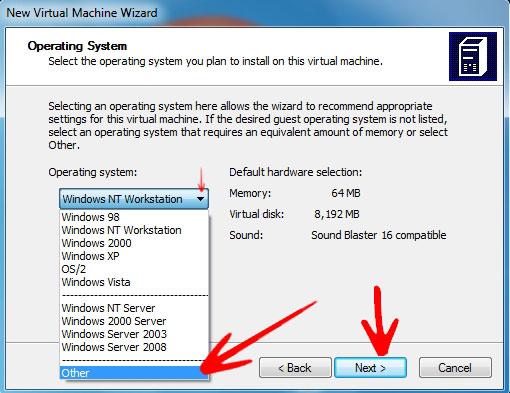
6. Step Next is the Selection of the Operating System. Select Others from the Drop Down List and Click next.
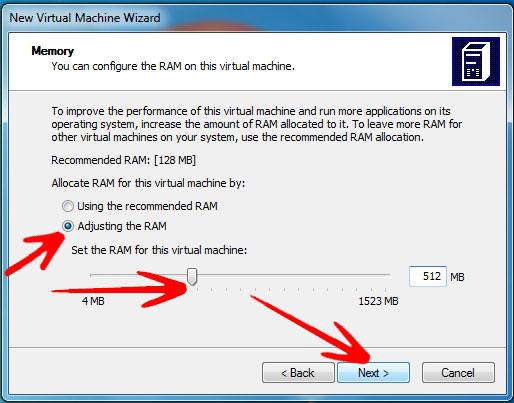
7. Step Now it will ask you to allocate RAM for the Virtual Machine. Ubuntu works fine with 384 – 512 MB RAM. I adjusted the RAM to 512MB, click next.
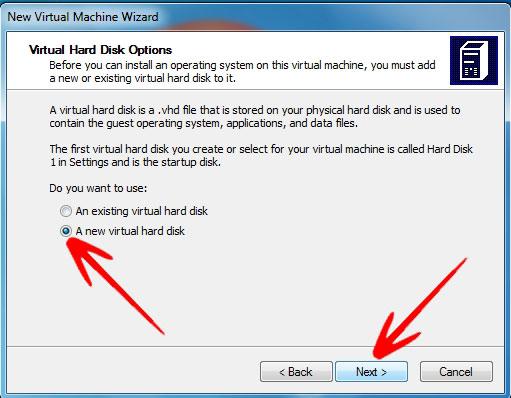
8. Step Next is the Virtual Hard Disk. Virtual Hard Disk is a .vhd file that will reside on your windows partitions and will contain the operating system files,applications and data files. Choose A new virtual hard disk and click next.
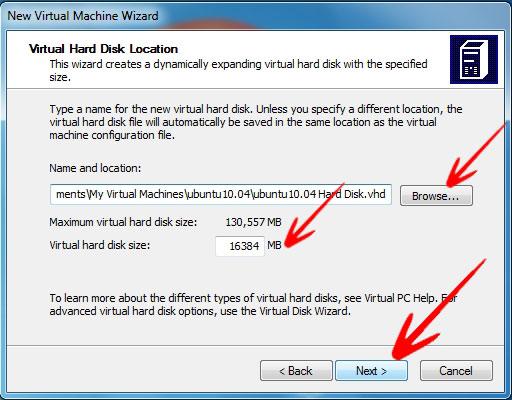
9. Step Now you have to select the location for the Virtual Hard Disk (.vhd) and allocate Virtual Hard Disk Size. The Default location is Document/My Virtual Machines/. Click next when done.
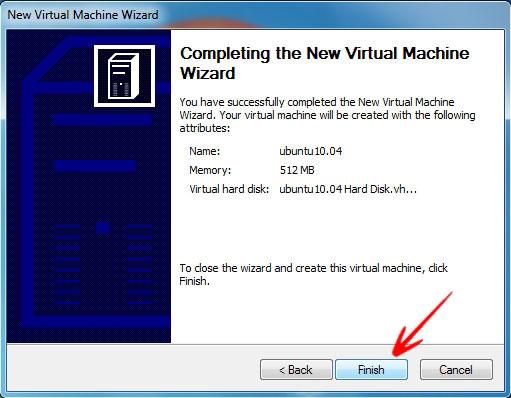
10. Step Click Finish to Complete the New Virtual Machine Wizard.
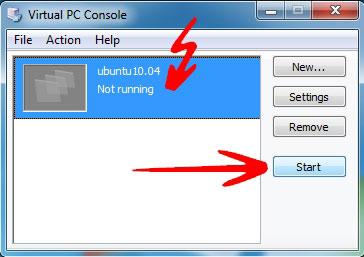
11. Now in the Virtual PC Console your Virtual Machine will appear along with its status. Here it is Ubuntu10.10 Not Running. Click Start to run the virtual machine.
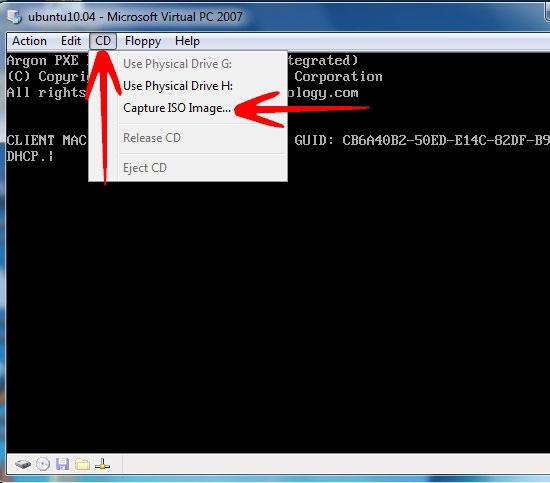
12. A Virtual Machine window will appear and will start the boot process of the Virtual Machine. Click on CD in Menu bar and select Capture ISO Image.
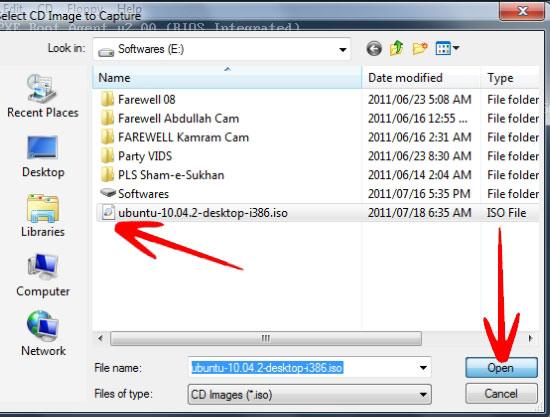
13. Select the ubuntu10.04 .iso image file and click open.
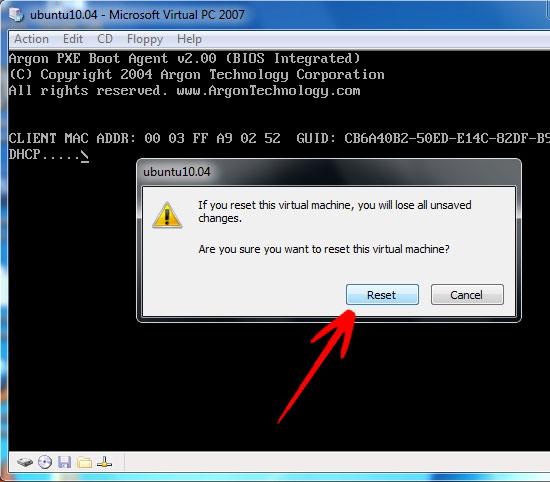
14. On the Menu bar click Action and then reset, to restart the Virtual Machine and boot from the ubuntu 10.04 iso image.

15. A warning dialog box will appear click reset to continue with the restart of Virtual Machine.
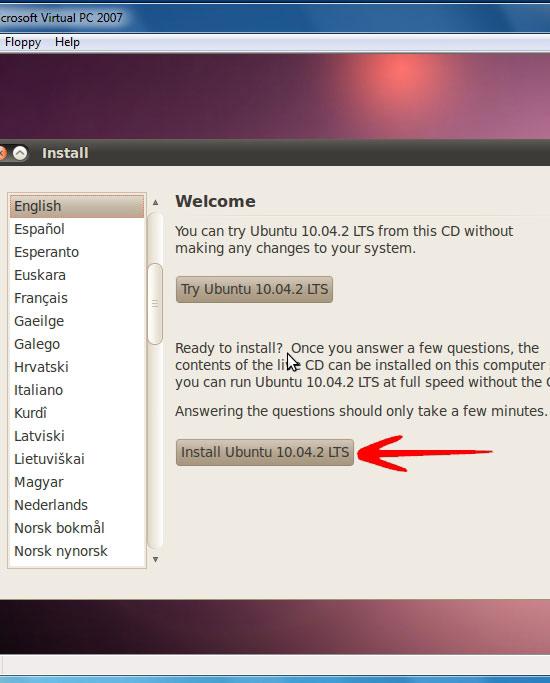
16. After the Restart, the machine will boot into Ubuntu and the following screen will appear. Click on Install Ubuntu 10.04.2 LTS.
17. The installation process will start with setting up the clock, click skip if you want to set clock manually.

18. Select your Region and Time Zone. Click Forward to continue.

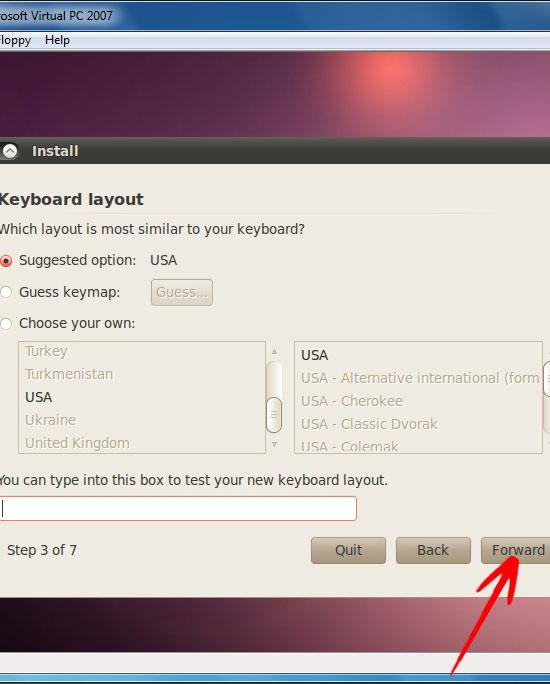
19. Select the Keyboard Layout and click forward.
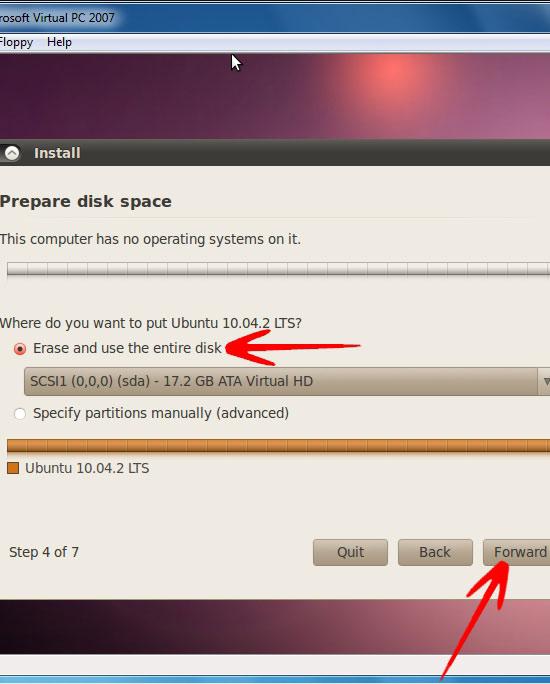
20. It will now ask you where to install ubuntu. Select the already selected option. This is the Virtual Hard Disk location you selected during the Virtual Machine Wizard. Click Forward.
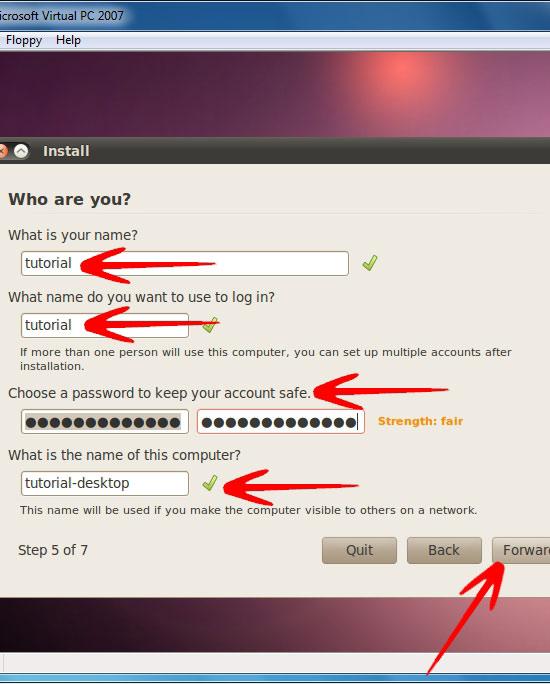
21. Enter your name and password for the user account. Click forward when done.
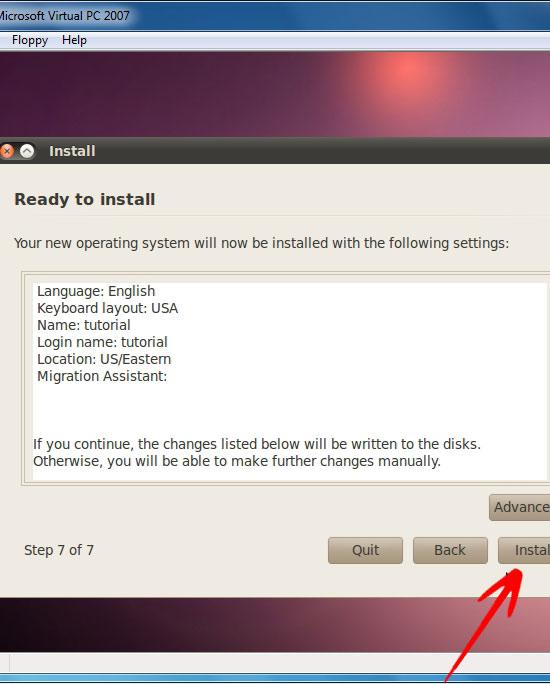
22. Next it will display the summary of your installation selection of Ubuntu. Click Install to perform the installation.
23. The installation process will start.

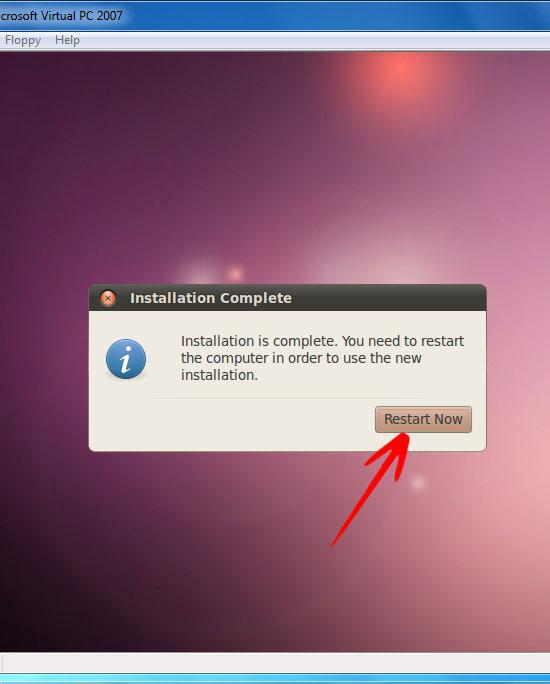
24. Once the installation is complete you need to restart the Virtual Machine. Click Restart Now.
25. The Virtual Machine will boot the fresh installation of Ubuntu 10.04 and the login screen will appear.
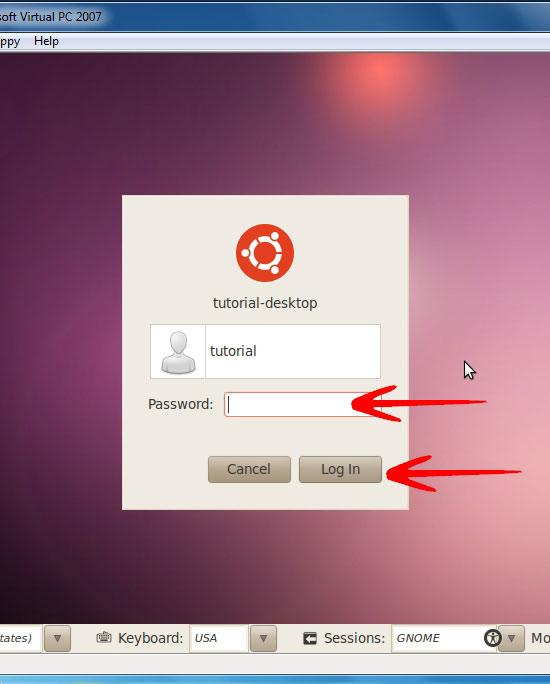
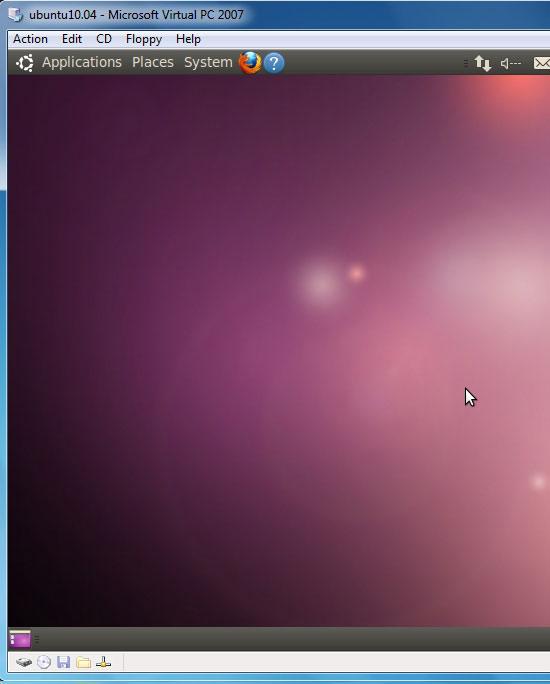
26. Login and the Ubuntu Desktop will welcome you.
Conclusion
Ubuntu is a nice operating system. It can be installed as a single installation or multiboot with windows, but the most harmless way is to install it as a guest operating system through Virutalization software like MS Virtual PC.