Ever wanted to make your Windows 7 wifi connection a hotspot? Follow the steps below

Make Windows 7 a hotspot
You’ve got a wireless network at home and you want to get your iPod touch, iPhone, or other wireless device connected but all you’ve got is a wired network at home, work, school or elsewhere, Windows 7 makes this process trivial.
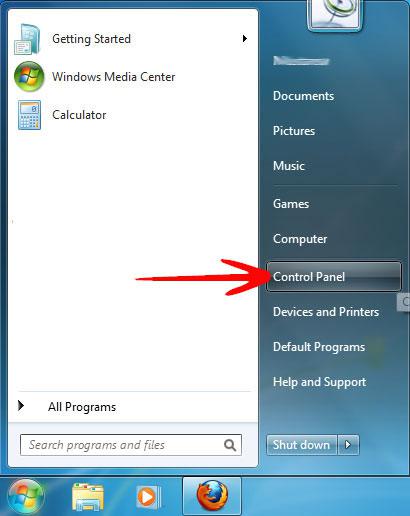
1. Step In the Start Menu Open Control Panel.
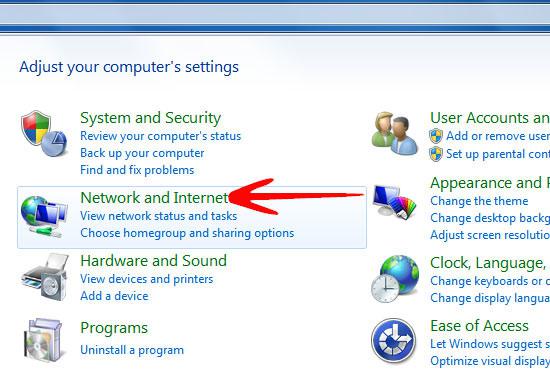
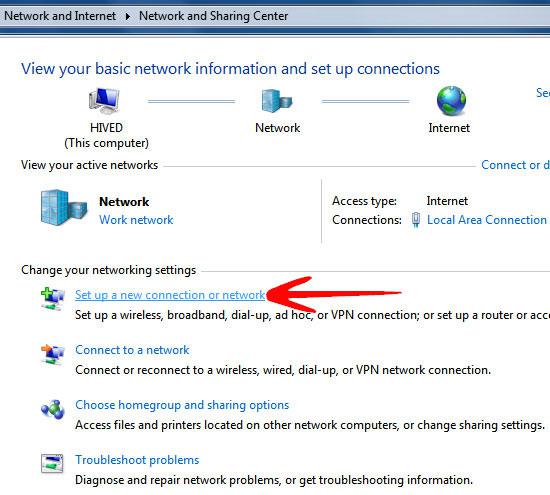
2. Step In the Control Panel Menu, click on Network and Internet.
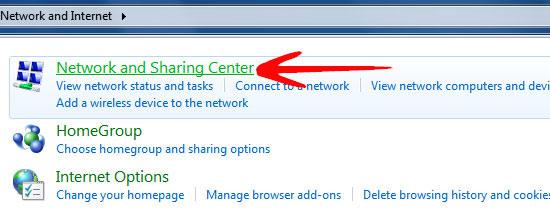
3. Step Open the Network and Sharing Center.
4. Step Click on Setup a new connection or network in the Network And Sharing Center window.
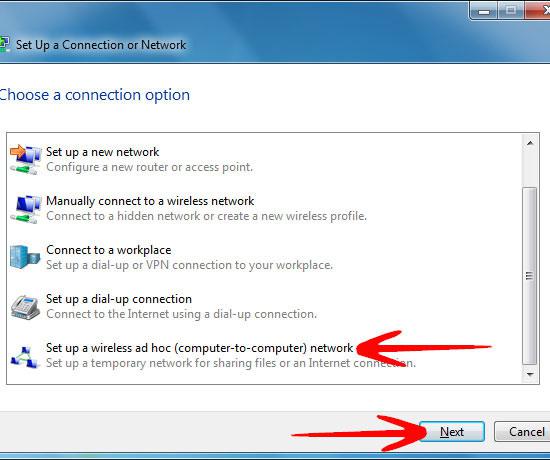
5. Step In the “Setup a Connection or Network” window, under the “Choose a Connection” option, select Set up a wireless ad hoc (computer-to-computer) network, and click Next.
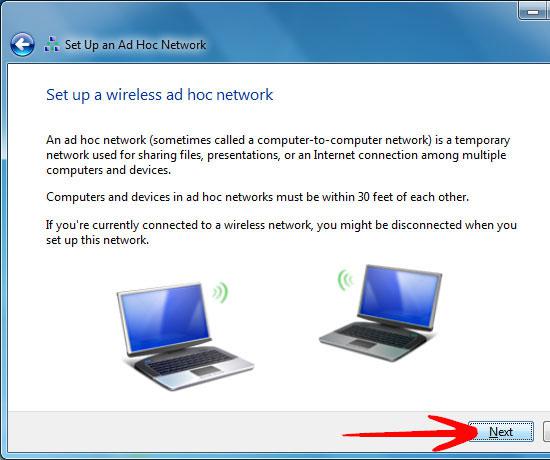
6. Step The Next window displays some instructions for setting up a wireless ad hoc network, Click “Next”.
7. Step It will now ask you to enter the network name and security keys. Click “Next” when done.
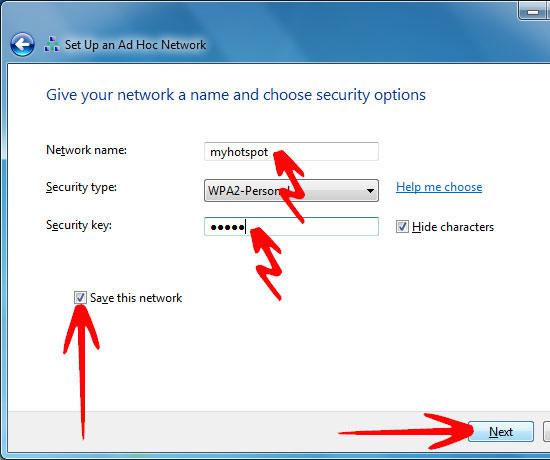
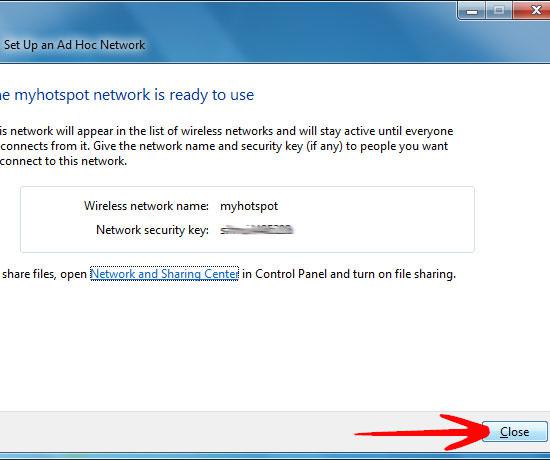
8. Step It will display the “Network Name” and “Key” of the newly formed wireless network.
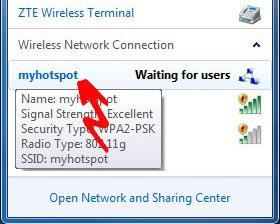
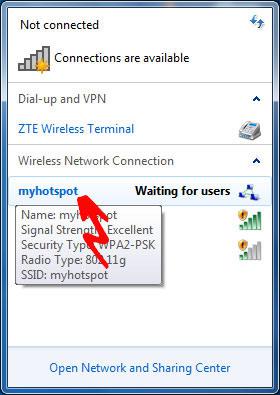
9. Step The newly formed Wireless connection now appears under the “Wireless Network Connection” and is ready for users to connect. In order to enable the users to use it as a hotspot, you need to share your Internet Connection with them.
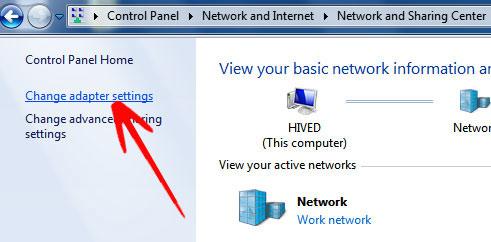
10. Step To share your internet connection, go to Control Panel -> Network and Internet -> Network and Sharing Center and click on “Change Adapter Settings”.
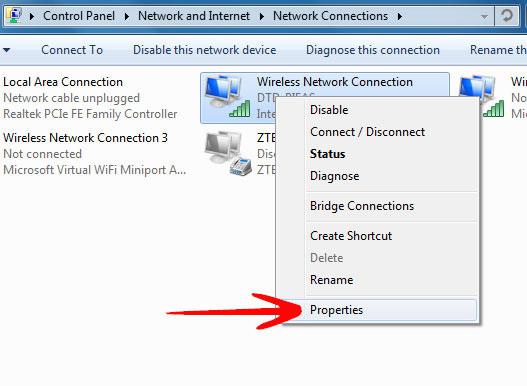
11. Now right click on the connection that enables you internet access and select “Properties”.
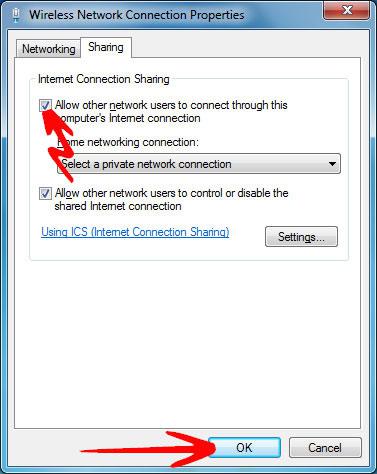
12. In the “Connection Properties” window, open the “Sharing” tab and check the Allow other network users to connect through this computer’s internet connection. Click Ok when done.
At this point, you should be able to connect any wireless device to your new ad hoc network and access the internet or even share files directly with your laptop.