In this Photoshop tutorial, we are creating a color changing animation (with sepia) in Photoshop.

Steps to make a gif animation in photoshop
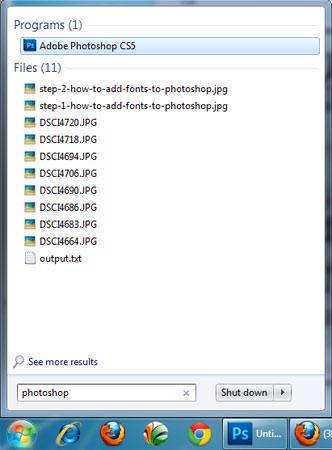
1. Step Open Photoshop program. Click on Start and type ‘photoshop’ in Search programs and files and press Enter. Alternatively, you can also open the Photoshop by clicking Start >> All Programs >> Adobe Photoshop
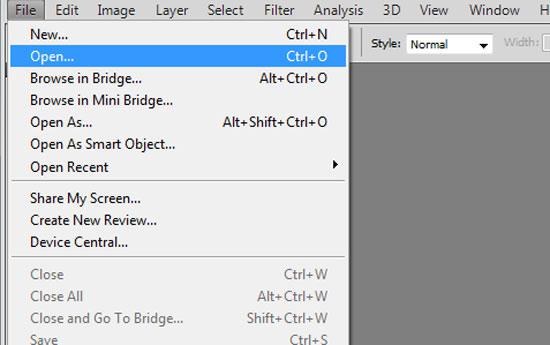
2. Step Open the image you want to make a gif animation. To open image, click on File >> Open
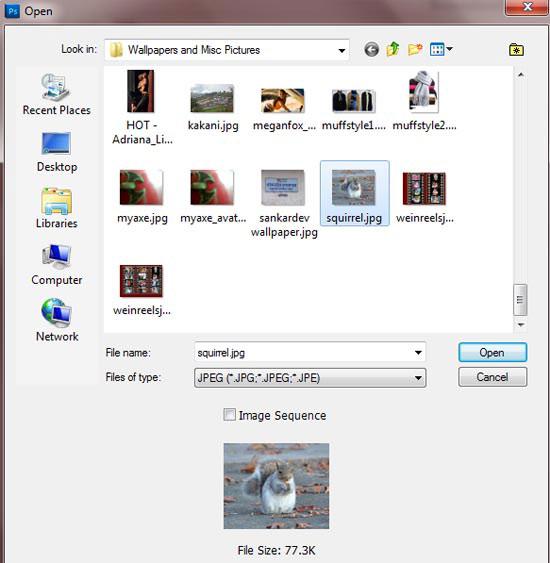
3. Step In the opened “open dialog box” locate and select the image you want to open. Then click Open
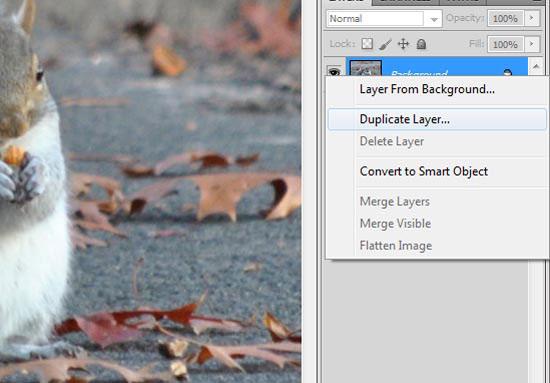
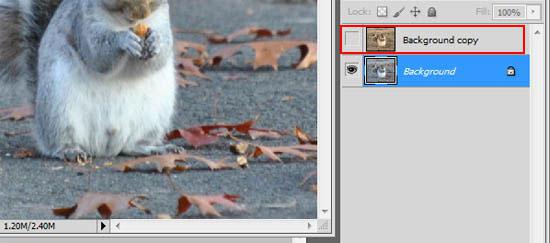
4. Step In the Layer Palette, right click the layer and select ‘Duplicate Layer..’. If your layer palette is hidden then click Window >> Layers (Shortcut – F7)
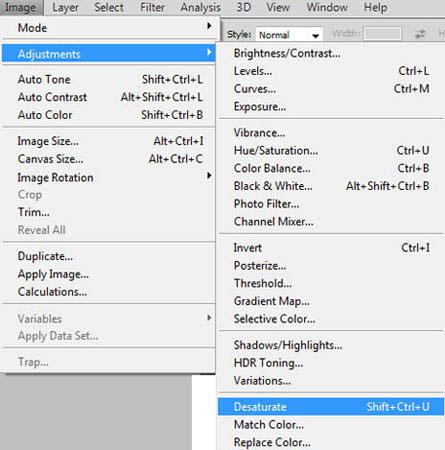
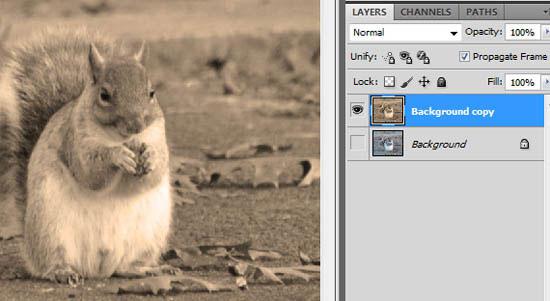
5. Step Select the duplicated layer by clicking on it in Layer Palette. Make sure the opened image is color. Now we have to desaturate it or you can also make it black and white. To desaturate, on the menu bar, click on the Image >> Adjustments >> Desaturate (Shortcut – Shift + Ctrl + u)
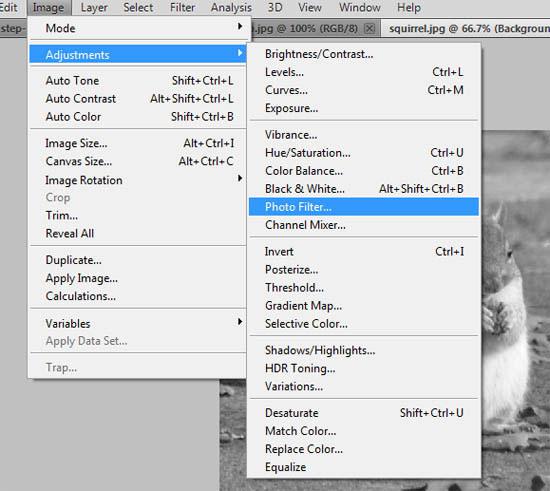
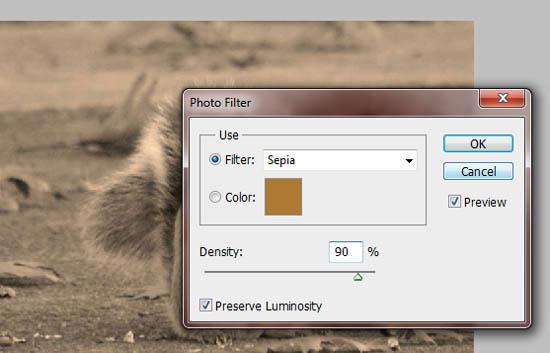
6. Step After your image is desaturated, click on the Image >> Adjustments >> Photo Filter..
7. Step In the opened Photo Filter dialog box, choose ‘Sepia’ in the ‘Filter’ section.
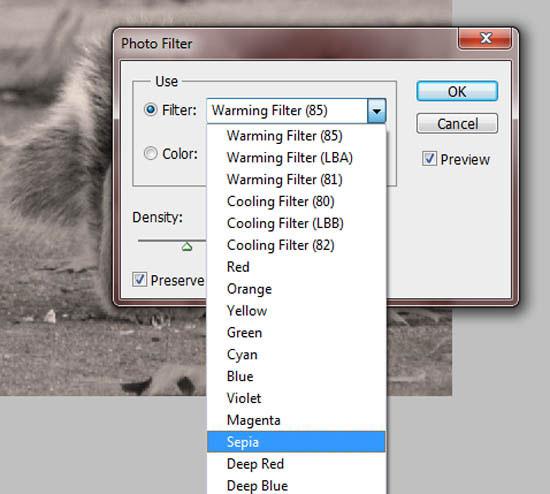
8. Step Increase the Density upto 90% and make sure Preserve Luminosity is checked or clicked otherwise your image might look bit darker. Finally click OK
9. Step Click on the Window >> Animation
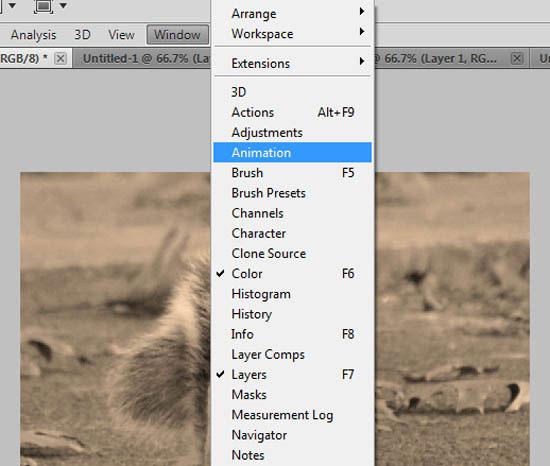
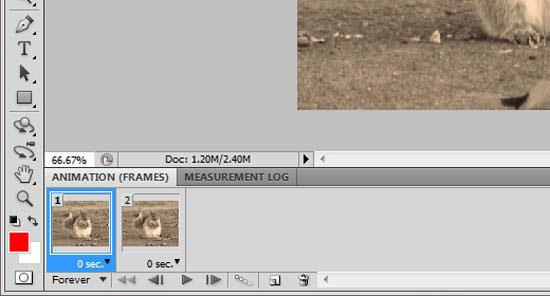
10. Step An Animation panel opens at the bottom.
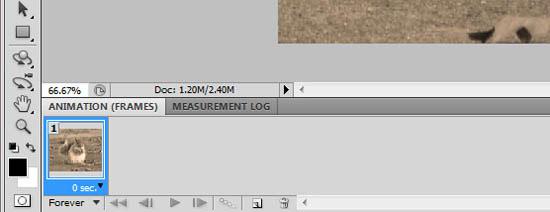
11. Initially, you have noticed one frame in the animation panel, Now duplicate the frame by clicking ‘Duplicate selected frames’ located at the bottom of the animation panel.
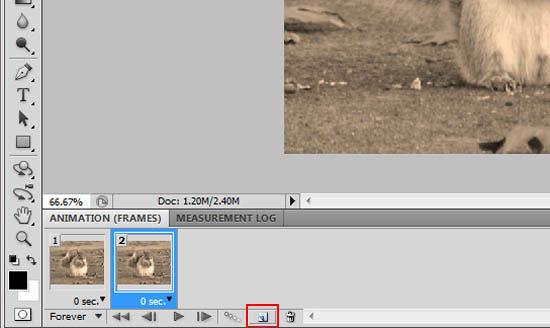
12. Select the Frame 1 by clicking on it.
13. In the layer palette, click on the visibility icon (eye icon) of duplicated layer to hide it. See in this screenshot.
14. Again in the animation panel, Select the Frame 2 by clicking on it. .
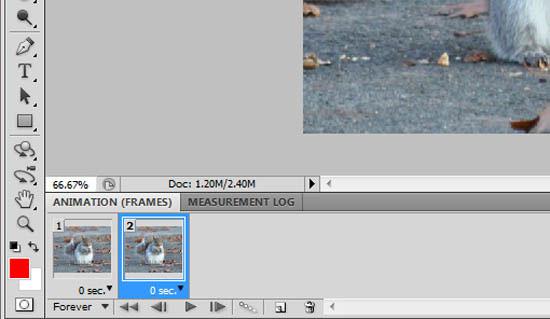
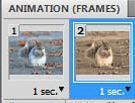
15. Lastly in the layer palette, again click on the visibility icon (eye icon) of duplicated layer to show it (When eye icon is shown, it means layer is revealed and when eye icon is hidden, it means layer is hidden). This time, hide the original layer (one below duplicated layer) by clicking on its visibility icon of the layer.
16. Finally you should see the differences in frame 1 and frame 2 in the animation panel. See the screenshot.
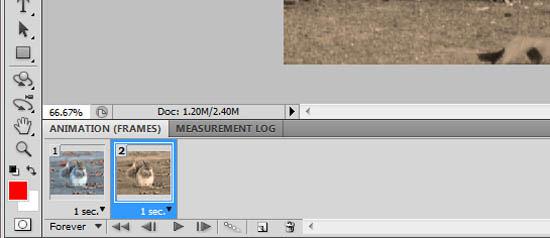
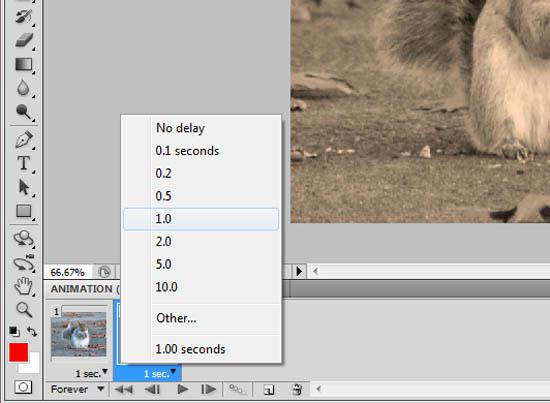
17. Change the frame delay option by clicking on the seconds drop down. Finally, click Play animation button to test the gif animation.
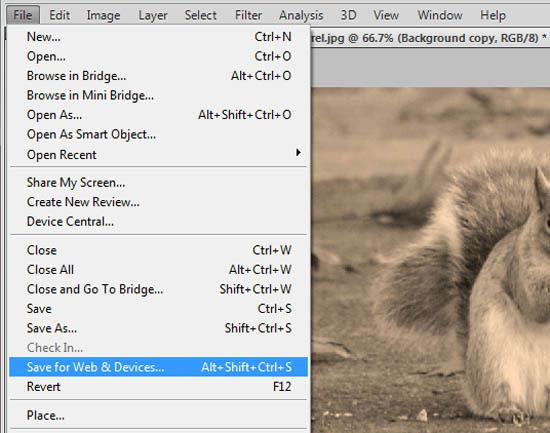
18. To save/export gif animation, click File >> Save for Web & Devices..
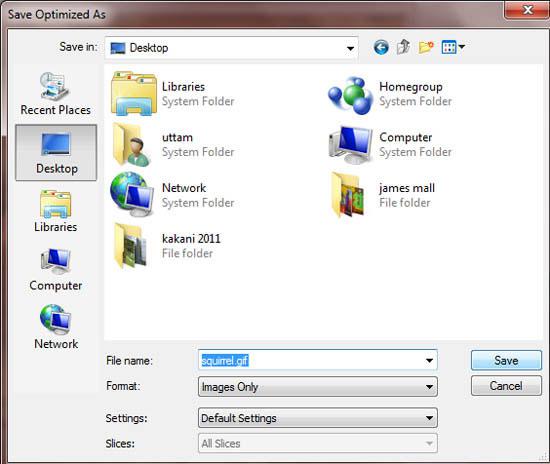
19. Select gif from the drop down and click Save button at the bottom.
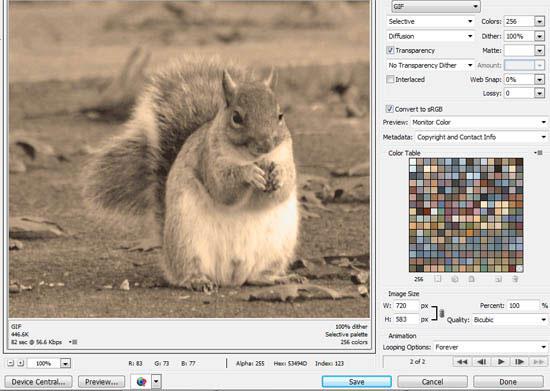
20. Finally give your desired file name and click Save. That are the complete steps to make a gif animation in Photoshop.
Videos
Conclusion
Adding an attractive gif animation to your website or any other presentation looks instead of adding pictures / images only.