Today we are going to measure some important computer performance statistics starting with your processor idle time.
1. Step Click on Start and enter perfmon into your search bar and hit enter

2. Step Confirm the UAC prompt with yes
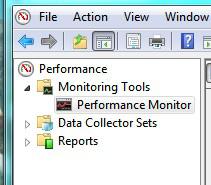
3. Step In the left pane, click on Performance Monitor (you might have to uncollapse Monitoring Tools)
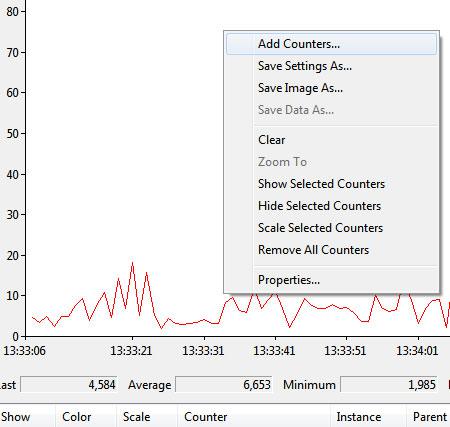
4. Step In the right pane now right-click and select Add Counters:
5. Step You now have to scroll down in the fieldset “available counters” a little until you find Processor. Click on the dropdown button to expand it and get more options.
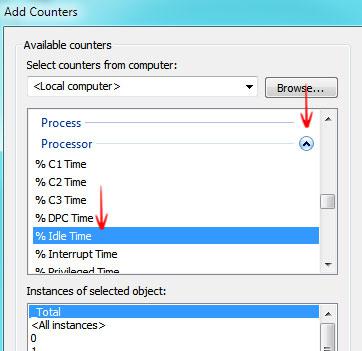
6. Step One of the options is % Idle Time – select it and click on the button Add >> at the bottom
7. Step Click OK
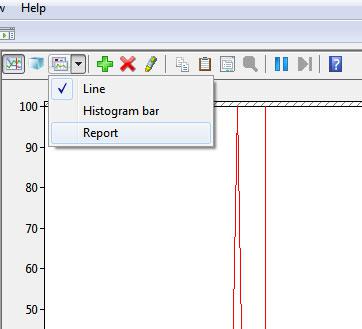
8. Step Click on the little graph icon and select Report from the dropdown
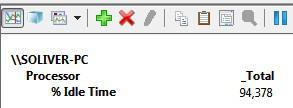
9. Step You can now see your Processor idle time:

10. Step A value close to 100 means your CPU is using less resources. A value close to 70-80 means it is busy. A value below 20 very busy, etc. To put this number into context you should do some further research. We might add another tutorial that explains all the numbers shortly.
With perfmon you can also track data over a certain period of time to get more accurate numbers.