
You may often need to switch between your regional language and English or any other language frequently in Windows 8. Each time you want to change your system language you need to open the Control panel and then navigate to Language Settings. It is a very time consuming job. You can easily create a “Language Settings” Shortcut in Windows 8 to avoid this trouble
Steps to create a “Language Settings” Shortcut in Windows 8
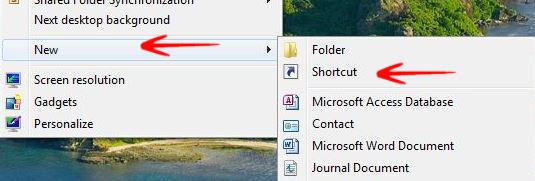
1. Step Right Click in an empty space in the Desktop-> Go to New-> Select Shortcut.
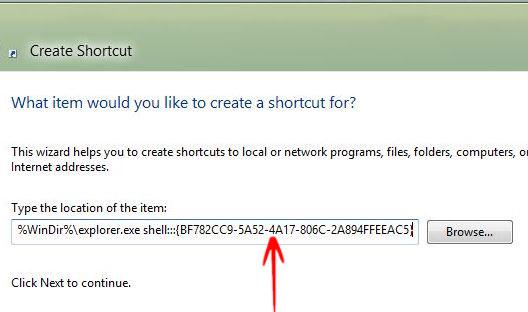
2. Step The Create Shortcut dialogue box opens. Write the following command
%WinDir%\explorer.exe shell:::{BF782CC9-5A52-4A17-806C-2A894FFEEAC5}
Select Next.
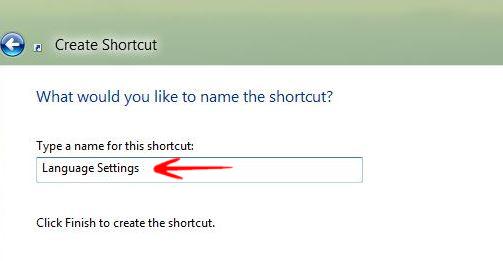
3. Step Now you have to Name the shortcut. So, in the dialogue box just type the name Language Settings and Click on Finish.
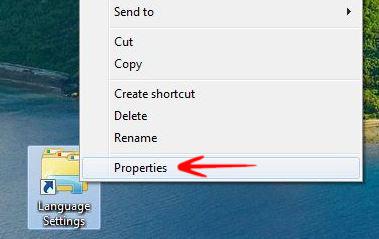
4. Step Now right click on the Language Settings-> Go to Properties.
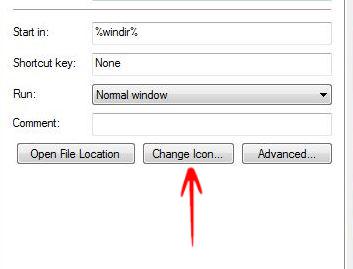
5. Step Select the Shortcut Tab-> Click on the Change Icon option.
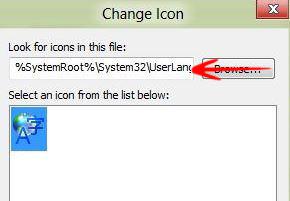
6. Step Now the Change Icon dialogue box opens->In the option Look for icons in this file type the following command
%SystemRoot%\System32\UserLanguagesCpl.dll
Click OK.