

Internet Explorer 10 comes default with Windows 8. In this tutorial, we are showing you how to remove Internet Explorer 10 from Windows 8.
Why We Suggest NOT To Remove It
We strongly suggest to not remove the Internet Explorer 10 – not only can it cause problems, at times you might also run into some situations when you will need it to configure internal Windows settings. Some things like VPN’s, Proxies, Feeds, etc. can be linked to internal processes and require you to have a copy of IE10. Also, there is really no disadvantage – IE10 is a good browser and we strongly recommend to install at least 3 browsers on your OS and use all three of them for different purposes to avoid possible hi-jacks that affect only one browser.
Uninstall Internet Explorer 10 Properly
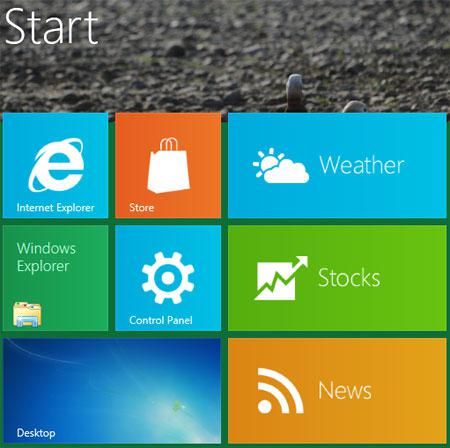
1. Step Open the Windows 8 Control Panel by clicking on the Control Panel tile on the Start Screen.
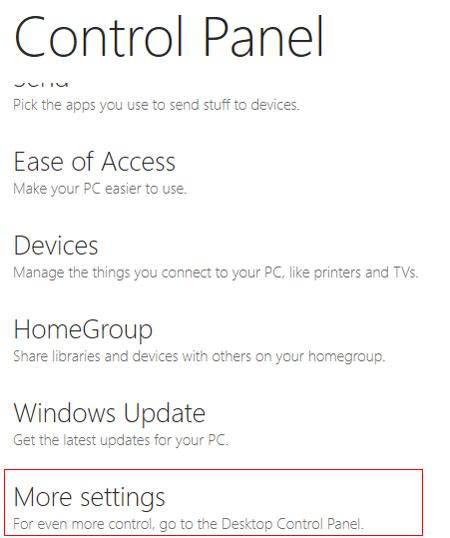
2. Step A control panel Window opens. Scroll down and click on the More Settings.
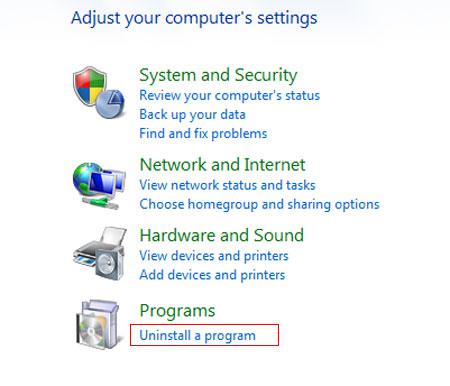
3. Step Click on the Uninstall a program link. Alternatively, you can open this directly by typing appwiz.cpl in the Run dialog box (Press Windows + R to open Run dialog box).
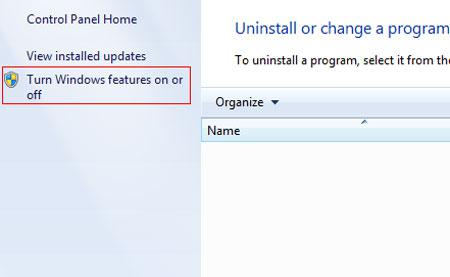
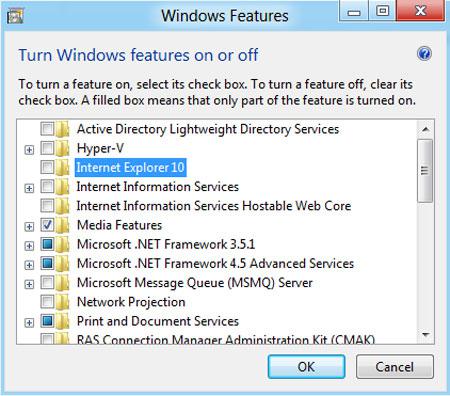
4. Step Next, on the left pane, click on the ‘Turn Windows features on or off’.
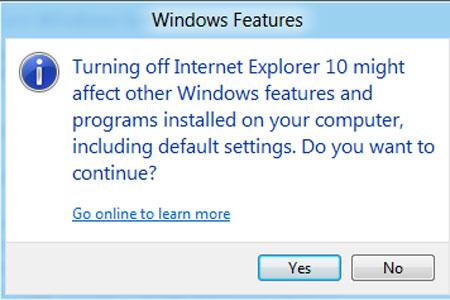
5. Step Next, click / tick to uncheck Internet Explorer 10.

6. Step Next, click on the Yes button.
7. Step Next, click on the OK.
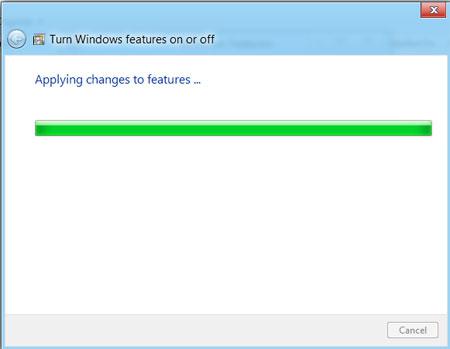
8. Step Next, removing of Internet Explorer 10 process starts.
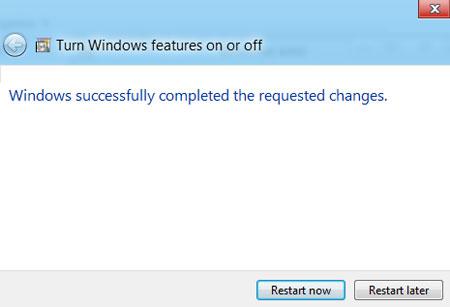
9. Step Lastly, you will be asked to restart your computer. Click Restart Now to completely remove Internet Explorer 10 from your computer.
Conclusion
Although the new Internet Explorer 10 is nice, fast and bug free compared to earlier version of IE but still if you want to remove it then follow the steps provided in this tutorial.
There are other ways to uninstall IE10 but this one is pretty fool-proof.