 In this tutorial, we are showing you how to remove the USB write protection from a USB drive in Windows 8 but it also works for 7.
A related problem: F: and H: is not accessible – access is denied might give you more clues as to what else you can do if the steps below do not work for you
Remove write protection from USB Drive
1. Step If you get the error message then first of all you should check the cable or the slot where you have plugged on your USB drive. Sometimes the error might get fixed when you connect the drive properly. If your error is still not fixed then follow the step – 2.

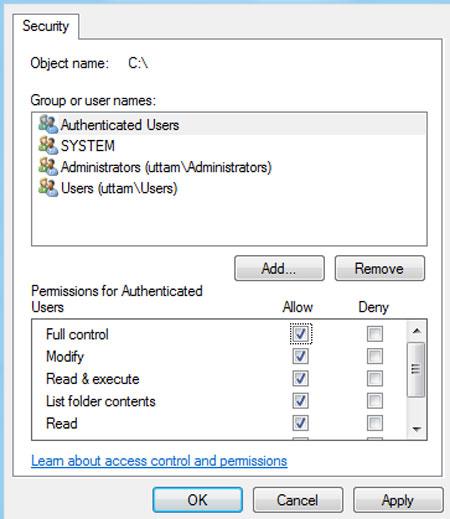
2. Step From your start screen, Open the Windows Explorer tile (Press Windows key + E) and then right-click on your USB drive and click on Properties. Click on the Security tab. Select your username and check if you have Write permissions. If you do not have, then tick/check Allow column (Full Control) and then click on the Apply and then OK.
3. Step If your error is still not resolved then you may have to look for a physical switch on the drive that needs to be unlock. In some USB drive you may find the switch that needs to be unlicked to remove the write protection from your drive.
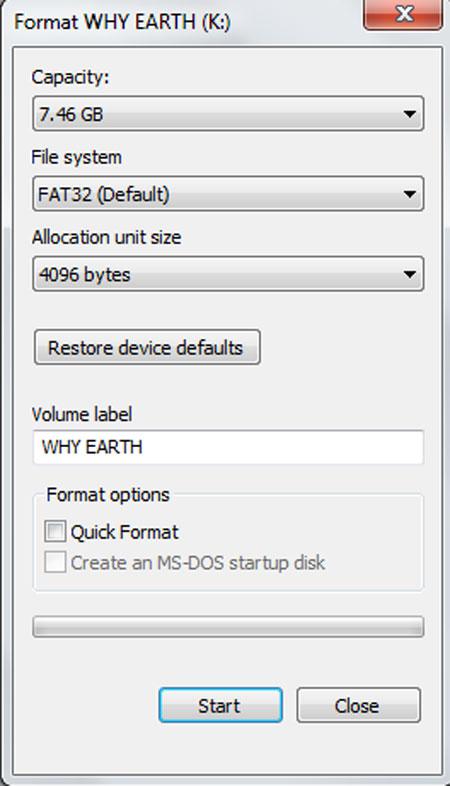
4. Step If you still receive the error then you might have to format the USB drive. Sometimes formatting the USB drive might resolve the issue. Copy the important data to your another drive and format your USB drive. Sometimes, after formatting, write protection of the USB drive might be resolved.
Conclusion
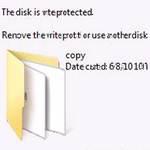
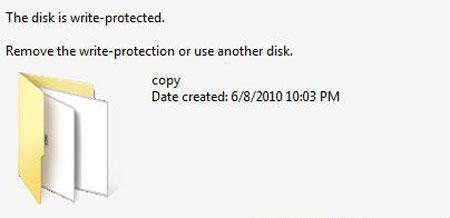
Sometimes you might encountered a problem with your USB drive. After connecting the USB drive, you might get the error like ‘The disk is write-protected. Remove the write-protection or use another drive’. With this tutorial you can fix this error.

