
This article will help you to set up an internet connection using Windows 7. It has made networking simpler, enhancing the Plug and Play feature
In case of a wireless networks, Windows 7 offers a very easy connectivity. You can find the option on the lower right hand corner of the taskbar where the network icon will display the connection status if any wireless network is detected.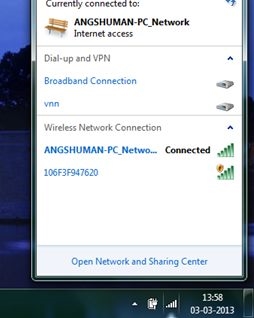
But not all can avail the wireless service and has to stick to a LAN network or broadband using a LAN cable and ETHERNET port. In case of setting up a network using a cable, like that of a broadband connection for example, you can follow a simple procedure and set up the network manually. After you have set up your modem and connected it with you PC or laptop, go to the ‘Start’ menu and open the ‘Control Panel’. The ‘Control Panel’ looks like this.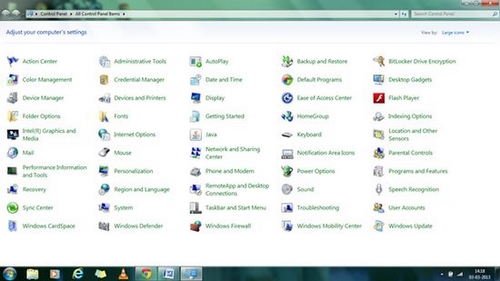
After the Control Panel window opens up, click on the ‘Networking and Sharing Centre’ icon.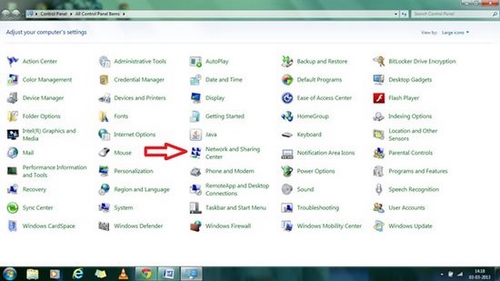
The following window will open.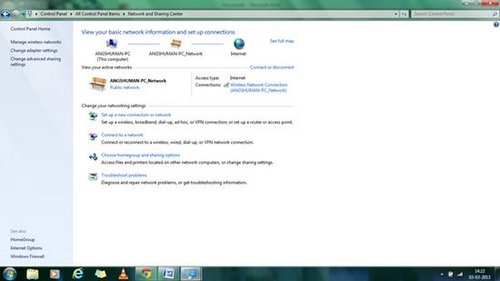
In order to set up a new connection, click on the ‘Set up a new connection or network’ option. The new connection wizard window opens up.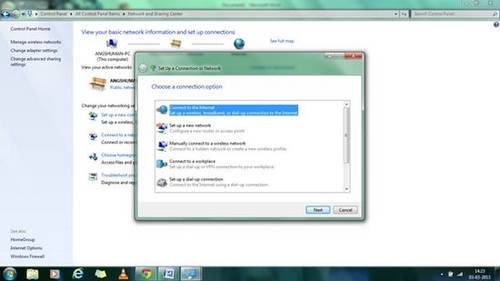
Select the ‘Connect to the Internet’ option and then click next.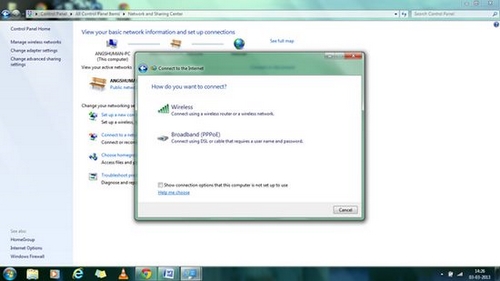
Click on the ‘Broadband (PPPoE)’ option. The following window will open.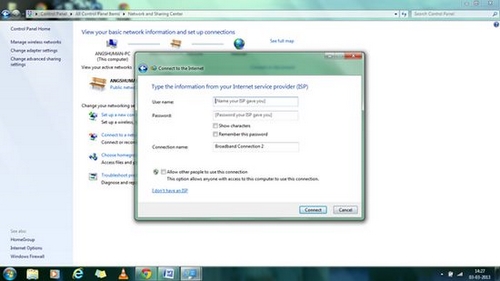
Now all you need to do is to feed in the username and password and click on the connect button. The username and pass word is usually given by the Internet service provider.
After the connection is set up and if you want to connect to your broadband network again, all you need to do is just click on the network icon on the taskbar and select your network and connect to the Internet.