How to setup remote desktop in Windows 7. A tutorial by Vivek N.

Windows remote desktop is a feature in Windows 7 that allows users to work on the computer even from any remote machine. A remote machine can either be located in the local area network or it can be present at geographically distant location and connected to the local area network via VPN. In either case the machine which is to be ‘remotely desktoped’ needs to be configured to accept the remote desktop connection requests and allow users to gain access to the console of the computer. This feature by default is disabled and only administrators enable this. As a computer administrator if you want to enable Remote Desktop feature in Windows 7 computer you are required to follow the below steps:
Logon to Windows 7 computer with the account with administrator privileges.
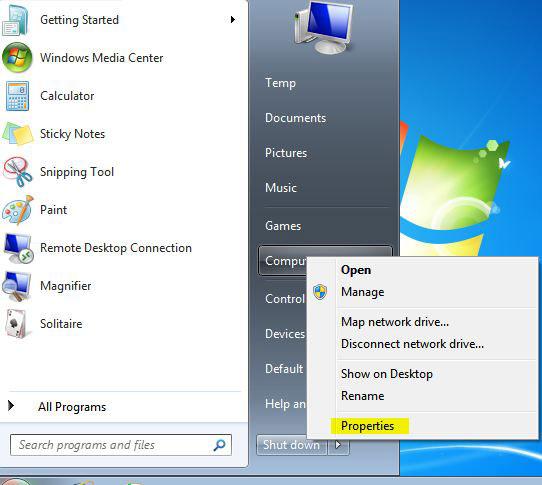
Click on Start button and from the menu right click Computer.
From the available options list click on Properties.
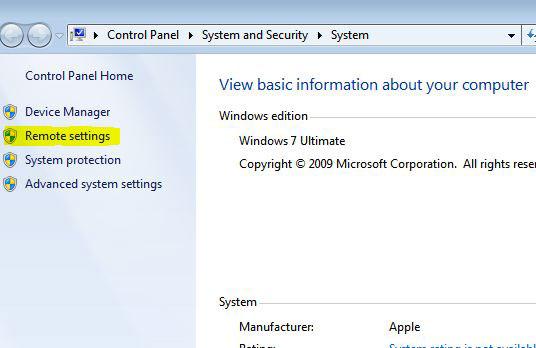
From the opened page in the left pane click on Remote settings link to open System Properties box.
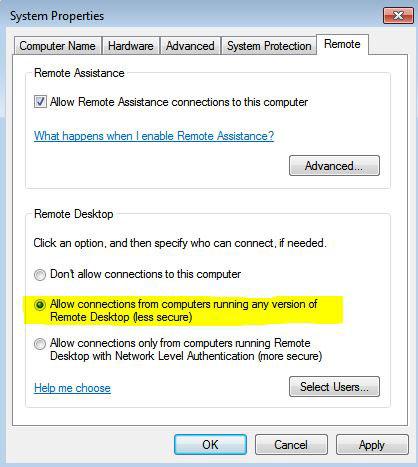
Make sure that you are on Remote tab and under Remote Desktop section choose Allow connection from computers running any version of Remote Desktop (less secure) radio button in case you want to remote desktop this computer from both Windows Vista/7 and Windows XP. Alternatively you can choose Allow connection only from computers running Remote Desktop with Network Level Authentication (more secure) radio button in case you want to Remote Desktop the computer using only Windows Vista or Windows 7 computers.
Note: You can only use Remote Desktop feature to connect to the remote computer if you have an account with administrator privileges on the target computer.

