
If you want to take ownership of some protected files in Windows 8, you will need to know a few things that differ from Windows 7.
In Windows 8 you can only assign ownership manually. In Windows 7 it was possible to select a new owner from a pre-defined list of user accounts running on the PC. In the last Windows 8 build (developer preview) this is a bit more complicated.
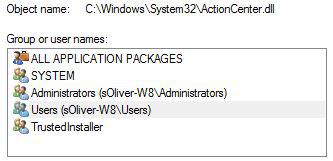
1. Step Open a folder with protected system files
2. Step Right-click on a file and click on Properties
3. Step Go to the tab Security
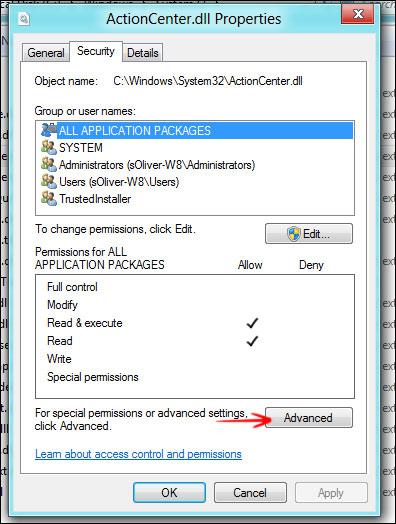
4. Step Click on Permissions to take ownership of the file
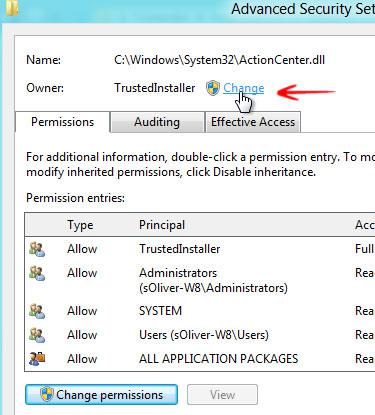
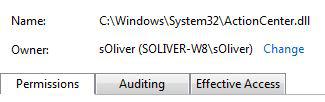
5. Step At the top click on the hyperlink Change owner:
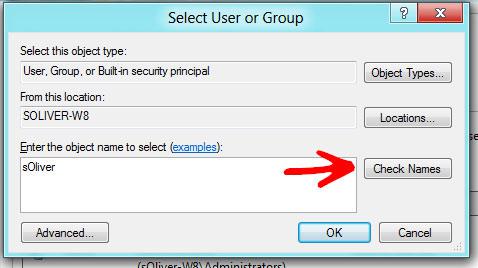
6. Step Now enter the username of your account. In my case “sOliver” and optionally click on Check names to verify that the name is correct
7. Step It should now list YOU as the owner of the file. CLICK ON APPLY
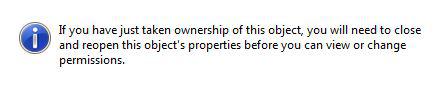
8. Step Obligatory notice
9. Step Select your username from the list (back on the Security tab) and click on Edit. Confirm the UAC prompt
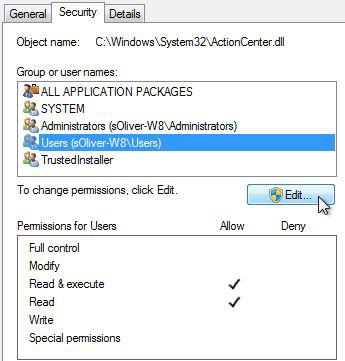
10. StepSelect your username again and check the box Full Control
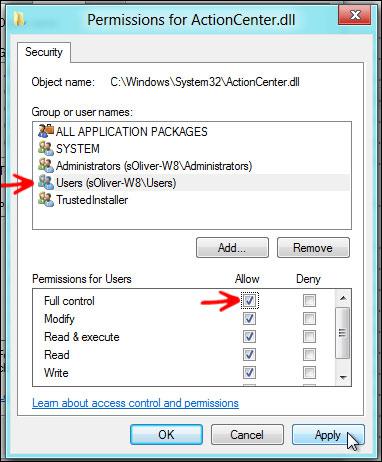
11. Click on Apply
12. Great, you’re now the owner and you have full control over the file. You can rename the file and move it wherever you want.
It’s easy to take ownership of files in Windows 8 and edit the user permissions. However, this can sometimes be a real headache and troublesome. If you’re having problems taking ownership of files let us know what’s bugging you.
In time we will post a useful script to add this whole procedure to the context menu, so you don’t have to do it over and over again.