 Taking screenshots on Windows 8 is very easy, but taking professional screenshots can be challenging if you want to do it quickly
Quick Links:
- Take Screenshots Using Built-in System Tools
- Take Professional Screenshots Using Lightshot
- Take Screenshots in Games
Taking Screenshots Using Built-In Windows 8 Tools
1. Step Windows 8 has a few tools to take screenshots. If you don’t want to bother downloading 3rd-party tools you can use them to take screenshots with a “ok” quality.
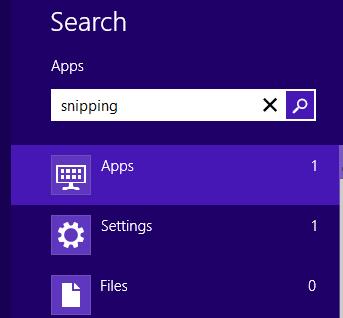
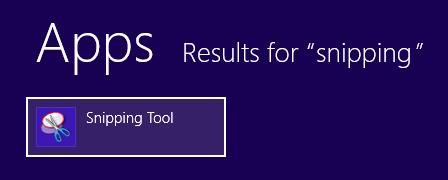
2. Step Open the Modern UI Start Screen with all the tiles, hit CTRL + F and you will see the Charms bar. Enter “snipping” and select Programs
3. Step Now on the left pane righ-click on the Snipping Tools
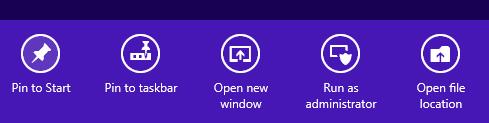
4. Step If you would like to frequently use that program to take screenshots, you should now right-click on it and at the bottom select Pint to Start
5. Step If not, simply left-click the program to open it
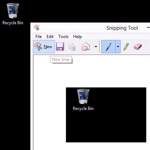
6. Step When you click on the button “New”, drag a rectangle on the area that you want to take a screenshot of. This may be a little strange when you try it first, but it works flawlessly
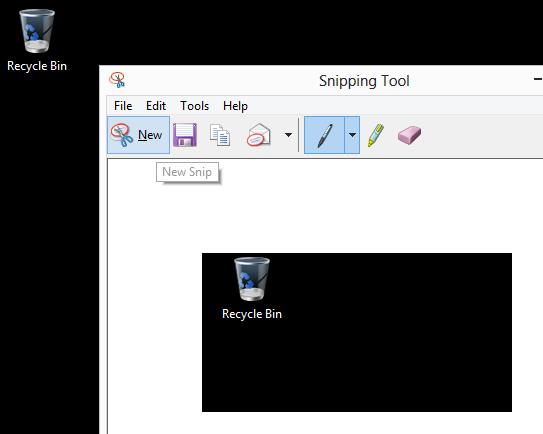
7. Step As you can see it’s quite handy to take screens not of the entire screen but of smaller objects, that’s why this tool is more powerful than many other screenshot tools that only take screens of your entire desktop
Anyway, if you are looking for some more sophisticated tools proceed below
Taking Screenshots Using Professional 3rd-party Tools
1. Step Head over to http://app.prntscr.com/
2. Step Click the green download button and install the tool on Windows 8
3. Step Lightshot is a great tool because you can simply continue to use the PrtScr key on your keyboard to take screenshots. It uses the same system hook. If you (on rare occassions) don’t want to use Lightshot and use the built-in PrtScr key then simply open the tray and close Lightshot
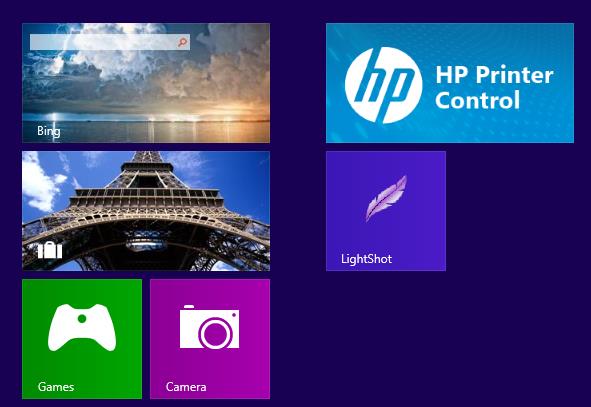
4. Step Alternatively, you can open Lightshot using the Start screen
5. Step When you press the PrtScr key on your keyboard then DRAW a rectangle again (similar to snipping tool above) and you be able to take a screenshot of exactly that area. Handy!
6. Step After drawing the rectangle you will see various buttons at the bottom, you can either copy the screenshot to your clipboard or save it to your hard drive. Additionally, you can drag the corners to increase the area of the screenshot. This works great if you need to work very carefully
Taking Screenshots In Games
We have some great tutorials on this topic. How about you give them a try:

