You want to remove write protection from a disk? Here’s how you do it!
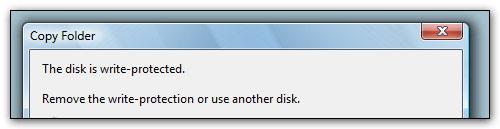
So, I tried to move a file on my external hard drive. I received the message “The disk is write protected – Remove the write-protection or use another disk”. This can sometimes happen (possibly a driver problem). Diskpart is a system tool that can be used to modify the attributes of disks and remove the write-protection. Here’s how you use it.
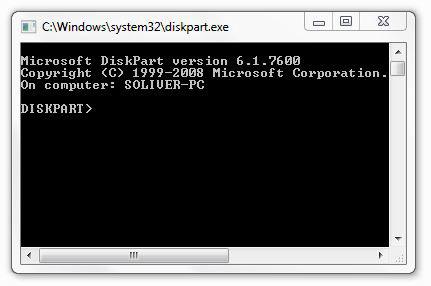
1. Step Open a command prompt and enter
2. Step Enter diskpart
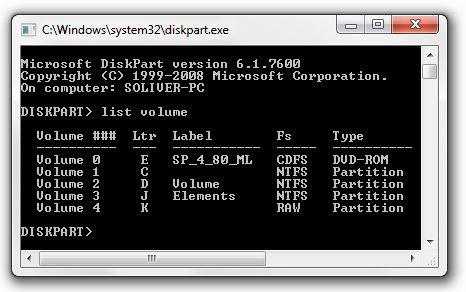
3. Step Enter list volume
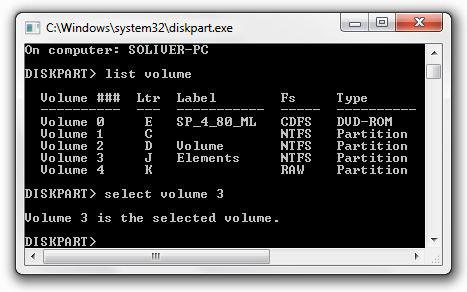
4. Step Enter select volume # where # is the number e.g. 3
5. Step Enter attributes disk clear readonly
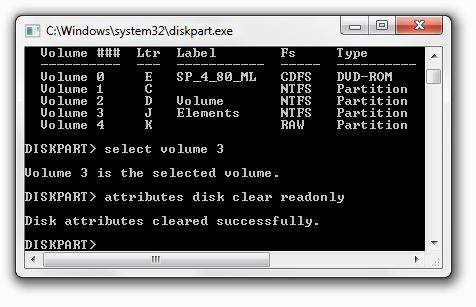
6. Step If the write-protection is still active, you can try to enter attributes volume clear readonly instead.
A possible solution, if you don’t want to always use diskpart to remove the write protection over and over again, is to install AHCI drivers for your drive. Here’s how to enable AHCI in Windows 7


THANK YOU VERY MUCH for alleviating my problem. i have an 8G usb flash disk that is suffering from that so called disk protection thing. this is great. thank you once again
Thanks! It worked on my NTFS formatted WD External Drive :D
Hi,
I tried it but it doesn’t work.
My problem drive is SD memory card of camera.
Any other solution?
Thanks
this method works only for ntfs devices
but if u have a micro sd with adapter(fat or fat32) doesnt work
for this remove the adapter from pc or laptop and check that the button that lock the micro sd card isnt locked
Hey I have done all it said step by step but still it won’t read my DVD-R help please thank you
HEY IT NEVER WORKED ON MY HP FLASH DISK