If you are a laptop user,in an office or you are even trying to keep on top of your own electricity costs – knowing how to use your computers sleep function is a must.
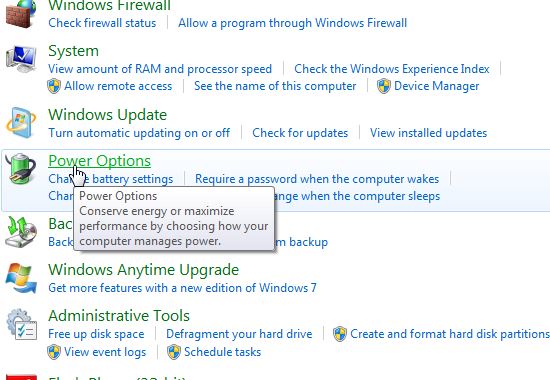
1-Accessing Power Options
Open the “Control Panel”. Select the “System and Security” option – Next is the “Power Options” button.
2-Viewing Your Power Saving Options
You should have at least three options at your disposal – “balanced mode” , “power saving mode” and “high performance mode”. “Balanced Mode” is what is recommended.
In case you want to edit either of the modes, you simply click on “change plan settings”.
3-Adjusting Power Saving Settings
You have two options to play with, one is “Turn off display” which is used in case you have unsaved data, and would like to continue instantly.
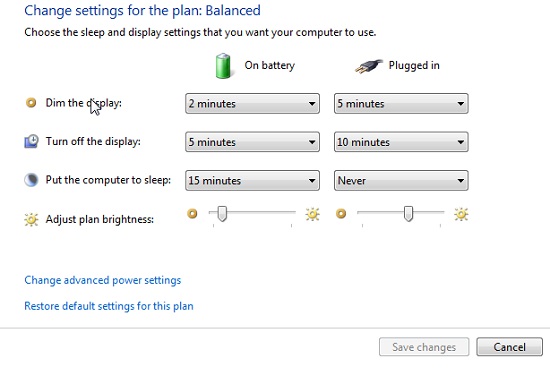
The other is “Put the computer to sleep” where after the time you have specified the computer automatically puts itself in to sleep mode. The PC starts right from where you had left it, so no data is lost. This feature has been added mainly for the Laptop users.
4-Wake Up PC Settings
Password Login is set up by default.
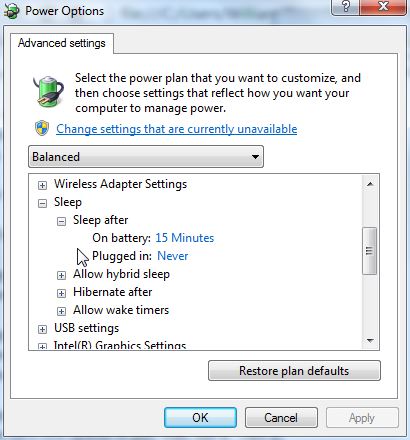
You can change this and other features in the “advanced settings” option in the change plan settings.For example if you wanted to remove the need for a password on wake up – right above the drop down menu, you have the “Change settings that are currently unavailable”. Under “require password on wake up” change it to “off”.
Changing the sleep functions on your computer can help extend the battery life for laptop users. There are other power saving steps that can be taken that we will go through in future guides.

