Are you wondering what the file .msstyles in your recently downloaded Windows 7 theme is or do you want to know how to use custom msstyles themes on Windows 7? Get all the information you need after the break.

.Msstyles Themes Content
The .msstyles file is the most important part of a custom theme, it includes most of the elements of the Windows 7 shell. If you want to make custom Windows 7 themes (as we explained recently) you need to get very familiar with msstyles themes files.
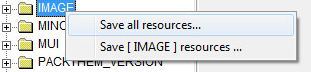
Open ResourceHacker and open the msstyles themes file. Right-click on image and say “Extract all resources”. You can now see what images are stored in the Msstyles file and you can start making Windows 7 themes.
How to use Msstyles themes on Windows 7?
1. Step Download the UXTheme Patcher
2. Step Extract the Universal Theme Patcher
3. Step Run the patcher and patch your files uxtheme.dll, themeui.dll and themeservice.dll (no worries, you can always restore
IMPORTANT: If you run sfc.exe or a system restore you will have to patch your Windows 7 system files again.
Copy Theme Folder (Including .Msstyles) And .Theme File
4. StepCopy your entire custom Windows 7 theme (this includes more files than just a msstyles file) to C:\Windows\Resources\Themes
Normally you need to copy everything, the theme folder and the .theme file to the Themes folder (C:\Windows\Resources\Themes\)

Tip: If you only have a msstyles file you can try to replace the default aero.msstyles which you can find in C:\Windows\Resources\Themes\Aero – this may or may not work.
Make sure that you do not create a subfolder while extracting the theme. The .theme file needs to be in C:\Windows\Resources\Themes\ and a folder with the same name as the .theme file needs to exist as well. Example:

The msstyles file is typically inside the theme folder, in this example Midnight.