If you don’t like or need the new Metro desktop, you can easily disable it using this registry tweak.

Tip: Before you modify the registry in Windows 8, it’s a good precaution to make a backup of the Windows 8 registry
Steps to disable Windows 8 metro desktop
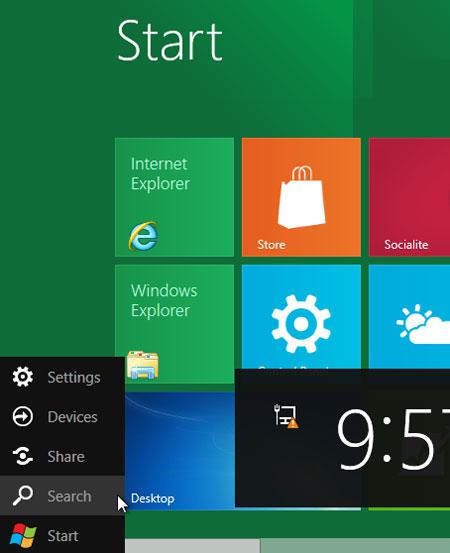
1. Step In your Metro Start Menu, move your mouse to the lower left corner and the Start menu pops up. Click on Search.
2. Step Type regedit in the Search Apps text box. Click on the regedit.

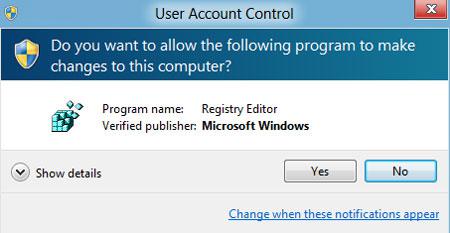
3. Step Click on Yes in the User Account Control box.
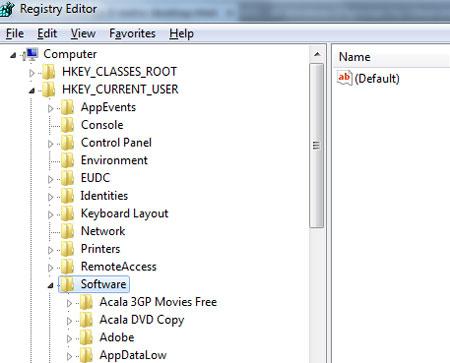
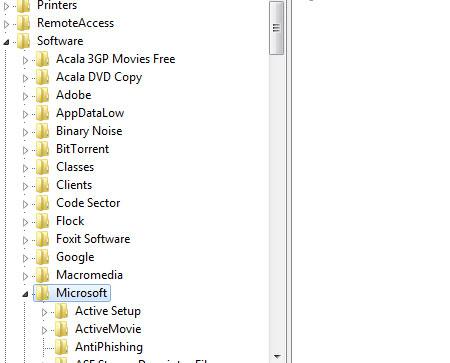
4. StepNow the Registry Editor opens. Navigate to following sub key: HKEY_CURRENT_USER\Software by clicking their respective expand icon.
5. StepIn Software sub key, navigate again to Microsoft by clicking it’s respective expand icon.
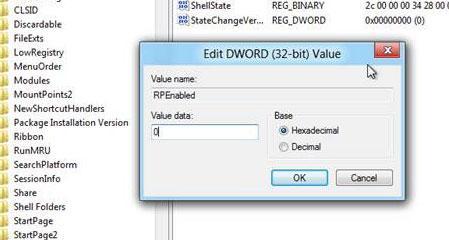
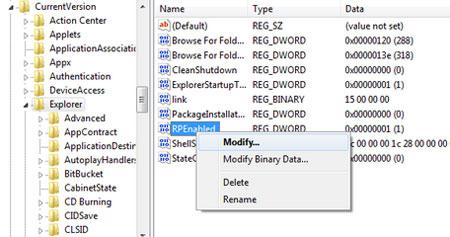
6. StepIn Microsoft sub key, navigate again to Windows\CurrentVersion\Explorer by clicking their respective expand icon one by one. Then on the right side of the pane you will see RPEnabled. Right click on it and select Modify.
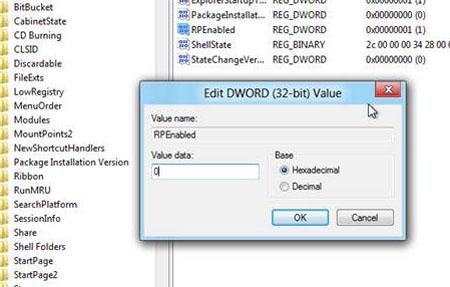
7.Change the DWORD value data to 0. To disable Windows 8 metro desktop, we have to set it to 0 and to enable again we have to set it to 1. Now logoff or restart your computer to take effect. That are the complete steps to disable Windows 8 metro desktop.
Conclusion
With this tutorial you can disable Windows 8 metro desktop. Please note, these steps will disable all new Metro UI and other features like new Task Manager, PDF Reader, Immersive IE, Metro Apps, Start Screen etc.