
Tip: If you are trying to make the Microsoft Loopback Adapter the primary adapter, you should first make sure the adapter is actually installed
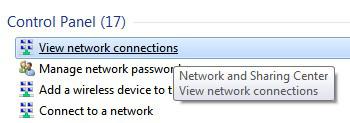
1. Step Let us open the Network Connections Control Panel. Hit Windows key + R on the keyboard and paste this into it ncpa.cpl and hit Enter. Alternatively, simply enter View Network Connections into the search bar on your Start Menu:
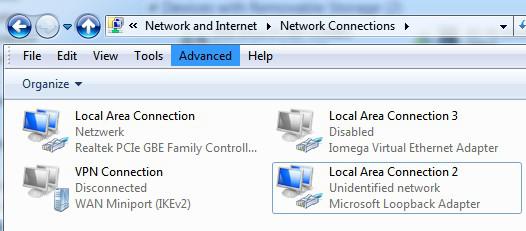
2. Step On there, click on the option Advanced at the top as seen below
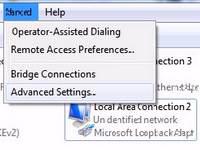
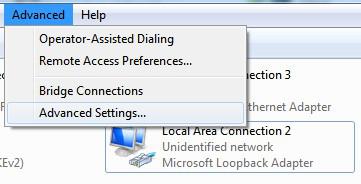
3. Step Now access Advanced Settings, confirm the prompt
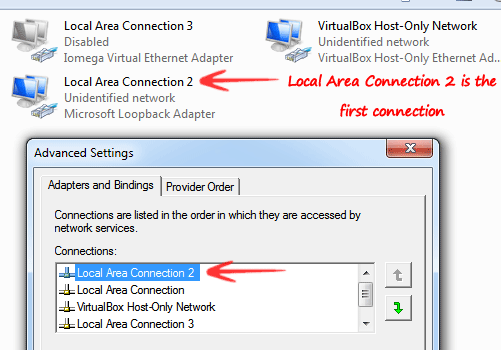
Let’s Change The Connection Priority
4. Step Next, you can see a list of Connections and two arrows on the right side. Use the arrows to change the binding order. The network connection that is listed first will be your primary network connection e.g. your network services will always try to access that connection first
Important: Keep in mind, the names are Network Connection names and not the actual names of your adapters. Therefore, I highly recommend that you rename all your connections to match the names of your adapters so you can easily identify them, but it’s not required
Let’s Change The Bindings For Certain Connections
5. Step Below the connections field you can also change the binding order. First select a connection at the top and you can then change the binding below e.g. move up the TCP IPv6 protocol UP.
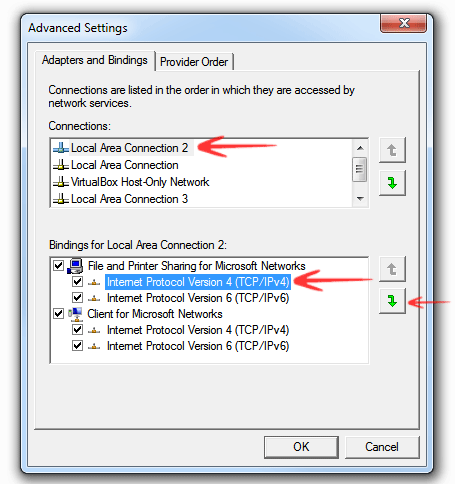
You can move all protocols that you installed for the adapter. Make sure to first select the adapter at the top, the two fields are interlinked. We’ll have another guide on this topic up shortly that will explain how to properly use IPv6 on Windows 7 PC’s