
Installing certificates in Windows 7 is not difficult, here’s how.

Installing Certificates in Windows 7
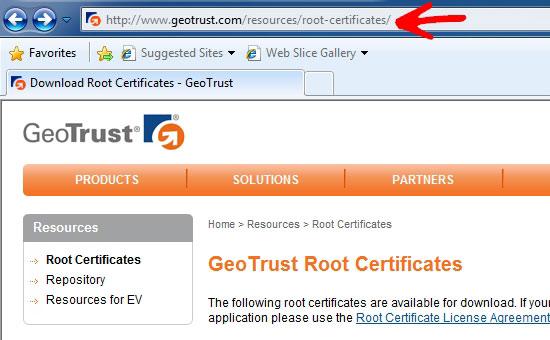
Certificates are used for secure information (such as passwords, credit cards numbers ,etc) transaction over the internet. By default your Internet Browser already keeps a number of root certificates from trusted Certificate Authorities ( Thawte, GeoTrust, Verisign, GlobalSign, etc). To Install/Import a Certificate, first you need to download a certificate from the Certificate Authority website. I am downloading it from www.GeoTrust.com
Step by step procedure
1. Step Go to Download Root Certificates – GeoTrust.
2. Step Select the appropriate certificate, right click on it and click Save Target As.
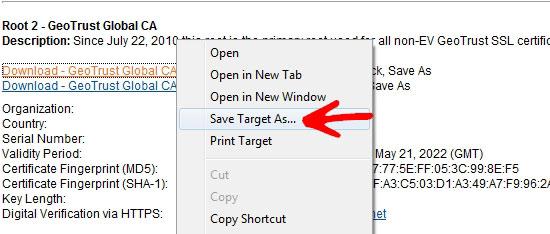
3. Step Save the File with .cer extension.

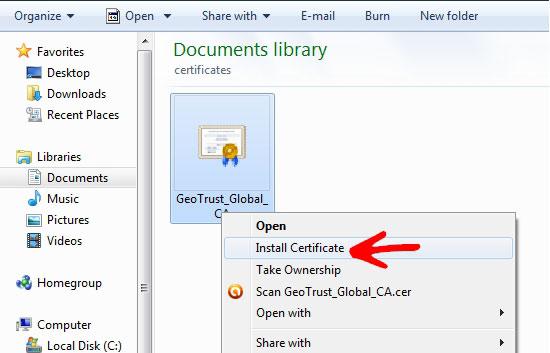
4. Step Now browse to the directory where you downloaded the certificate, right click and select Install Certficate.
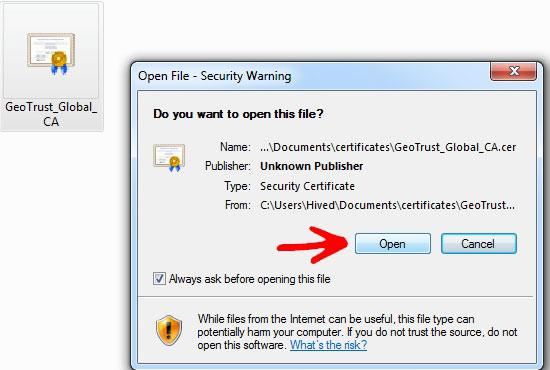
5. Step Click Open on the Security Warning Dialog Box.
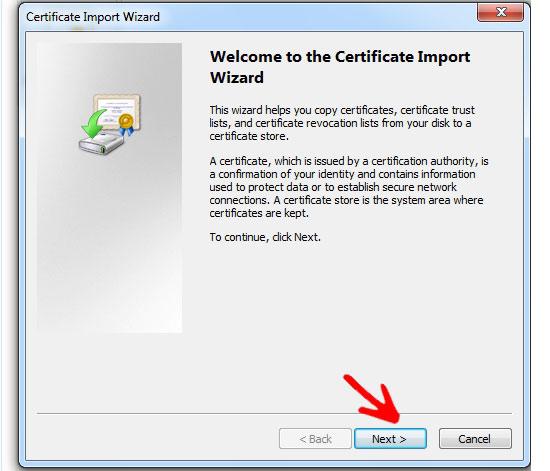
6. Step The Certificate Import Wizard will open, click next to continue.
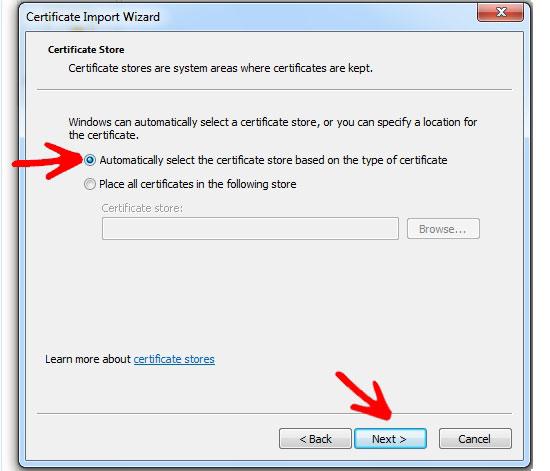
7. Step In the Certificate Store, select Automatically select the certificate store based on the type of certificate option. Click Next.
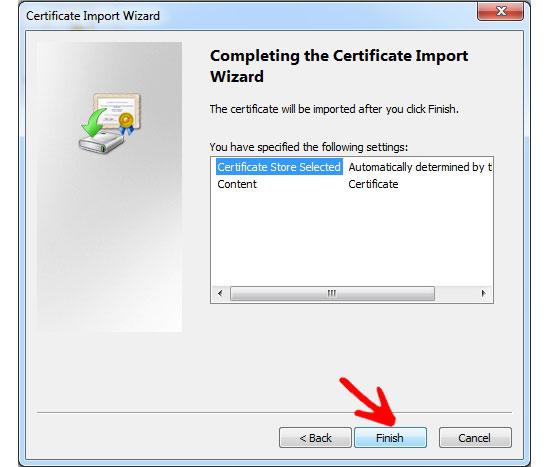
8. Step It will display summary of the certificate. Click Finish to Import the Certificate.
9. Step A message box comes up to show success. Click ok to continue.

Conclusion
Certificates are important when providing sensitive information over the internet. When you provide password, or credit card number, make sure that the communication is encrypted. Make sure the URL in address bar converts from http:// to httpS:// when you click login after entering your password. Be Safe!