
Setting up a VPN in Windows 7 isn’t so difficult. All you need is a VPN server, which is more difficult to set up and possibly expensive. If you are using a VPN service, learn how to set up a VPN connection in Windows 7

Tip: Before you start following this tutorial blindly, make sure you have a VPN server to connect to or this won’t work. A VPN service provider that is relatively cheap is hidemyass.com, but there are also many other VPN providers out there. If you know any you may post them below.
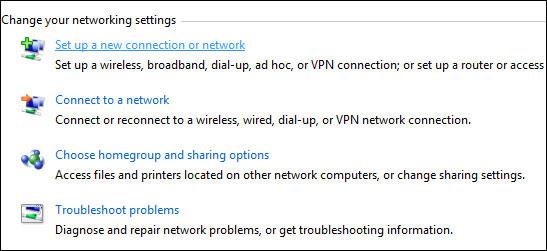
1. Step Right-click on the network icon on your desktop and click on Properties
2. Step At the bottom you will be able to change your Windows 7 network settings. Click on Setup a new connection or network
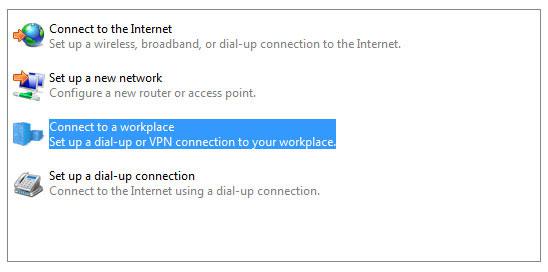
3. Step Select connect to a workplace (third option)
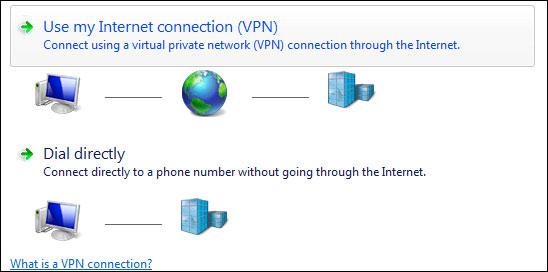
4. Step Select Use my Internet connection (VPN)
5. Step You will need to enter your VPN address now. You will get this address from your VPN service provider, e.g. hidemyass.com or any other VPN service provider. You can check Don’t connect now; just set it up so I can connect later if you don’t want to use the VPN connection right away.

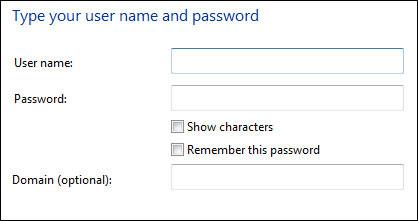
6. Step Enter your username and password for the VPN connection. Again, you will get the information from your VPN service provider.
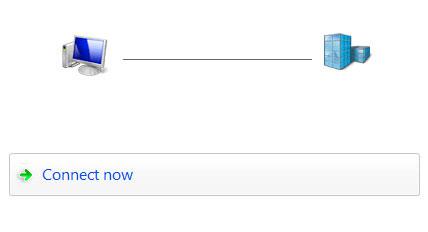
7. Step Click on connect now to connect to your VPN:
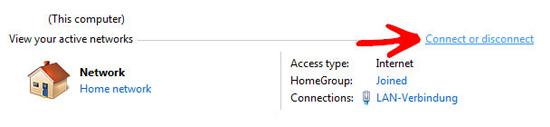
8. Step Open the Network Sharing Center again (step 1) and then click on Connect or disconnect as seen below:
9. Step A small window will open with all your connections, click on your VPN connection and then on Connect: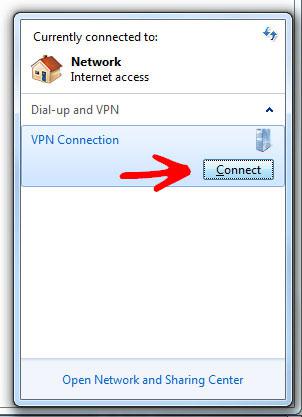
Hopefully this will help you to set up a VPN connection in Windows 7. If you have any questions or comments, let us know. A great tool for secure VPN gaming connections is Tunngle. Also, always be on the lookout for cheap VPN providers, there are some hidden gems out there and a VPN connection can come in very handy many times.
Here for example is a FREE VPN to watch Hulu, ABC, etc outside the US