In this tutorial we will intialize a new disk, format a partition, add a volume label and enable file and folder compression
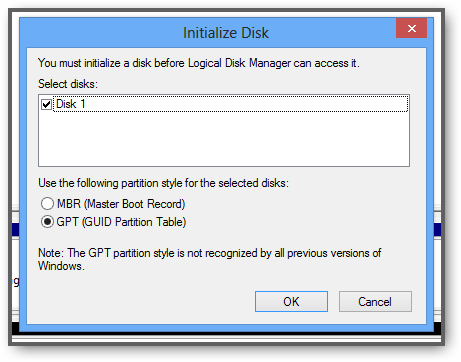
Intitialize Disk: MBR vs. GPT Partition
1 When you first open the Windows disk manager you will be prompted with this – if you are unsure what to select, read our guide: MBR or GPT partition

2 After confirming the dialog with OK search for the drive with Unallocated disk space:
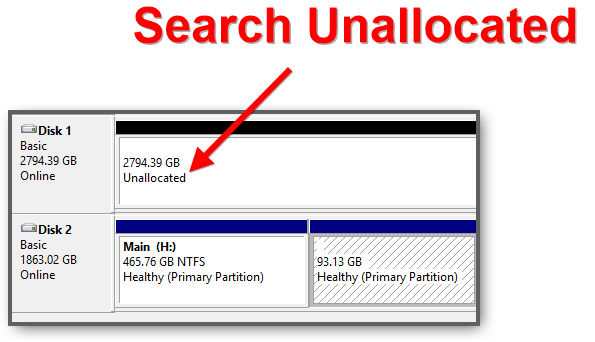
Unallocated Space
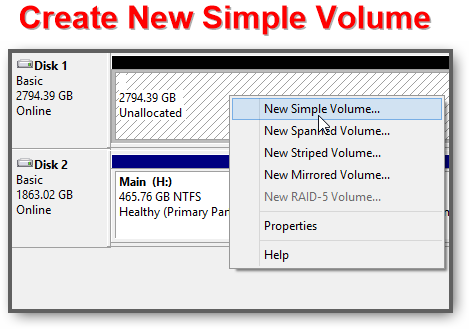
3 Right-click on the unallocted space and click New Simple Volume to create a simple volume. If you want a software raid, you can try Mirrored Volume (which is a nice additiona and relatively stable compared to a hardware RAID)
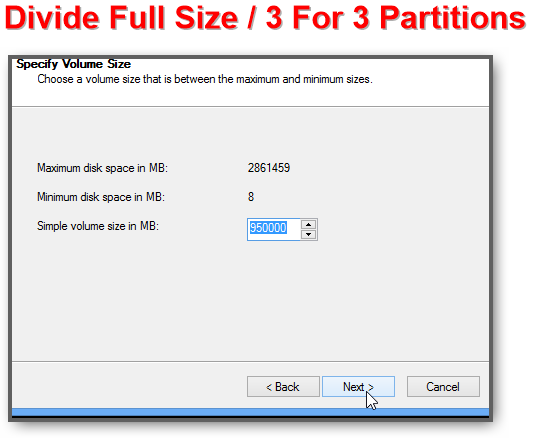
4 Now, it’s time to open the Calculator and divide the maximum disk space in MB by the number of your partitions. If you want 3 partitions divide by 3 e.g. in this case 950.000 MB (nearly 1TB)
Add Volume Label
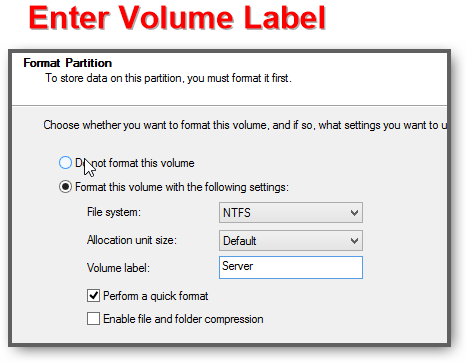
5 Make sure to enter a Volume Label so you can organize your partitions a little better. It is a good idea to think a little about what you want to store on the volume e.g. pictures, movies, backups or work related stuff. Depending on that you can give each partition a different volume label and organize your PC, it will help you to save time and help others to browse through your drive / folder structure if you orgnaize things
Enable File And Folder Compression
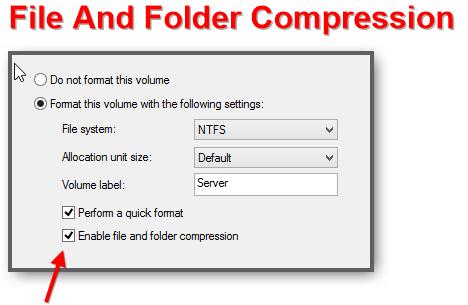
6 Make sure to select the file and folder compression to save disk space. This can help you to save a lot of disk space and is relatively safe to use
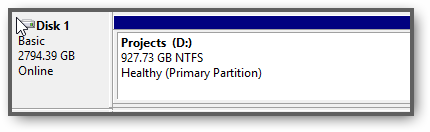
7 When you’re done you should see a healthy primary partition
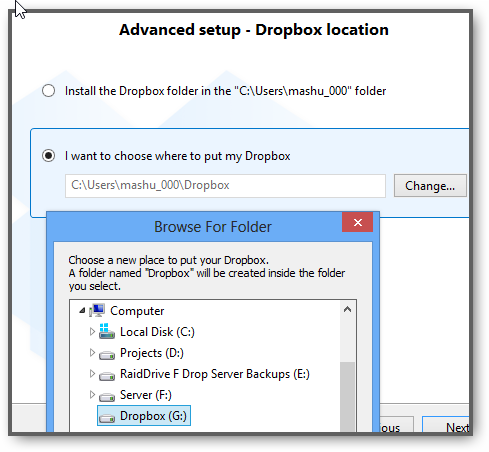
8 When you’re done you can for example store your Dropbox on an entire dedicated Dropbox partition