Transferring files between PC’s is really easy with Windows Easy Transfer Wizard
Microsoft has introduced an exciting and easy feature for Windows 8 Consumer Preview as well as previous versions from Windows XP, known as Easy File Transfer Wizard. It allows for quick and easy transfer of files, folders and settings to and from your Windows versions. This is a great feature that has made lives easier for Windows 8 users. You can now transfer files and folders to and from Windows computers without any hassle. Here is how you do it:
1. StepMove your mouse cursor to the top right corner of the screen and click the zoom icon. Now type easy transfer in the search bar and click on the Windows Easy Transfer. Click program found on the left taskpane.

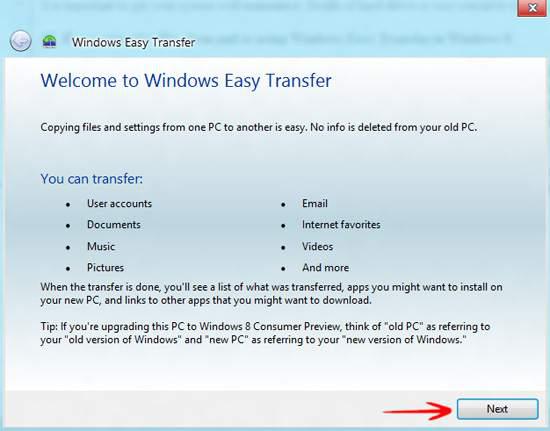
2. StepYou would now see a Welcome to Windows Easy Transfer screen. Click Next
3. StepNow click on the method of transferring data to a new PC. I have chosen An external hard disk or USB flash drive.

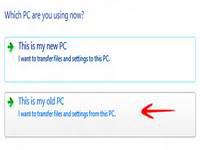
4. StepSince I am starting this tutorial from scratch, I have selected This is my Old PC so that you all get to know how to transfer files from one PC to another

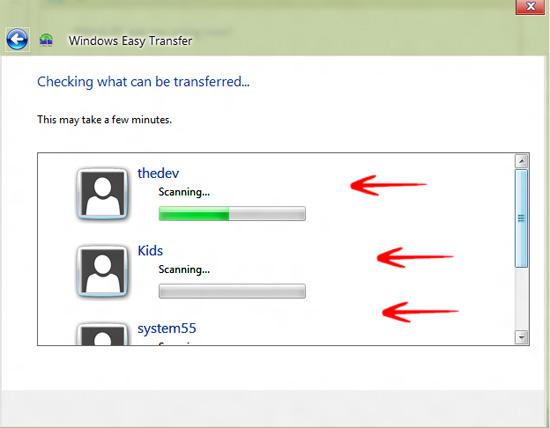
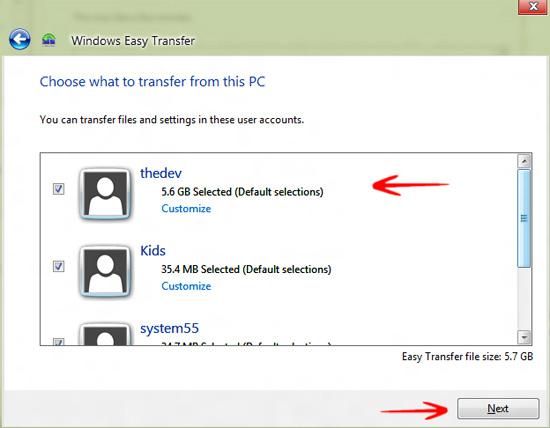
5. StepIt would take some moments to scan all accounts created in Windows 8 Consumer Preview to recommend what files and folders are required to be saved
6. StepNow select the user accounts from which you want to save files for the new PC. Always make sure to check the settings you want to transfer. In the bottom right corner, you would see the estimated easy transfer file size, which in my case is 5.7 GB. Click Next.
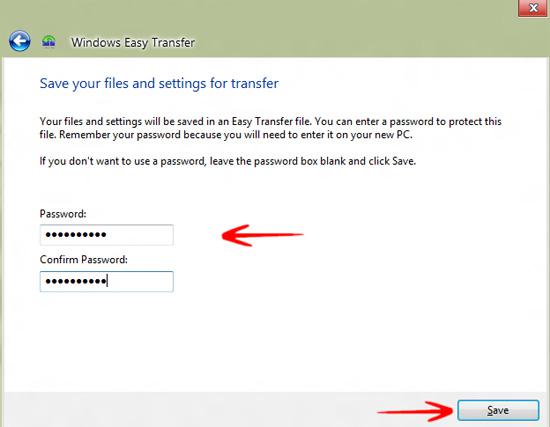
7.Do you want a password? It is totally up to you. Having password protected easy transfer files makes sure that the settings are all safe and secure for your access. However, it is not important to password-protect it. Click Save.
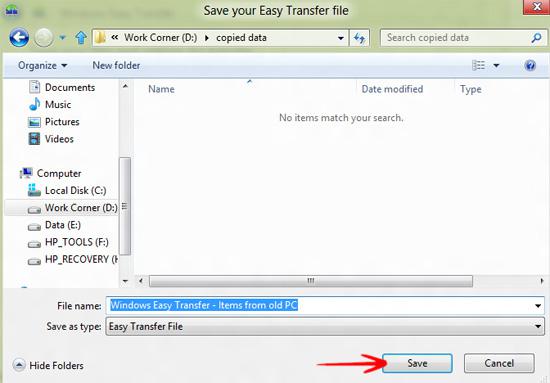
8. StepSelect the destination where you want to save the new file to. You can select a new partition or a USB device too.
9. StepBe patient and give your system a few moments for the new file to be saved. Do not work on any other programs until the file has been saved.

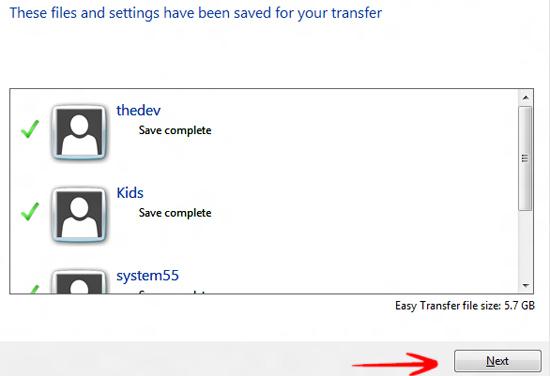
10. StepWhen settings have been saved, you would see a green check right next to the profiles. The estimated Easy transfer file size: 5.7 GB is shown right above the Next button. Click Next to continue.
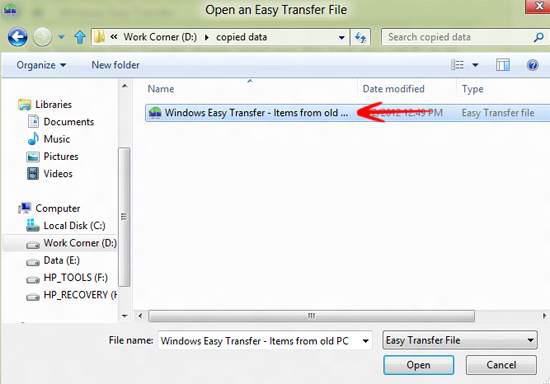
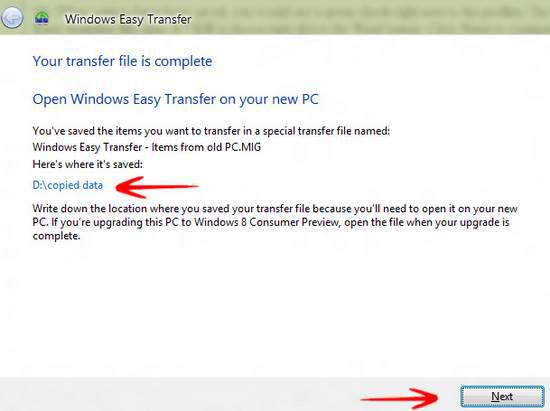
11. Now that the files and settings have saved, Windows Easy Transfer would display a message stating the location where your files and settings are located in a MIG extension. Click Next.
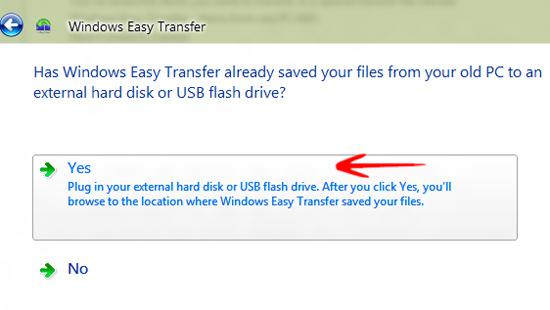
12. Click Close in the last screen. So now that you have the settings stored, you need to open them up in your new PC. Follow the steps from 1 to 3 and in step 4, instead of selecting This is my Old PC, select This is my new PC where you want the settings to be transferred. You would be asked whether you have saved the files and settings from your old PC. Click Yes and proceed.
13. Browse for the file and let the transfer process take place. Make sure to do this on your new PC.