You should definitely know how to take a screenshot in Windows or capture in-game shots. There are a multitude of tools to take shots on your desktop or in-game. I reviewed various tools to capture high-quality shots and where some games typically store screenshots.
Capturing shots in applications, on your desktop or in-game:
| Application Name | Screenshot Location | Special Features |
|---|---|---|
| Snipping Tool (Windows Feature) | Asked After Taking It (Save As) | Freeware / Built-In Windows Tool |
| WinSnap – Best Paid Capturing Tool | Asked After Taking It (Save As) | Delayed Screenshot, Annotations, Highlights |
| Greenshot – Built-In Screenshot Editor | Asked After Taking It (Save As) | Freeware / Built-In Editor / Context Menu Integration / OCR |
| Fraps / GameCam | Automatically | In-Game Screenshots / Recordings |
Capturing shots in various popular video games such as CS and Skyrim:
| Game | Screenshot Location |
|---|---|
| CS:GO | F5 Or Assigned Key – Location: C:\ Program Files (x86)\ Steam \ steamapps\ common \ Counter-Strike Global Offensive\csgo\screenshots |
| Skyrim | PrtScn – Location: C:\ Program Files (x86)\ Steam\ steamapps\ common\ skyrim |
| Aion | Built-In (PrintScreen) – Location:Game Folder |
| Oblivion | Oblivion.ini / Built-In (PrintScreen) – Location:Game Folder |
| Minecraft | F2 Or Assigned Key – Location:%appdata%\ .minecraft \ screenshots |
Taking a simple screenshot in Windows 7, 8/8.1 or 10
Note: This option is for everyone who does not NOT need high-quality screenshots and also does not want to download any tools.
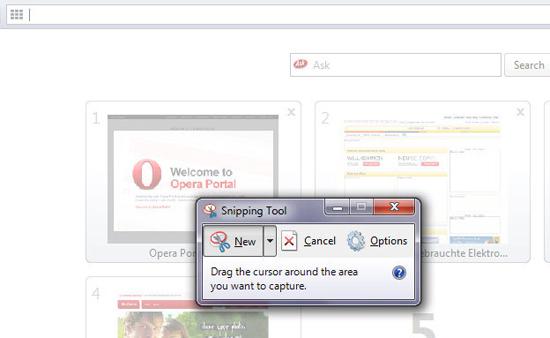
The easiest way to take a screenshot in Windows 7,8 or 10 is to use the Snipping Tool.

If there’s one Windows feature that I totally love then it’s the Snipping Tool. You can take a screenshot of your desktop in less than 3 seconds and all versions of Windows have it.
The Snipping Tool can either be found in C:\ Windows\ system32\ SnippingTool.exe or open it via Start Menu/All Programs/Accessories.
Windows 7/8: Open the Snipping Tool, then click on “New”. The area behind the snipping tool will be greyed out and you can now draw a rectangle to make your screenshot. The rectangle defines the size of your screenshot. Draw a large one if you want to take a screenshot of the whole desktop.
If you need it regularly, you should pin it to the taskbar!
Of course you can also simply press “PrintScreen” and then paste the screenshot into Paint or Photoshop, but the Snipping tool is so much faster. It also allows you to highlight things and save the image as a JPG file.
Taking High-Quality Screenshots Using WinSnap
There are many dedicated programs for taking screenshots. Some allow you to add captions, annotations, arrows, text, cursors, shadows, reflections, watermarks and even colorize them. One tool I frequently use is called WinSnap.

WinSnap is capable of all of the above and is the cheapest tool around. However, it is only capable of taking screenshots on your desktop, not within video games or full-screen applications. A special feature called delayed screenshots however allows you to take screenshots after a X seconds, which comes in very handy every now and then whenever you first have to perform an action before capturing a screenshot, e.g. show a dropdown menu. After that you can add annotations to your screenshots with just one click or add large arrows. You will find examples on our site, many are taken with WinSnap.
Greenshot With Built-In Screenshot Editor
If you don’t want to spend any money but still need to take high-quality screenshots for your technical articles and instructional guides, you should get Greenshot. The built-in editor is flexible enough to add all sorts of highlights and add instructions.

Greenshot also has a OCR plugin, Office plugin, Jira plugin, Confluence plugin, Box and Dropbox support and supports various other programs and platforms such as imgur.
In a nutshell, the best free tool for taking shots on Windows.
Capturing Screenshots Ingame (Fraps Alternative)
If you want to take a screenshot ingame you are either lucky and the game has a built-in screenshot function (most games nowadays have one) or you need a tool like Fraps or GameCam. Below I listed two examples that might help you to find out how you can capture screenshots ingame.

If you are looking for a free alternative to Fraps, you might want to try out GameCam to capture your screenshots ingame:

Capturing shots in Minecraft
Minecraft is one of the most popular games of our time and taking screenshots is incredibly easy to share your Minecraft builds, shots of your castles and buildings and what not. Simply hit F2 to start taking shots and copy and paste the following address into your Windows explorer:

Screenshot Location: %appdata% \ .minecraft \ screenshots
Enter this into the address bar in your Windows explorer (Windows key + E)
How to take a screenshot in Aion
Aion has a built-in screenshot function: Press “PrintScreen” (PrtScn) and paste it into your favorite photo editing tool.
How to take a screenshot in Oblivion
The Elder Scroll’s Oblivion also has a built-in function to take screenshots, but you will have to activate it first.
- Open Oblivion.ini, to do that go to C:\ Documents and Settings\ username \ My Documents \ My Games \ Oblivion \ Oblivion.ini
- Find bAllowScreenShot=0
- Change to bAllowScreenShot=1
- Save (Strg+S)
Now you can take screenshots in Oblivion, they will automatically be saved to C:\Program Files\Bethesda Softworks\Oblivion


You ROCK my world. I work with a bunch of Mac wacs. And it always pis. . . wait, you said keep it clean . . . it angers me that they brag about their stinking screen shot. Now I know we PC Geniuses have it too. Bwaa ha haaaaaaaaaaaa
snippit is cool but i have yet to figure out how to post to a forumn ect..it wont let me copy and paste it, and my print screen dosent seem to work. This is a new pc with OS windows 7…..I can snippit .. have a folder full…i was actually going to try and use the tool as a clip board since microsoft deleted it on windows 7…maybe u can help..would greatly appreciate it.( am 62 and was use to and loved xp3..thanks airboat233
My prtsc button doesn’t work either, even when I use alt/prtsc as suggested by Quicken. But the snippit worked great…when sent as an attachment in email, it was automatically put into the body of the email. My copy/paste also did not work. Also used to xp3 and fairly new to Windows 7. Thanks for all the tips…am happy I found this site!
I tried to sign up for newsletter, but got an error message. Used the snippit tool to take a picture of the error message…which worked fine. copied it, but even though the paste function showed up, it would not paste the screenshot into this message. It basically said no valid redirect.
i have 32bit os windows 7 but i cant find snipping tool? why dont i have it?
The snipping tools is great for taking a screenshot on Windows 7. You must have it, look in the path specified above
Well, have looked at and tried all suggestions,as with Marti, i am used to Xp and am NOT impressed with 7. windows live mail will not send emails containing the screenshot i EVENTUALLY was able to capture. am ready to uninstall 7 and return to XP, at least it will work!!!
I have windows7 and use yahoo.com for emailing.I can capture a screenshot ok but when I try to send it by email I can`t as I get the message “there is no email programme associated” and I dont know how to correct this.
Added a few tools I frequently use to take screenshots on Windows. I may add some instructions for Mac and Ubuntu too, if any of you know any other good tools feel free to post them
thx a lot Greenshot is very useful tool. I can capture whole page window and provides lot of options and precisely shows pixel width while capturing . All capture r of very high quallity – thanx very useful website.