If you want some windows always on the top so they do not minimize, read this tutorial.

Always on Top option in Windows 7
When we have multiple windows open simultaneously, the window we click on comes on top but sometimes we need some specific window to remain always on top. For example if I am writing some text from a source file into a destination file. I want to work in destination file but want source file to remain on top so that I may read from it. In such a case we need this Always on Top option applied to it.
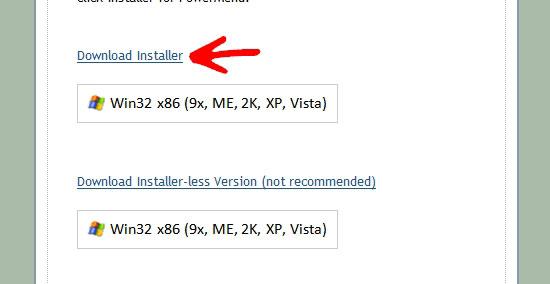
1. Step Go to Download Page for Power Menu .

2. Step Select download Installer.
3. Step When download finishes, Install Power Menu.
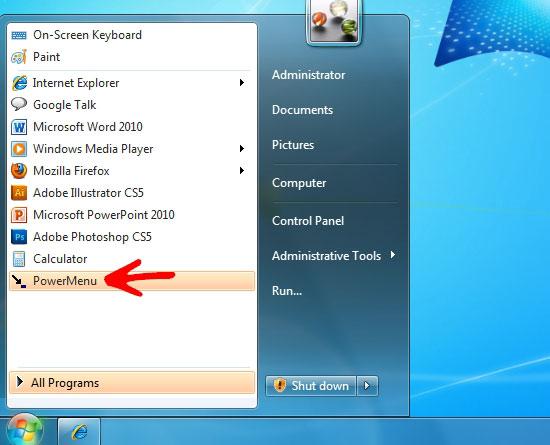
4. Step Go to start menu and clik Power Menu Icon (newly installed).
5. StepPower Menu tray-icon will now appear in the system tray.

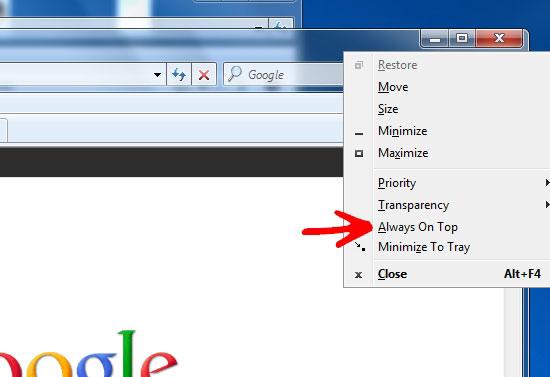
6. Step To use the Always on Top option, Select the specific window you want Always on Top, right click on the Menu Bar, and click Always on Top option.
7. Step The PowerMenu also comes with other options, like Transparency and Minimize to Tray. Minimize to Tray can help in case your taskbar is cluttered with opened applications.
The Always on Top feature can be added through the PowerMenu application. It helps you keep one of your windows on top of the others. Like if you want to browse, and at the same time check for the messages in the chat window, you can have the chat window always on top.
